To switch off all vibrations on your iPhone, including those for emergency alerts, it’s a straightforward process.
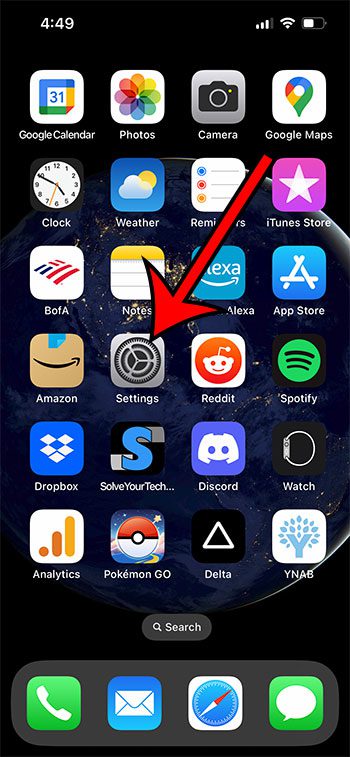
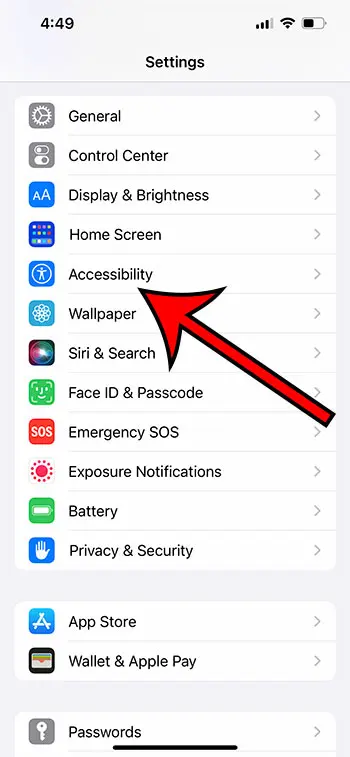
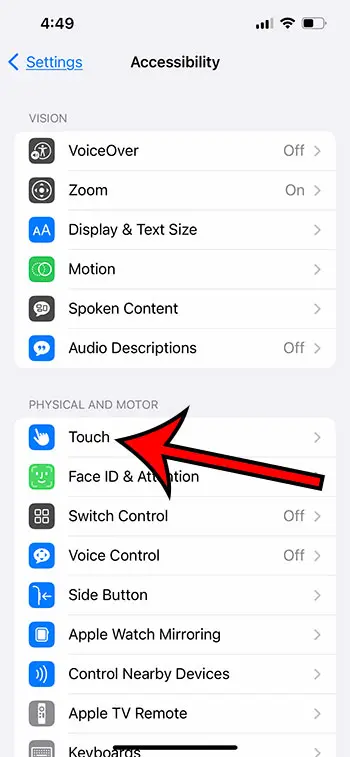
First, navigate to the ‘Settings‘ menu, followed by the ‘Accessibility‘ option. From there, select ‘Touch.’
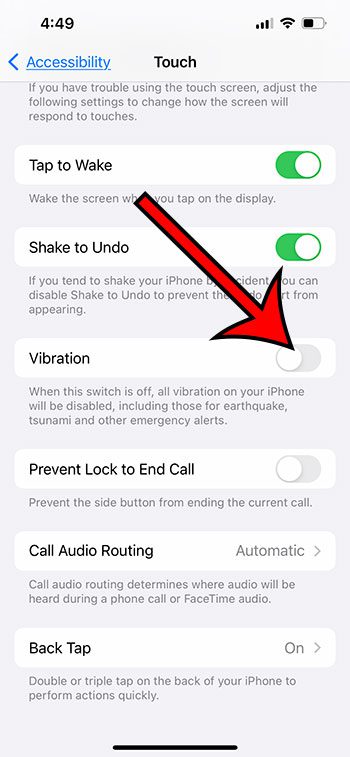
Within this menu, you’ll find the ‘Vibration‘ setting; turning this off will disable all vibrations on your device.
This approach ensures your iPhone won’t vibrate for calls, notifications, or even earthquake and tsunami alerts, providing a completely vibration-free experience.
Our guide continues below with additional information about how to turn off vibration on iPhone 13, including pictures of these steps.
Check out our how to turn off vibration on iPhone video on YouTube as well.
Related: You can read our article about the text message vibration setting if you would like to change that option.
How to Turn Off All Vibration on an iPhone (Guide with Pictures)
The steps in this article were performed on an iPhone 13 in the iOS 16 operating system, but will work for many other iPhone models and iOS versions.
Step 1: Find the Settings app icon on your Home screen and tap it to open the menu.
Step 2: Scroll down and select the Accessibility option.
Step 3: Choose the Touch button in the Physical & Motor group of the menu.
Step 4: Scroll down and tap the button to the right of Vibration to turn it on.
Note that you can also come back here and re-enable this setting at any time if you would like to turn the iPhone vibration back on.
Now that you know how to turn off vibration on iPhone 13, you will be able to use these steps any time that you want to enable or disable this notification setting on your device.
Related: Many apps will have their own settings to disable pounds or vibrations. This how to turn off sound Pokemon Go tutorial can show you how to do it in that app.
More Information About iPhone Vibration
While the article above has focused on shutting off all of the vibration on your phone, you can also choose to disable the vibration for specific things.
For example, if you don’t want your iPhone to vibrate when you get a phone call, then you would go to Settings > Sounds & Haptics > Ringtone > then tap the Vibration button at the top of the screen and choose None.
This will work for other similar settings as well, such as your text tone, voicemails, calendars, reminders, and more.
Another vibration setting that people like to change involves the alarms.
You can adjust this setting by going to Clock > Alarm > Edit > choose the alarm > Sound > Vibration > then None.
As indicated on the menu in the section above when you turn off your iPhone vibration, this will also affect things like the alerts that you receive for earthquakes, tsunamis, or other emergency alerts.
Video About Turning Off iPhone Vibration
Summary – How to Stop iPhone from Vibrating Entirely
- Tap Settings.
- Select Accessibility.
- Choose Touch.
- Turn off Vibration.
Conclusion
Your iPhone has a number of different ways that it can let you know about notifications, including various vibration settings.
These vibrations, coupled with sounds and visual indicators on your screen, can help to ensure that you see the information that you need.
But if you don’t like the vibrations and have turned off as many as you could find, then you might be looking for a quick way to disable all of those vibrations.
While you might have found the vibration settings for some of your notifications when you went to change things like your ringtone or text message notification sound, you’ve probably noticed that your iPhone can vibrate a lot.
Finding all of these different settings could take a while, and there’s no guarantee that you will find everything until a vibration occurs.
Luckily there is an option in the Settings menu that lets you completely disable all of the vibration on the smartphone.

Matthew Burleigh has been writing tech tutorials since 2008. His writing has appeared on dozens of different websites and been read over 50 million times.
After receiving his Bachelor’s and Master’s degrees in Computer Science he spent several years working in IT management for small businesses. However, he now works full time writing content online and creating websites.
His main writing topics include iPhones, Microsoft Office, Google Apps, Android, and Photoshop, but he has also written about many other tech topics as well.


