Powerpoint slides are in the landscape, or horizontal, orientation by default. But you may have a presentation that would be better if it were in the portrait orientation, so you may be wondering how to make a Powerpoint slide vertical.
Our tutorial below is going to show you how to switch your presentation so that the slides are vertical instead.
The second section in this article will also show you how to have a presentation with multiple orientations by creating multiple Powerpoint files that link to one another.
The orientation switch is achieved by clicking a link from the first file that opens the second file. This transition is relatively seamless when you’re giving the presentation, and you can even apply it to the second file as well if you wish to return to the first file later on in the presentation.
How to Make a Powerpoint Slide Vertical
- Open your presentation.
- Select the Design tab.
- Choose Slide Size, then Custom Slide Size.
- Click Portrait, then OK.
Our article continues below with additional information and pictures for these steps.
As mentioned earlier we also continue with instructions on how to achieve a presentation with some vertical slides and some landscape slides.
How to Switch to Vertical Slides in Powerpoint 2013 (Guide with Pictures)
The steps in this article were performed in Microsoft Powerpoint 2013. The first section in this article is going to show you how to change the orientation of every slide in your presentation so that they’re all vertical. The next section will show you how to make only one slide, or some slides, vertical.
Step 1: Open your presentation in Powerpoint 2013.
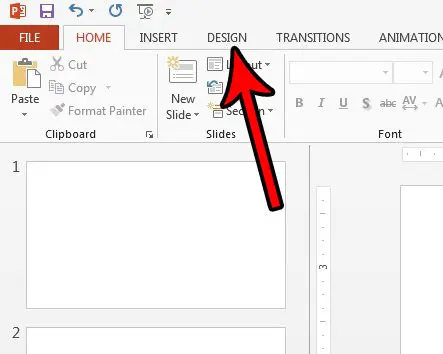
Step 2: Click the “Design” tab at the top of the window.
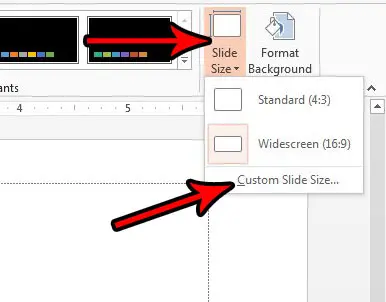
Step 3: Click the “Slide Size” button in the “Customize” section at the right end of the ribbon, then choose the “Custom Slide Size” option.
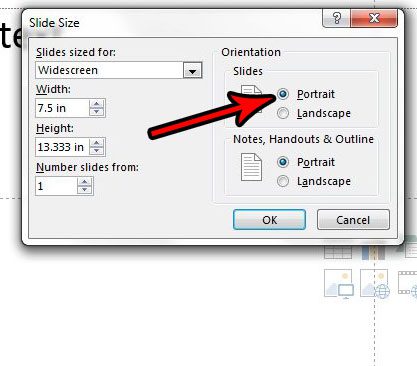
Step 4: Select the “Portrait” option under “Orientation“, then click “OK.”
We continue below with instructions on how to further customize your slide orientation if you only want to make some of the slides vertical in your presentation.
How to Make Some Slides Vertical in Powerpoint 2013 By Linking Two Presentations
This is a little more complicated, as Powerpoint doesn’t natively give you a way to have multiple orientations in one presentation. Therefore we need to make two separate presentations, one landscape and one portrait, then link them together. Ideally you will want to put both of these presentations in the same folder in case you are copying it to someplace else.
Step 1: Create a landscape presentation, then create a second, separate presentation and put it into the Portrait orientation using the steps in the section above.
Step 2: Open the Powerpoint file that is going to display first when you are giving the presentation.
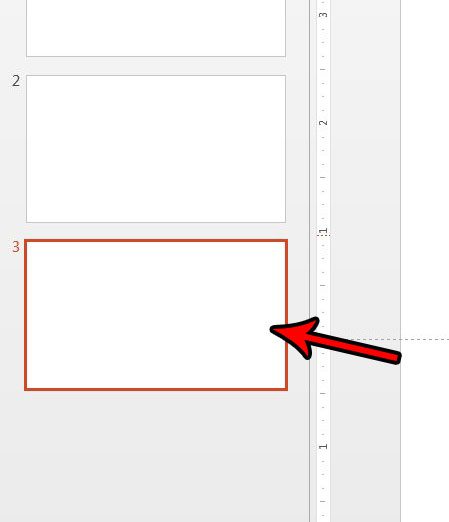
Step 3: Select the slide in the column at the left side of the window that will play last before you show the presentation with the different orientation.
Step 4: Choose the text or image that you will click to open the second presentation.
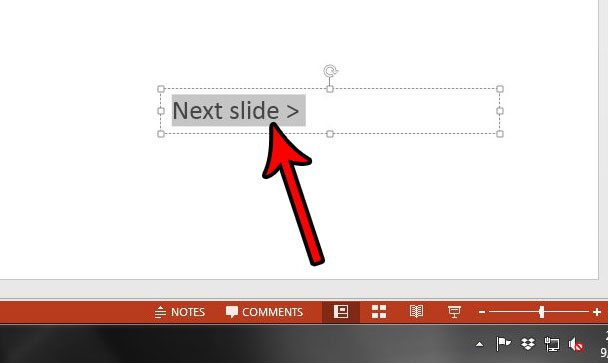
Step 5: Click the Insert tab at the top of the window.
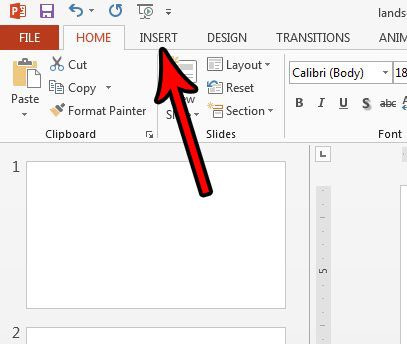
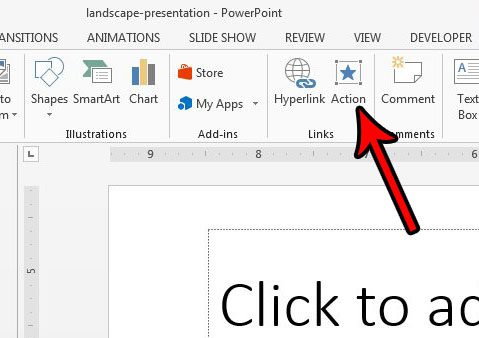
Step 6: Click the Action button in the Links section of the ribbon.
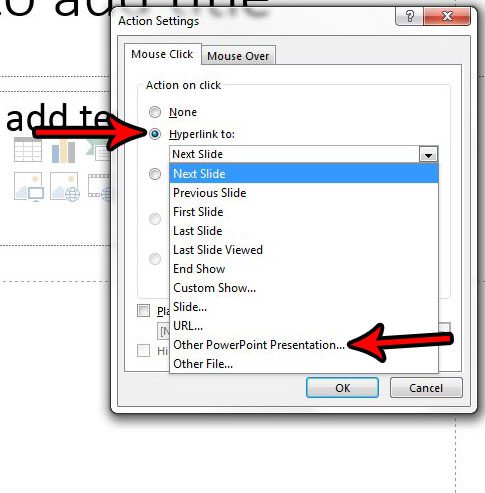
Step 7: Select the Hyperlink to option, then select Other Powerpoint Presentation from the list.
Step 8: Browse to the other Powerpoint file, select it, then click the OK button.
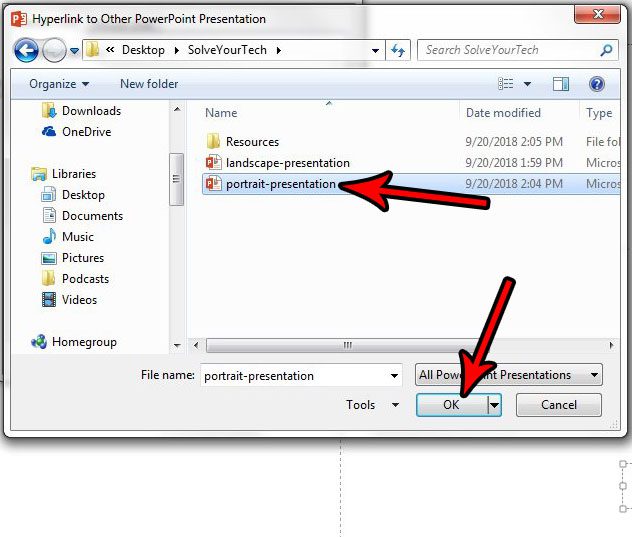
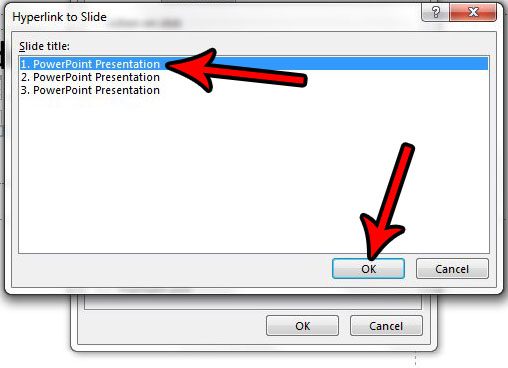
Step 9: Choose the slide that you want to open after clicking the link, then click the OK button.
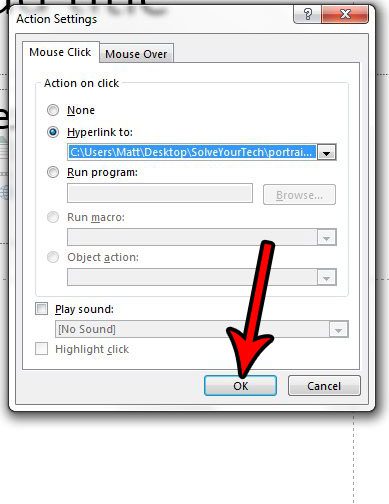
Step 10: Click the OK button on the Action Settings menu.
Be sure to save the open presentation, then press F5 on your keyboard to play it. Note that you will need to click the hyperlinked text or object that you selected in Step 4 to switch over to the file that’s in the other orientation. Additionally, if you move the file or send it to someone else, you will need to move or send both of these files.
If you wish to return to the first presentation that you started with, you will need to repeat the steps in this section to create hyperlinked text or a hyperlinked object in the second presentation that links back to the first presentation.
Unfortunately, this process is a little complicated, but it’s the only way to create a presentation in Powerpoint where you have a mix of portrait and landscape slides.
Do you have animations in your presentation, but you want to present without them? Find out how to remove animations in Powerpoint if you would prefer not to use them.
Continue Reading
- How to create a check mark in Powerpoint
- How to make curved text in Powerpoint
- How to make a Powerpoint slide vertical
- How to remove an animation from Powerpoint
- How to set a picture as a background in Powerpoint

Matthew Burleigh has been writing tech tutorials since 2008. His writing has appeared on dozens of different websites and been read over 50 million times.
After receiving his Bachelor’s and Master’s degrees in Computer Science he spent several years working in IT management for small businesses. However, he now works full time writing content online and creating websites.
His main writing topics include iPhones, Microsoft Office, Google Apps, Android, and Photoshop, but he has also written about many other tech topics as well.