To set time for slides in PowerPoint, click Slide Show > Rehearse Timings, go through your slides at the pace you want, and click Yes to save the timings. For an exact time per slide, click Transitions, check After under Advance Slide, and enter the time. To pause a running slide show, press B for a black screen or W for a white screen, then press the same key to return.
This guide covers PowerPoint for Windows, and the Transitions steps also apply to PowerPoint for Mac. It follows Microsoft’s Rehearse and time the delivery of a presentation, Set the timing and speed of a transition and keyboard shortcuts for delivering presentations articles.
Building a timed photo slideshow? First use our guide to importing photos as separate PowerPoint slides, then set the display time for the finished slides using the steps below.
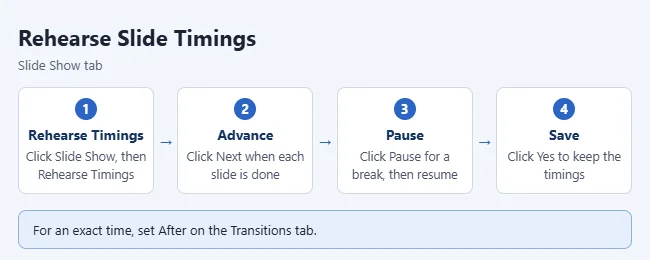
How to Rehearse and Save Slide Timings
- Click Slide Show > Rehearse Timings. The timer starts right away.
- Click Next, click the mouse, or press the Right Arrow key to move to the next slide.
- Click Pause if you need a break, then Resume Recording. To add narration as you go, see how to do a voiceover on PowerPoint.
- At the end, click Yes to keep the timings or No to discard them.
Result: Each slide now has a saved time and will advance on its own during the show. Microsoft says the current slide’s time shows to the right of the Pause icon, with the total presentation time next to it. Press Esc at any point to stop recording and exit.
How to See and Fix Each Slide’s Time
Click View > Slide Sorter. Microsoft says each slide’s time appears at the bottom right of the slide. If one slide is off, you can change it with the exact-time steps below instead of rehearsing again.
During a rehearsal, Microsoft’s Rehearsal toolbar also lets you type an exact length in the Slide Time box, or click Repeat to restart the time for the current slide.
How to Set an Exact Time for Each Slide
- Select a slide, or several slides.
- Click the Transitions tab.
- In the Timing group, under Advance Slide, check After and enter the minutes or seconds.
- Click Apply To All to use it on every slide.
Result: The slide advances on its own after that time. Microsoft notes that the timer starts when the slide’s final animation or other effect finishes. Leave On Mouse Click checked too if you want to be able to click ahead early.
Don’t mix this up with the Duration box in the same group. Duration sets how fast the transition effect plays, not how long the slide stays on screen.
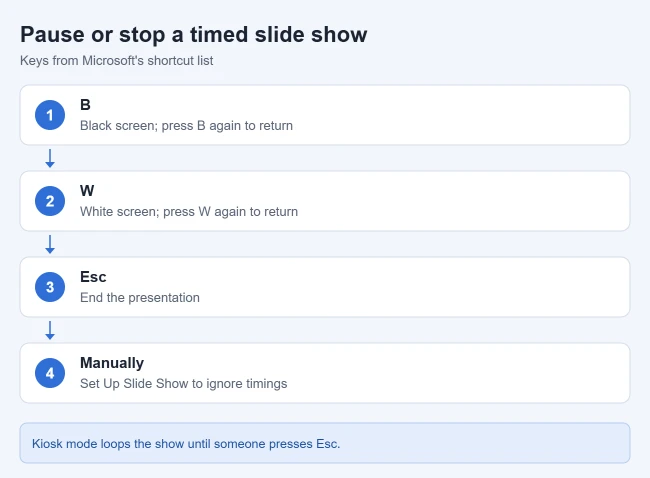
How to Pause a PowerPoint Slide Show
- Press B to show a blank black slide, or W for a blank white slide. Press the same key to go back to the presentation. (Need tall slides for the show? See how to rotate a slide in PowerPoint.)
- Press Esc to end the presentation.
- To stop auto-advancing entirely, click Slide Show > Set Up Slide Show and choose Manually under Advance slides. Switch back to Use Timings to turn them on again.
For audience-led questions or demonstrations, you can also make objects appear by clicking a button in PowerPoint. That uses an animation trigger on the current slide, rather than a timer that advances to another slide.
How to Make a Slide Show Loop on Its Own
For a booth or kiosk, click Slide Show > Set Up Slide Show and choose Browsed at a kiosk (full screen). Microsoft’s self-running presentation guide says this loops the show until someone presses Esc. Rehearse and save timings first so the slides advance on their own.
Shortcuts While Rehearsing
- T: set new timings
- O: use the original timings
- M: use a mouse click to advance
- R: re-record slide narration and timing
Frequently Asked Questions
Why won’t my slides advance automatically?
Check Slide Show > Set Up Slide Show. If Manually is selected under Advance slides, PowerPoint ignores your timings. Choose Use Timings instead.
How do I remove the timing from one slide?
Select the slide, open the Transitions tab, and clear the After check box. The slide then advances when you click the mouse.
Related Guides

Matthew Burleigh has been writing tech tutorials since 2008. His writing has appeared on dozens of different websites and been read hundreds of millions of times.
After receiving his Bachelor’s and Master’s degrees in Computer Science he spent several years working in IT management for small businesses. However, he now works full time writing content online and creating websites.
His main writing topics include iPhones, Microsoft Office, Google Apps, Android, and Photoshop, but he has also written about many other tech topics as well.