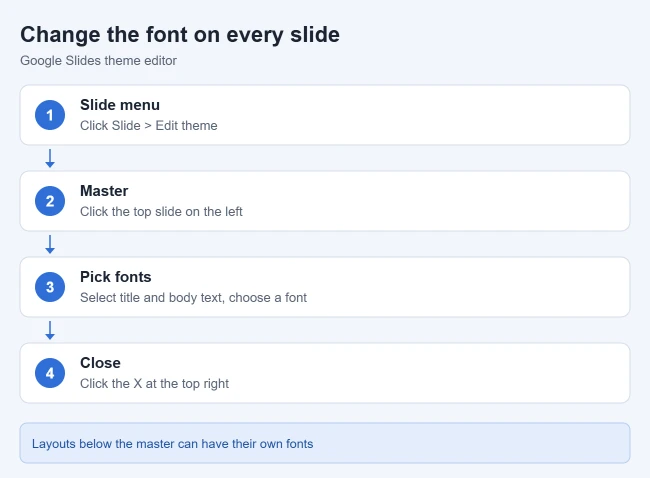
To change the font on all slides in Google Slides, edit the theme. Click Slide > Edit theme, click the master slide at the top of the left panel, select the title and body text, choose a new font from the toolbar, then close the theme editor. Slides that use the theme’s text styles update to the new font.
Google defines a theme as a preset group of colors, fonts, backgrounds, and layouts in Use a template or change the theme, background, or layout in Google Slides, and lists the clear-formatting shortcut in Keyboard shortcuts for Google Slides.
How to change the font on every slide
- Open your presentation in Google Slides on a computer.
- Click Slide > Edit theme. (Google’s own theme-color steps use this same menu.)
- In the left panel, click the top slide, the master. The editor then shows that changes apply to all slides.
- Click the title placeholder (“Click to edit master title style”) and choose a font from the toolbar.
- Click the body text placeholder, select the bullet levels you use, and choose a font.
- Close the theme editor with the X at the top right, or click any slide.
Result: titles and body text that follow the theme switch to the new font across the presentation.
Change fonts on a specific layout
Each layout under the master (Title slide, Section header, and so on) can carry its own text styles. You can change a subtitle font by clicking the layout that contains it in the theme editor, then editing “Click to edit master subtitle style.” The editor highlights which slides use that layout, so you can see what will change.
- In Slide > Edit theme, click the layout below the master.
- Select the placeholder you want, such as the subtitle, and choose a font.
- Close the theme editor.
Result: only slides using that layout get the new font.
Some slides didn’t change?
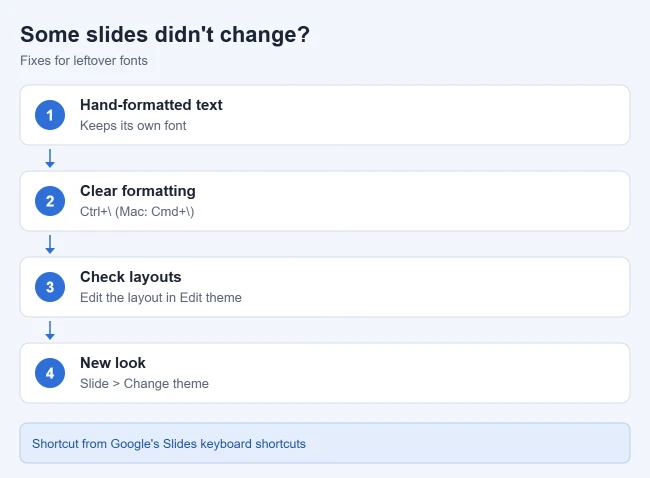
Text you formatted by hand on a slide keeps its own font; a manual change breaks the link to the master. To undo the manual formatting, select the text or text box and use Google’s Clear formatting shortcut: Ctrl+\ on Windows or ChromeOS, or Command+\ on a Mac. The text should then follow the theme’s font. Check a slide or two afterward, since clearing also removes other manual formatting such as bold or color.
Other ways to change fonts
- One text box: select the text and pick a font from the toolbar.
- More fonts: Choose More fonts in the font list to add more choices; these come from Google Fonts and you can’t upload your own.
- A whole new look: click Slide > Change theme and choose a theme on the right. Google says a theme sets colors, fonts, background, and layouts together.
- Another presentation’s theme: in Slide > Change theme, click Import theme at the bottom right, choose a Google Slides or PowerPoint file, pick its theme, and click Import theme (Google).
Frequently asked questions
Can I copy one text box’s font to other text boxes?
Yes. Google’s Slides shortcuts include Copy formatting (Ctrl+Alt+C, or Command+Option+C on a Mac) and Paste formatting (Ctrl+Alt+V, or Command+Option+V). Select the formatted text, copy its formatting, then select the other text and paste it.
Can I change only the titles?
Yes. In the theme editor, change just the title placeholder on the master and leave the body text alone. Titles across your slides switch, and body text keeps its current font.
Related guides

Matthew Burleigh has been writing tech tutorials since 2008. His writing has appeared on dozens of different websites and been read hundreds of millions of times.
After receiving his Bachelor’s and Master’s degrees in Computer Science he spent several years working in IT management for small businesses. However, he now works full time writing content online and creating websites.
His main writing topics include iPhones, Microsoft Office, Google Apps, Android, and Photoshop, but he has also written about many other tech topics as well.