It’s surprising how often you might find yourself in a situation where you need to add symbols to documents or slideshows.
But despite the usefulness of these symbols, they can be tough to locate in applications like Microsoft Powerpoint.
Our check mark Powerpoint tutorial below will show you where to find this symbol and include it in one of the slides in your presentation.
How to Add a Check Mark in Powerpoint for Office 365
- Open your presentation.
- Choose the slide for the checkmark.
- Select Insert.
- Click inside a text box or create a new text box.
- Select the Symbol button.
- Click Font, then choose Wingdings.
- Select the check mark at the bottom of the list, then click Insert.
Our guide continues below with additional information on adding checkmarks in Powerpoint, including pictures for these steps.
Do you need to add other symbols as well? Our square root symbol article will show you how to include that symbol and others in your Word documents.
Certain objects have a lot of utility in slideshow presentations, so you may find yourself using them on multiple occasions. Perhaps you want to know how to get a bullet point on Google Slides, or how to insert a text box in Powerpoint. But you may be wondering how to add a check mark in Powerpoint if it would be a beneficial symbol to include on one of your slides.
A check mark can be a useful symbol to include in a number of different document types, including slideshows that you create in Microsoft Powerpoint. But it can be difficult to add such a symbol to one of your slides because it can be tough to find.
Our guide below is going to show you where to locate the check mark symbol in Powerpoint so that you can add it to a text box in one of your slides. You can then customize that check mark in the same ways that you would customize other text that you have added.
You can also check out our check mark symbol in Word tutorial for information on including that symbol in your documents.
How to Insert a Check Mark Symbol in Powerpoint (Guide with Pictures)
The steps in this tutorial were performed in Microsoft Powerpoint for Office 365 but will work in most other recent versions of Powerpoint as well.
These steps will show you the Powerpoint insert check mark process so that you can add the symbol to one of your slides.
Step 1: Open your slideshow in Powerpoint.
Open a Powerpoint file.
Step 2: Select the slide where you wish to add the check mark from the column of slides at the left side of the window.
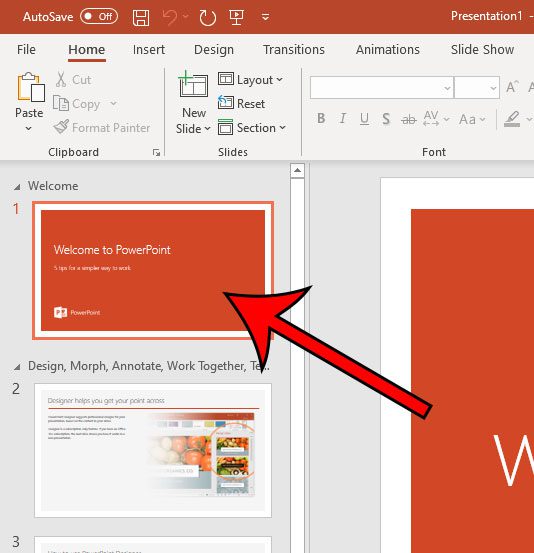
Choose the slide for the checkmark.
Step 3: Choose the Insert tab at the top of the window.
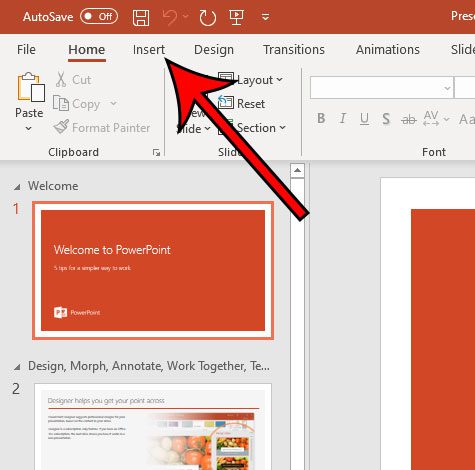
Click Insert.
Step 4: Click inside an existing text box where you wish to add the check mark, or click the Text Box button in the ribbon to add a new text box, then click inside of it.
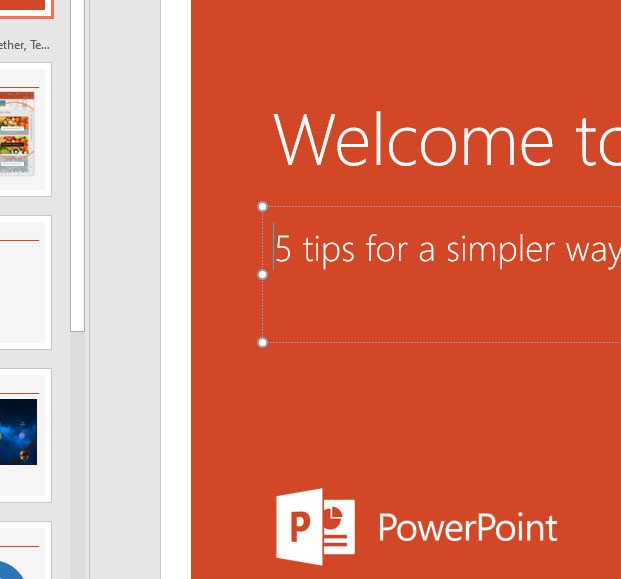
Click inside of a text box.
Step 5: Select the Symbol button in the Symbols section of the ribbon.
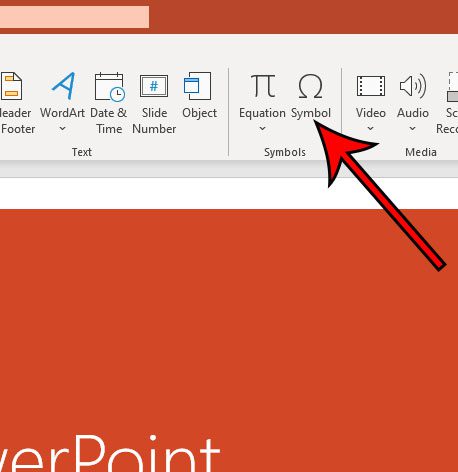
Click the Symbols button.
Step 6: Click the Font dropdown menu, then scroll down and choose the Wingdings option.
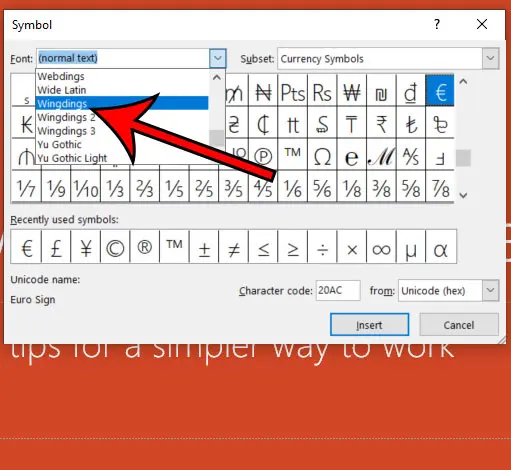
Choose the Wingdings font.
Step 7: Scroll to the bottom of the list of symbols, select the check mark, then click the Insert button.
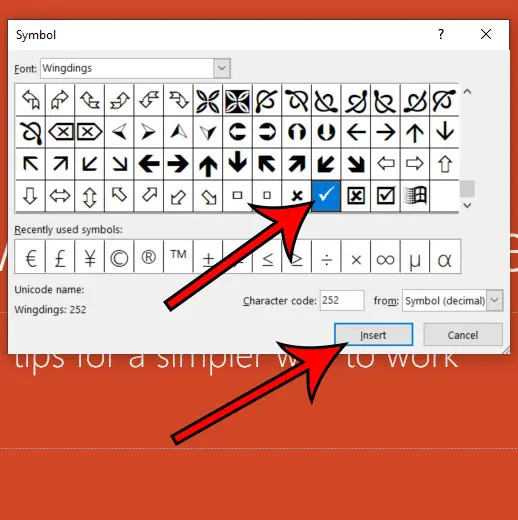
Choose the check mark, then click Insert.
Now that you know the check mark Powerpoint method you will be able ot add these symbols to future slides, as well as any of the other symbols that you might find in various fonts within the Powerpoint application.
Alternate Option for Adding Check Marks in Powerpoint (Older Powerpoint Versions)
There is also a check mark that can be added to one of your slides which is located on the Interface tab of the Icons menu. You can add this with the following steps:
- Click the Insert tab.
- Select the Icons button in the Illustrations section of the ribbon.
- Choose the Interface tab at the left side of the window.
- Click the check mark, then click Insert at the bottom of the window.
This method works in older versions of Powerpoint. If you have a newer version of Powerpoint then the Icons button will open a window where you can browse or search for check mark symbols instead.
Are you working on a slideshow that will be playing on a continuous loop somewhere? Find out where to find the setting in Powerpoint that enables it to loop endlessly.
More Information on How to Insert Check Mark in Powerpoint
Either of the methods outlined above provide you with a way to add a check mark to a Powerpoint slide. One other option that you could consider is to go to the Insert tab, then click the Icons button in the Illustrations group in the ribbon. You can then type the word “check” into the search field at the top of the window, select a check mark, then click Insert.
Adding a check mark with the above method will place the check mark in the slide as an image, which you can move, rotate, or adjust as needed.
While we discussed how to insert a check mark in Powerpoint using the Symbol dialog box, you can find a number of other helpful symbols besides the check mark character. For example, the Wingdings font has a bunch of other tiny pictures that could be useful, as well as a variety of arrows that you might want to insert to point out an important point.
One of the benefits of using the Symbol dialog box to add check marks is that you can use formatting options that you are probably already familiar with, such as font size and font color. When you insert a check mark symbol from the Icons menu, you can also adjust its appearance, but those adjustments need to be from the Graphics Format tab, which becomes visible after you click the check mark. Then you can use options like Graphics Fill to change the color of your check marks, or you could use Graphics Outline to give the check mark character a border.
One final method that you can use to add check marks involves an application called the Character Map. If you click the search button in your taskbar and type “character map” into the search field, it will open a window that looks very similar to the one that opened when you click the Symbol button in the ribbon. You can then follow the same steps from our guide above by choosing the Wingdings font and browsing to the desired checkmark symbol.
Frequently Asked Questions About the Powerpoint Check Mark
Can I copy check marks between different Powerpoint slides in my Powerpoint presentation?
Yes, once you have included a tick mark symbol on one of your slides, you can copy and paste it like you would with any other text that you have in one of your slides.
Simply select the check mark, then press Ctrl + C on your keyboard to copy it. You can then choose the slide for the copy, then press Ctrl + V to paste it.
Can I insert check marks in other Microsoft Office applications?
Yes, other applications like Microsoft Excel and Microsoft Word have ways for you to add things like a check mark or a square root symbol to your files.
The exact method differs between the applications, however, as the navigational ribbons are laid out a little differently, and you interact with content differently in both applications.
But the general idea of clicking the Symbols button, then choosing the Wingdings font from the drop-down menu, and selecting the check mark symbol is consistent between the different programs.
Is there another option for a check mark if I don’t like this style?
Yes, other fonts, such as Segoe UI, have similar options when you need a tick symbol or a tally mark.
The Segoe UI symbol options can be a nice alternative and includes a variety of other static symbols that you may find useful for your slideshows.
Is there an alt code that I can use instead to add a check mark to my presentation?
If you are adding a lot of these symbols to your slides, then using a keyboard shortcut can make things a little easier.
You can use the Wingdings check mark by selecting the Wingdings font from the Font dropdown menu on the Home tab, clicking inside a text box, then holding the Alt key and pressing 0252.
Continue Reading

Matthew Burleigh has been writing tech tutorials since 2008. His writing has appeared on dozens of different websites and been read over 50 million times.
After receiving his Bachelor’s and Master’s degrees in Computer Science he spent several years working in IT management for small businesses. However, he now works full time writing content online and creating websites.
His main writing topics include iPhones, Microsoft Office, Google Apps, Android, and Photoshop, but he has also written about many other tech topics as well.