Google Slides offers a handful of different themes that you can use to customize the appearance of your slideshow. You can then incorporate the steps from our tutorial on how to present Google Slides with speaker notes and make sure that you are including everything that you need to say when you give the presentation.
The default Google themes look good, and they provide a simple way to start editing your presentation so that you can focus on content instead of appearance.
But you may have a picture that you would like to add to your chosen theme, such as a company logo or a graphic that is appropriate to the presentation’s content.
Our guide below will show you how to apply a background image of your choosing to every slide in your presentation.
Google Docs offers a number of different ways that you can customize pictures, too. Find out how to circle on Google Docs using a tool found within that application.
How to Add a Background Image to a Theme in Google Slides
The steps in this article were performed in the desktop version of the Google Chrome Web browser, but will also work in other desktop browsers like Microsoft Edge or Mozilla Firefox.
Step 1: Sign into Google Drive and open the slideshow.
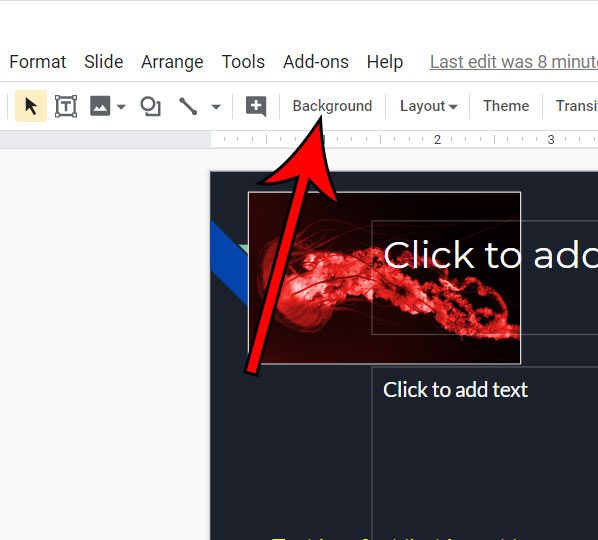
Step 2: Click the Background button in the toolbar.

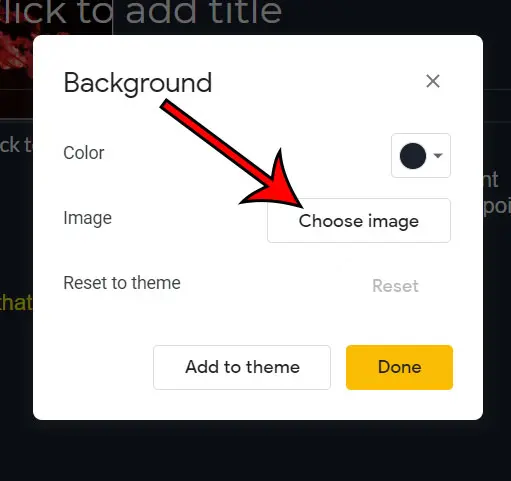
Step 3: Select the Choose image button.

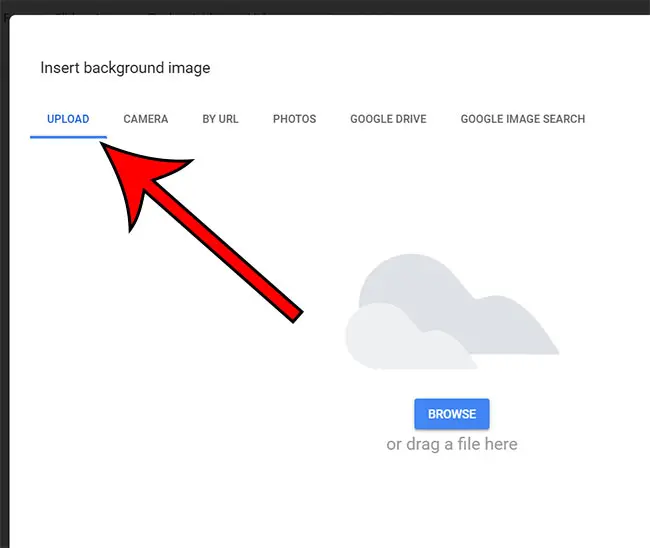
Step 4: Choose where to get the image by selecting a tab at the top of the window.

Step 5: Follow the prompts to select the image.
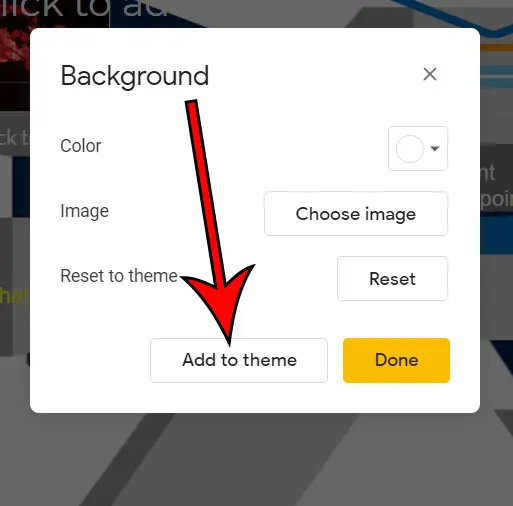
Step 6: Click the Add to theme button to apply the image to every slide.

Note that there is a strong possibility that the image is not going to be sized appropriately. You may need to use an image editing application to edit the picture before using it. If your slideshow is in the landscape orientation, then pictures fit best if they have a 16:9 aspect ratio.
Continue Reading
- How to add an arrow in Google Slides
- How to add bullet points in Google Slides
- How to convert Google Slides to a PDF
- How to delete a text box in Google Slides
- How to print multiple slides on one page in Google Slides

Matthew Burleigh has been writing tech tutorials since 2008. His writing has appeared on dozens of different websites and been read over 50 million times.
After receiving his Bachelor’s and Master’s degrees in Computer Science he spent several years working in IT management for small businesses. However, he now works full time writing content online and creating websites.
His main writing topics include iPhones, Microsoft Office, Google Apps, Android, and Photoshop, but he has also written about many other tech topics as well.