While Microsoft Powerpoint is a very common tool in both organizational settings and school, not every situation requires a Powerpoint file.
You may find yourself needing to share or upload a Powerpoint presentation somewhere, but a PDF file is either requested or simpler to use.
Luckily you don’t need to resort to an online converter tool or another application, as you are able to convert Microsoft Powerpoint files to a PDF using only the options already found within Powerpoint.
You can read our guide on how to save Powerpoint as PDF with notes if you would like to include your speaker notes with the PDF file you generate.
Use these steps to convert Microsoft Powerpoint to PDF.
Step 1: Open your presentation in Powerpoint.
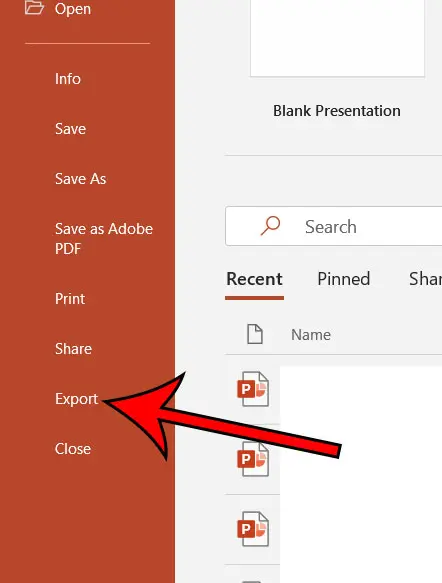
Step 2: Select the “File” tab at the top-left of the window.
Step 3: Choose the “Export” option in the left column.
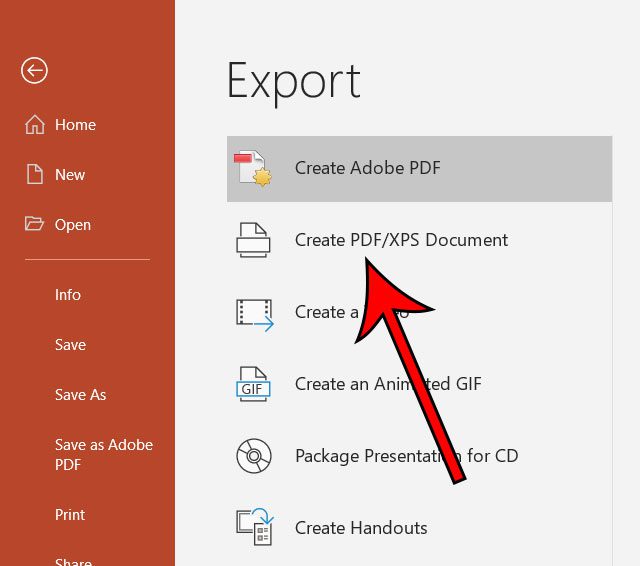
Step 4: Click the “Create PDF/XPS Document” option.
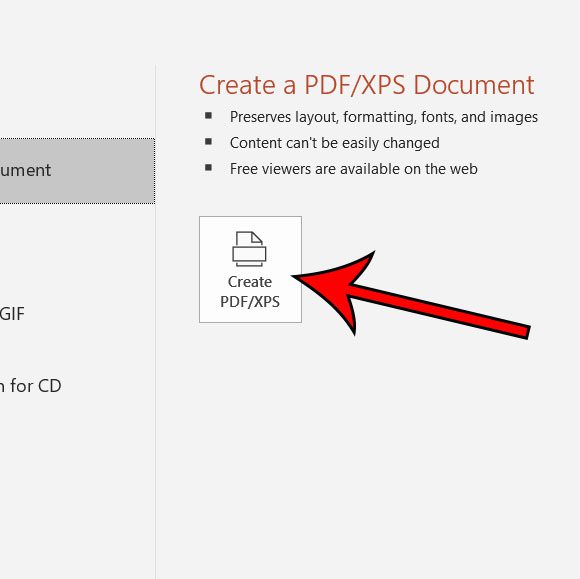
Step 5: Click the “Create PDF/XPS” button.
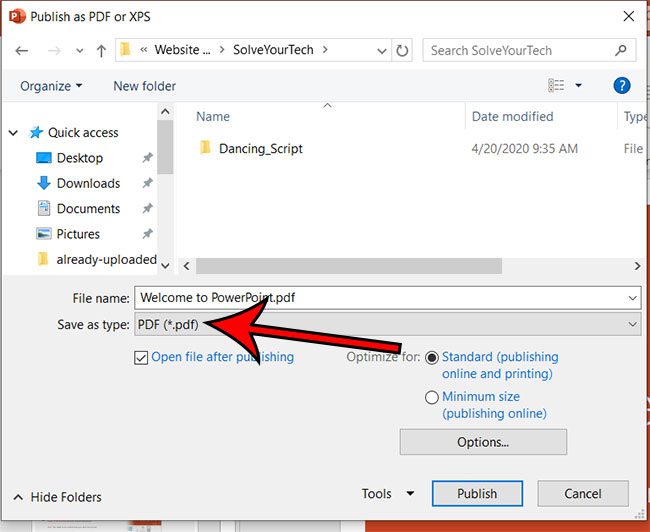
Step 6: Confirm that “PDF” is selected in the “Save as type” field, then click “Publish.”
In the Save window shown in step 6 above, note that there is an option for either “Standard” or “Minimum Size.” If your presentation file is very long and you are going to be sharing this PDF file via email, then you may want to select the “Minimum Size” option to confirm that it isn’t too large to send as an attachment.
Related: How to Upload a PDF to Google Drive
There is also an “Options” button that you can click which lets you choose other options for the exported PDF. For example, you are able to choose only a subset of your slides, rather than the entire presentation, if you only want to create a PDF from a few of the slides.
Note that PDFs are difficult to edit without a dedicated PDF editing application. It’s possible that your recipient will not be able to edit anything in the file if they don’t have something on their computer like Adobe Acrobat.
This method creates a copy of the existing Powerpoint file. You will still have the original Powerpoint file on your computer should you need to make additional edits to the presentation.
The steps in this article were performed using Microsoft Powerpoint for Office 365, but will also work in most other recent versions of Powerpoint as well.
Continue Reading
- How to create a check mark in Powerpoint
- How to make curved text in Powerpoint
- How to make a Powerpoint slide vertical
- How to remove an animation from Powerpoint
- How to set a picture as a background in Powerpoint

Matthew Burleigh has been writing tech tutorials since 2008. His writing has appeared on dozens of different websites and been read over 50 million times.
After receiving his Bachelor’s and Master’s degrees in Computer Science he spent several years working in IT management for small businesses. However, he now works full time writing content online and creating websites.
His main writing topics include iPhones, Microsoft Office, Google Apps, Android, and Photoshop, but he has also written about many other tech topics as well.


