Applying different effects and styles to the content of your slides in Microsoft Powerpoint is a crucial part of making your presentations look good.
Some of these formatting choices will be easy to apply, but if you want to know how to make text curve in Powerpoint, then you might be having trouble with that option.
Fortunately, our tutorial below will show you a way that you can achieve this effect in your slides.
How to Curve Text in Powerpoint 2013
- Select the slide where you want the curved text.
- Click the Insert tab.
- Choose the Text Box option.
- Draw the text box, then add the text.
- Select the text, then click the Format tab.
- Click Text Effects, then Transform, then one of the curved text options.
Our article continues below with additional information on how to curve text in Powerpoint 2013, including pictures for these steps.
You can read this guide if you would like to learn how to draw shapes in the presentations you create in Google Slides.
Powerpoint has a lot of different options for adding elements to a slideshow but some of them, like making curved text in Powerpoint, can be a little tough to find.
The visual nature of a Powerpoint presentation typically means that the aesthetics of your slide elements are an important contributor to how much your audience enjoys and, therefore, is engaged in your slideshow.
Text plays a large part in most presentations, but it’s naturally a little boring to look at. One way that you can spice up your presentation text is by curving it.
If you’ve ever tried to curve text in your slideshow before, however, then you might have found that it’s a little tougher than you might have thought.
Our tutorial below will show you how to make curved text in Powerpoint by adding a text box and applying a text effect to the text that you put in that box.
If you also use Google Slides, then you might want to check out our guide on how to add bullet points in Google Slides for a useful method for creating lists on your slides.
How Do You Curve Text in Powerpoint?
The steps in this article were performed in Microsoft Powerpoint 2013, but will also work in other versions of Powerpoint as well.
Once you complete the steps in this guide, you will know how to make text curve in Powerpoint by adding a text box to a slide, typing in the text that you want to curve, then adding an effect to that text to curve it.
Step 1: Open your presentation in Powerpoint 2013.
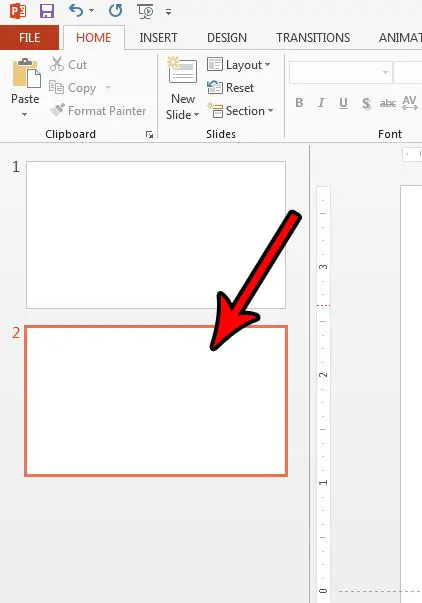
Step 2: Select the slide at the left side of the window to which you wish to add the curved text.
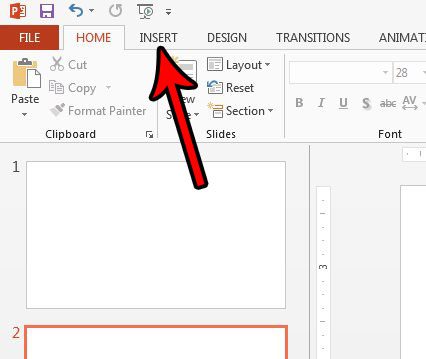
Step 3: Click the Insert tab at the top of the window.
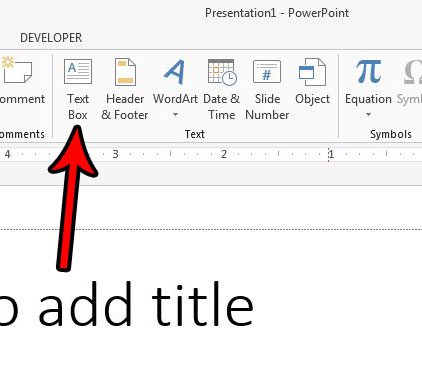
Step 4: Click the Text Box button in the Text section of the ribbon.
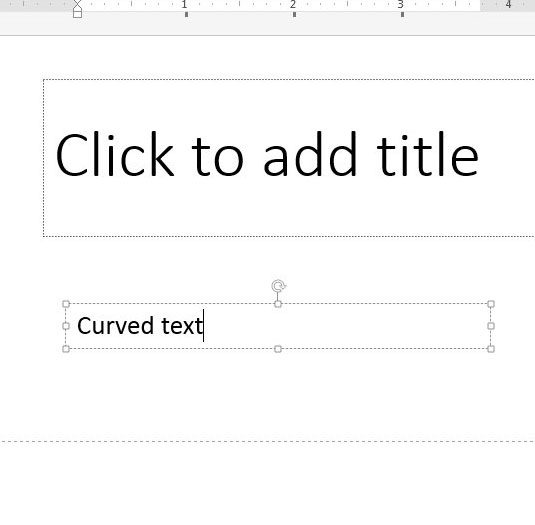
Step 5: Draw the text box on your slide, then type the text that you want to curve.
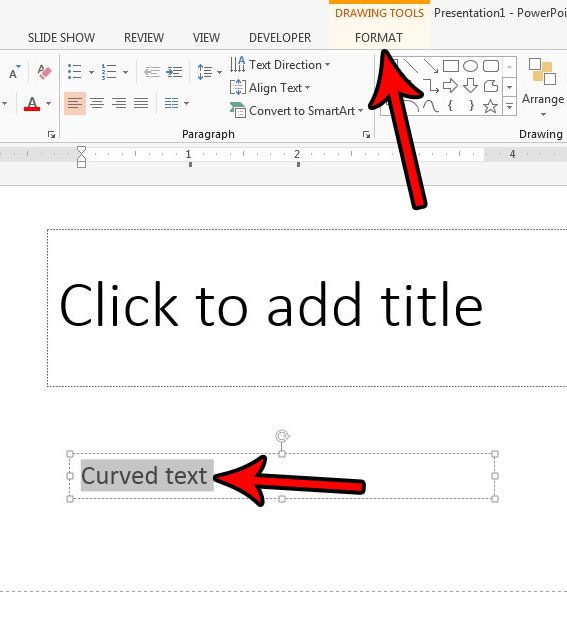
Step 6: Highlight your text, then click the Format tab under Drawing Tools at the top of the window.
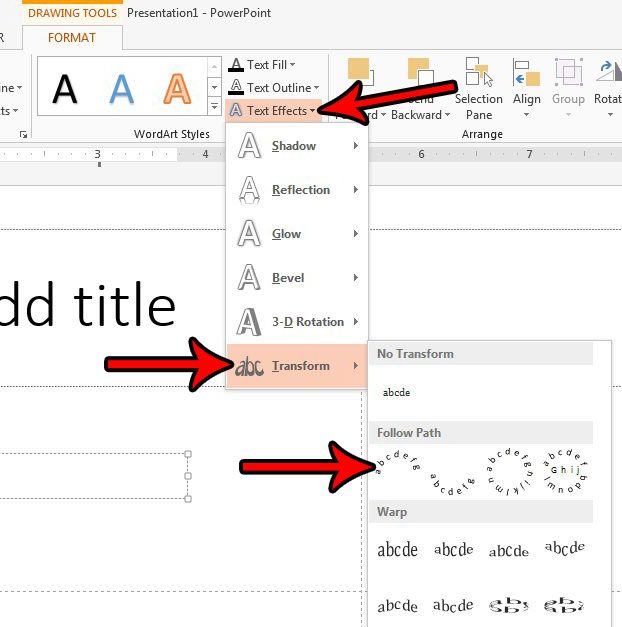
Step 7: Click the Text Effects button in the WordArt Styles section of the ribbon, select the Transform option, then click one of the options under Follow Path.
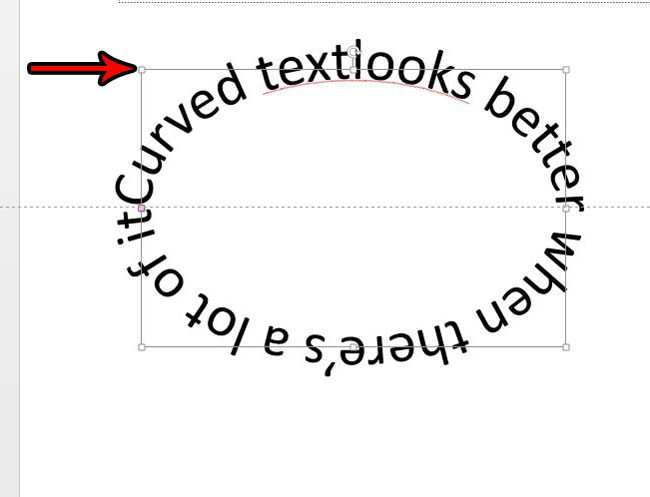
If this doesn’t give the desired effect, then try making the text box bigger.
One of the settings you can change for your slideshow involves your links. This change hyperlink color in Powerpoint article will show you what to do.
The curve will adjust based on the size of the text box, and I find that I typically get the curved text effect that I want when I’m using a bigger text box.
You can increase the size of the text box by clicking on one of the squares on the outside of the box and pulling it outward.
Now that you know how to make text curve in PowerPoint you will be able to apply this effect in any Powerpoint presentation that calls for it.
Do you need to show your presentation somewhere on a loop so that people can view it when you aren’t able to give the presentation yourself? Find out how to loop in Powerpoint so that the presentation just plays constantly.
Continue Reading
- How to create a check mark in Powerpoint
- How to make a Powerpoint slide vertical
- How to remove an animation from Powerpoint
- How to set a picture as a background in Powerpoint

Matthew Burleigh has been writing tech tutorials since 2008. His writing has appeared on dozens of different websites and been read over 50 million times.
After receiving his Bachelor’s and Master’s degrees in Computer Science he spent several years working in IT management for small businesses. However, he now works full time writing content online and creating websites.
His main writing topics include iPhones, Microsoft Office, Google Apps, Android, and Photoshop, but he has also written about many other tech topics as well.