When I was previously using an iPhone 5, I found that most of my device usage was in the landscape orientation. It was difficult to type in portrait orientation, and reading Web pages was often difficult if the text was too small.
These problems are mostly gone, however, with the iPhone 6 Plus. The screen is big enough that typing in portrait orientation is much more comfortable, and I haven’t really had any issues with Web pages displaying at a resolution that is difficult to read. In fact, I have found that I use my iPhone 6 Plus in portrait orientation much more than I do in landscape.
It’s actually gotten to the point where my device rotating to landscape can become an annoyance, so I decided to lock my phone in portrait orientation. You can follow the steps below to learn how to do the same on yours.
How to Stop the iPhone 6 Plus Screen from Rotating
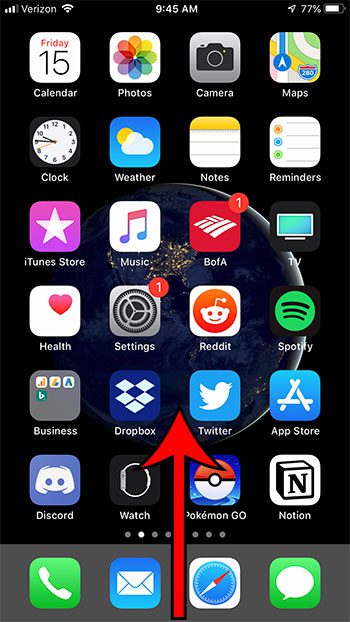
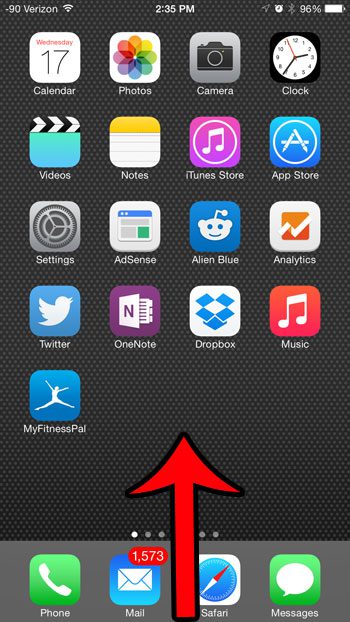
- Swipe up from the bottom of the screen.
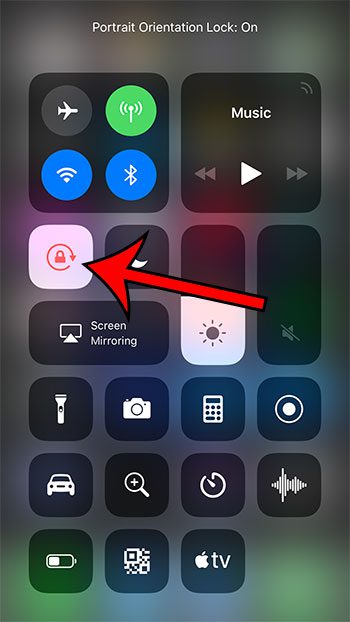
- Tap the Portrait Orientation Lock button to turn it on.
We also show pictures of these steps in the next section. Additionally, you can find how to stop your iPhone screen from rotating in iOS versions prior to iOS 11 with the section at the bottom of this article.
If it seems like your iPhone screen is always turning off too quickly, then find out how to keep iPhone screen on by changing a setting on the display menu.
How to Turn Off Screen Rotation on iPhone – iOS 12 (Guide with Pictures)
The steps in this section were performed on an iPhone 7 Plus in iOS 12.1.4. The steps are very similar in iOS 12 compared to earlier versions of iOS, but you can continue to the next section of this article if you are using an older version of iOS and your menus look different.
Step 1: Swipe up from the bottom of your screen to open the Control Center.
Step 2: Tap the button with the lock symbol on it to enable portrait orientation lock.
You can read our tutorial on how to rotate screen on iPhone 7 in settings for more information about making your device switch orientaiton.
Old Method – How to Use Portrait Orientation Lock on the iPhone 6 Plus
The steps in this article were performed using an iPhone 6 Plus, in iOS 8.1.2. These same steps, however, will work on iPhones using the iOS 7 operating system and above.
Note that portrait orientation lock does not affect things that default to landscape orientation, such as watching movies in the Netflix app, or playing certain games.
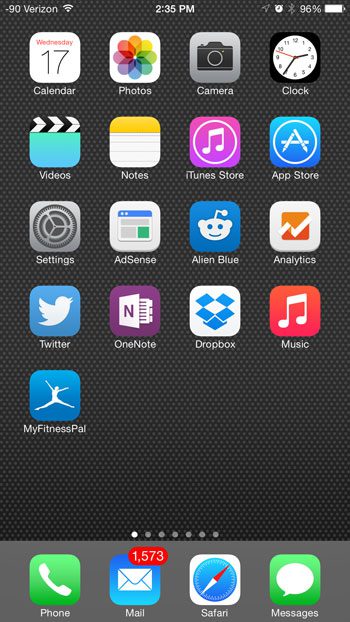
Step 1: Press the Home button under your screen to display your iPhone’s Home screen.
Step 2: Swipe up from the bottom of the screen to bring up the Control Center.
Step 3: Press the Portrait Orientation Lock button at the top-right corner of the Control Center.
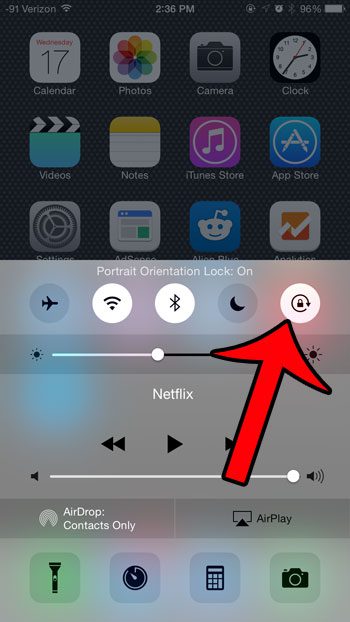
Now that you know how to enable or disable the rotating screen on an iPhone 6, you can better control the orientation of the device while you are holding it.
Our tutorial continues below with more information on working with screen rotation on an iPhone.
You can check out our auto rotate iPhone guide for more information about this topic, including items related to newer iPhone models.
Where Do I Find the Portrait Orientation Lock Button So I Can Rotate My iPhone Screen?
As we have shown in earlier sections in this article, the button that you need to use in order to be able to rotate your iPhone screen is called the “Portrait Orientation Lock” button.
You can find this setting on an iPhone, iPhone, or iPod Touch through the Control Center.
The method for getting to the Control Center will vary for the iPhone and iPod Touch depending on whether the device has a Home button.
For Apple devices with a Home button you will swipe up from the bottom of the screen. To disable screen rotation lock on a device without a Home screen you will swipe down from the top-right corner of the screen then tap the lock button.
When the button is white you won’t be able to rotate the screen, and the screen on your iPhone will be forced to stay in portrait mode. You will be able to put the device in landscape mode when the button is gray.
Note that not all apps support screen rotation. In cases like this the screen orientation will not be able to auto rotate, regardless of whether or not the rotation lock icon has been pressed. Some common app types that don’t support rotation are games or document editors, as they require the phone screen to stay in landscape or portrait mode and need to stop iPhone screen rotation from occurring.
More Information on How to Enable or Disable the iPhone 6 Rotating Screen
This will prevent your iPhone from rotating to landscape orientation if you adjust the way that you’re holding your phone. If you decide that you need to be able to switch from portrait orientation, then you will need to return to the Control Center and turn off the Portrait Orientation lock.
Note that a lock icon will be displayed at the top-right of your screen when the orientation is locked.
One particular item of note involves the display zoom setting. If you open the Settings app then select the Display & Brightness option you can scroll down to find a Display Zoom section. If you select Zoomed as the new zoom setting, then tap Set at the upper right corner you will no longer be able to switch between portrait or landscape mode, as the device will be locked into portrait mode.
This guide is focused specifically on using the Portrait Orientation Lock setting on an iPhone 6. As you saw in the steps above, this involves opening the Control Center by swiping up from the bottom of the screen. On newer iPhone models that don’t have a Home button you will open the Control Center by swiping down from the top-right corner of the screen instead.
The Control Center includes a number of different controls and settings for your iPhone by default, but you can also customize the buttons that appear there. You can do this by going to Settings > Control Center > Customize Controls > then start adding or removing options. You can remove an option from the Control Center by tapping the red minus symbol next to it, or you can add something to the Control Center by tapping the green plus symbol next to it.
You can also adjust the order of items in the Control Center using the three horizontal lines to the right of that item.
Would you like all of the controls on your iPhone 6 Plus screen to be bigger? Learn how to change the display zoom on your device from standard to zoomed.
If you’ve been trying to fix problems with your iPhone but would rather start from scratch, you can conduct a factory reset by following the instructions in the following section.
Restoring an iPhone to Factory Settings
The suggestions in this section are compatible with the great majority of iPhone models and iOS operating system updates.
More information on how to factory reset an iPhone 11 may be found in this guide.
After you remove all of your iPhone 11’s data and settings, it will be reset to factory defaults. You may need to reset your iPhone 11 for a variety of reasons, including selling or gifting it or if you are encountering software issues that cannot be handled otherwise. In this post, we’ll walk you through the simple procedure of factory resetting an iPhone 11.
Before performing a factory reset, make a backup of your data. This critical step entails completing a factory reset, which erases all data, including apps, photos, contacts, and personal preferences. Depending on your preferences, you can back up your iPhone 11 using iCloud or iTunes.
Follow these methods to restore your iPhone 11 to factory settings:
Step 1: First, launch the “Settings” software.
Step 2: The next step is to select “General.”
Step 3: At the bottom of the page, click the “Transfer or Reset iPhone” button.
Step 4: Select “Erase All Content and Settings” from the menu.
Step 5: Enter your passcode.
After selecting “Erase All Content and Settings,” you will be asked to enter your passcode. This procedure ensures that only those in positions of authority can do a factory reset.
Step 6: Confirm your selection.
After entering your passcode, a pop-up box will display asking you if you are certain you want to delete all data and settings. Select your action by selecting “Erase Now.”
Step 7: Wait for the procedure to be finished.
The amount of data on your iPhone 11 influences how long it takes to perform a factory reset. During this period, your iPhone 11 will restart and display the Apple logo.
Step 8: Reset your iPhone 11 or restore from a backup.
After you’ve completed the factory reset, your iPhone 11 will restart and ask you if you want to set it up from scratch or restore from a backup. If you have a data backup, you can use it to restore your iPhone 11.

Matthew Burleigh has been writing tech tutorials since 2008. His writing has appeared on dozens of different websites and been read over 50 million times.
After receiving his Bachelor’s and Master’s degrees in Computer Science he spent several years working in IT management for small businesses. However, he now works full time writing content online and creating websites.
His main writing topics include iPhones, Microsoft Office, Google Apps, Android, and Photoshop, but he has also written about many other tech topics as well.