Everyone tends to think that their computer or Web browser is running slower after they have been using it for a while.
Whether this is simply due to becoming accustomed to the speed of a new computer or using a different, newer computer and coming back to an old one, there are many times when the computer is not any slower, it just seems to be.
But one time when a Web browser can actually be slower than it used to be is when you have installed a high number of add ons.
Some of these add ons might have been installed intentionally, but the majority of users with a high number of Internet Explorer 9 add ons did not intend to install them. It was just a default option when they were installing a program, and they didn’t uncheck the option that installed the add on.
Fortunately, you can learn how to uninstall an add on in IE9 rather easily, which should help to increase the speed of your browser.
Uninstalling Add-Ons in Internet Explorer (IE9)
If you want to completely remove and uninstall an add-on from your browser, then you need to follow the same procedure that you would use to uninstall a regular program or application. You can read below to learn how to perform this task. If you just want to disable an add-on because you think you might need it again in the future, then scroll to the Disabling Add-Ons in Internet Explorer 9 (IE9) section below.
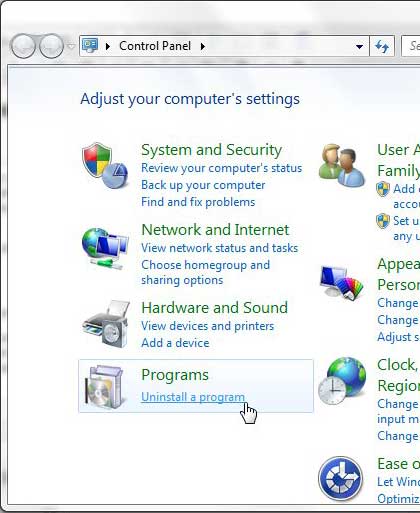
Step 1: Click the Start button at the bottom-left corner of your screen, then click the Control Panel option.
Step 2: Click the blue Uninstall a program link under the Programs section of the window.
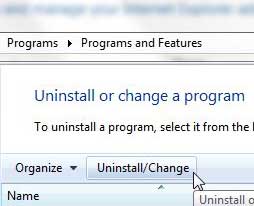
Step 3: Click the add-on that you want to uninstall from your computer, then click the Uninstall/Change button in the horizontal blue toolbar above the list of programs.
Step 4: Click any Yes or Uninstall prompts that you get to confirm that you want to uninstall the program. The actual uninstall process from this point could vary, depending upon which specific program you are attempting to remove.
Disabling Add Ons in Internet Explorer 9 (IE9)
If you are just getting used to IE9 after using an old version of the software or a different browser, then part of your problem in determining how to disabling an add on might simply be finding the menu to do so. So continue reading below to learn the process for disabling browser add-ons.
Step 1: Launch Internet Explorer 9.
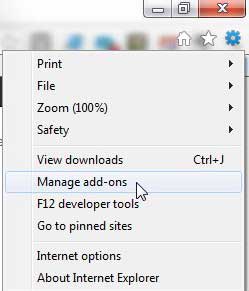
Step 2: Click the Tools icon at the top-right corner of the window (it looks like a gear), then click the Manage add-ons option.
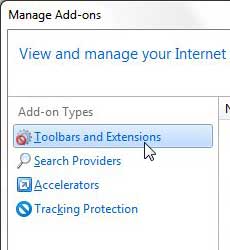
Step 3: Choose your add-on type from the column at the left side of the window, under Add-on Types.
Step 4: Click the add-on that you want to disable from the list at the center of the window, then click the Disable button at the bottom of the window.

Matthew Burleigh has been writing tech tutorials since 2008. His writing has appeared on dozens of different websites and been read over 50 million times.
After receiving his Bachelor’s and Master’s degrees in Computer Science he spent several years working in IT management for small businesses. However, he now works full time writing content online and creating websites.
His main writing topics include iPhones, Microsoft Office, Google Apps, Android, and Photoshop, but he has also written about many other tech topics as well.


