When you use Microsoft Outlook for work or for an organization, you may often find that you need to send emails to a lot of people.
While a lot of these emails will be going to individuals, you may also need to contact the same, large group of people.
Rather than typing out all of those email addresses every time and risk missing someone, you can learn how to create a distribution list in Outlook and expedite the process of sending emails to a large number of people at the same time.
Creating a distribution list in Outlook 2013 might seem like a daunting task, but it’s actually similar to how you created contacts in the first place. It’s also something that can be beneficial for school, work, or even personal emailing activities.
Do you often send emails to the same exact group of people? But is that group of people pretty large, and manually adding each email address is time-consuming?
Not only can this waste time, but it’s really easy to forget to include someone when you are manually adding a lot of email addresses. This can lead to someone being out of the loop on an important topic, and they might even think that you forgot to include them intentionally.
Going away on vacation and want to let people know? Find out how to create an out of office reply in Outlook 2013.
One way to resolve this issue is by creating a distribution list. Essentially you are creating a list of email addresses that can be added to an email as one “contact” rather than a bunch of individual contacts. It’s faster, less prone to human error, and will generally make your life a little easier.
This guide continues below with additional information about how to create a distribution list in Outlook, including pictures of these steps.
How to Make a Distribution List in the Microsoft Email Application (Guide with Pictures)
The steps in this article were performed in Microsoft Outlook 2013, but will work in other versions of Outlook as well.
Note that we are actually creating something called a Contact Group, not a distribution list, but its functionally the same thing.
The first part of this section provides a quick overview of how to create a distribution list. Continue reading for additional information, including images for each step.
Do you have a list of contacts in Excel that you want to get into Outlook? Find out how to import these contacts.
Step 1: Open Outlook 2013.
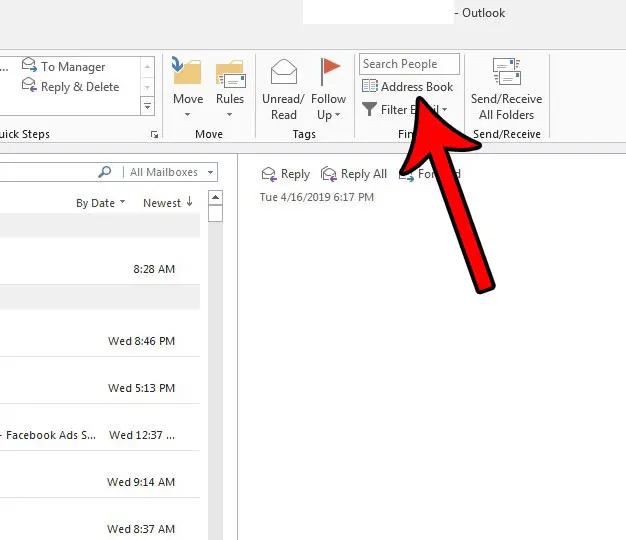
Step 2: Select the Address Book option in the ribbon at the top of the window.
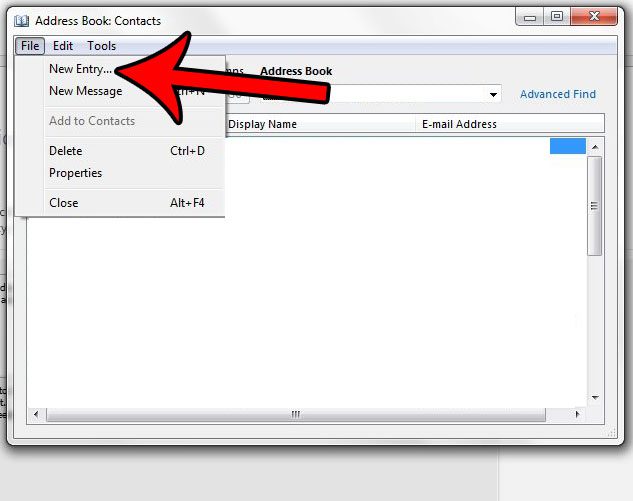
Step 3: Choose the File tab at the top of the window, then select the New Entry option.
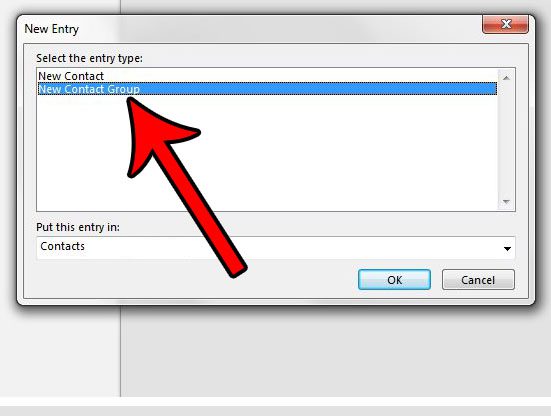
Step 4: Click New Contact Group, then click OK.
Step 5: Click the Add Members button, then choose the method for which you would like to add your first contact.
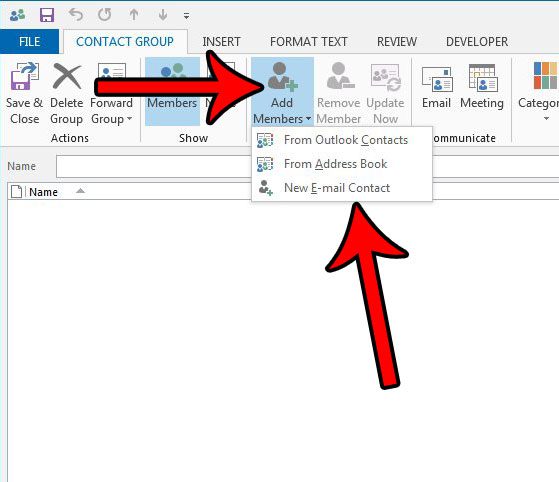
Step 6: Double-click on existing contacts and add new email addresses as needed.
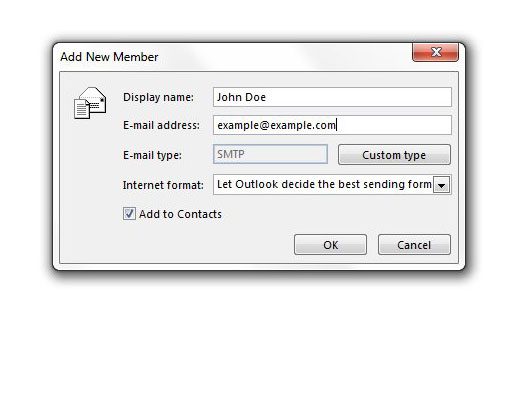
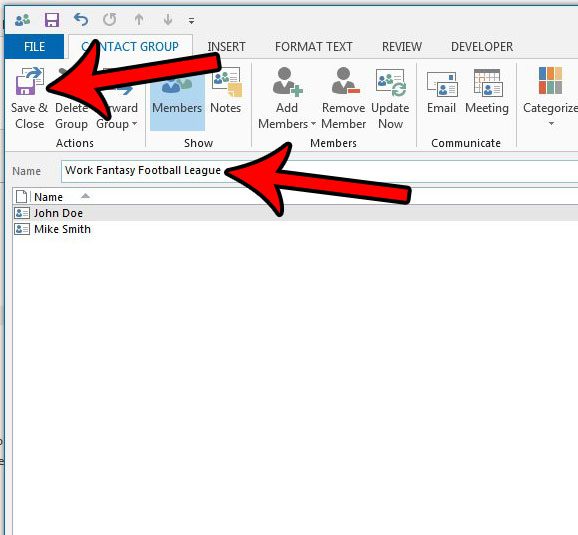
Step 7: Enter a name for the distribution list into the Name field, then click the Save & Close button when you’ve finished adding names.
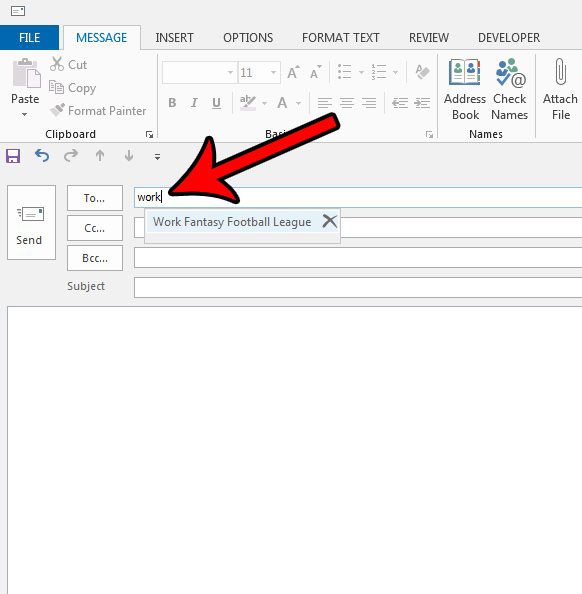
Step 8: Create a new email, then type the name of the distribution list into the To field at the top of the window, then select it from the list of results. You can then proceed with typing your email as usual.
You have now completed the steps for how to create a distribution list in Outlook 2013, which you can use when you want to quickly communicate with the people who you have added to that list.
Now that you have created this distribution list it will be much easier to quickly send an email to a large, pre-determined group of people.
If you find that this is a helpful way to manage groups on contacts, then consider creating more distribution lists, even if it’s only for a couple of people. Once you get in the habit of creating and using distribution lists you will find that you don’t need to worry about forgetting to include someone on a message.
If you want to send the emails to your distribution list, but you don’t want everyone on the list to see the addresses of the other recipients, then include the distribution list in the BCC field. You can enable BCC field by selecting the Options tab at the top of the Compose window, then selecting the BCC option.
Did you set up a signature for your email account yet? Find out how to create a signature in Outlook 2013 and give people all of the contact information that you think they might need.
Continue Reading
- How to disable work offline in Outlook
- How to strikethrough in Outlook
- How to create a Vcard in Outlook
- How to view the blocked sender list in Outlook
- How to set up Gmail in Outlook

Matthew Burleigh has been writing tech tutorials since 2008. His writing has appeared on dozens of different websites and been read over 50 million times.
After receiving his Bachelor’s and Master’s degrees in Computer Science he spent several years working in IT management for small businesses. However, he now works full time writing content online and creating websites.
His main writing topics include iPhones, Microsoft Office, Google Apps, Android, and Photoshop, but he has also written about many other tech topics as well.