To import an Excel list into Outlook contacts, save the sheet as a CSV (Comma delimited) file, then in classic Outlook go to File > Open & Export > Import/Export, choose Import from another program or file, pick Comma Separated Values, and select your file. Map your columns to Outlook fields before you click Finish. In new Outlook or Outlook on the web, go to People and use Import contacts instead.
These steps follow Microsoft’s Import contacts from an Excel spreadsheet to classic Outlook and Import or export contacts in Outlook using a .csv file articles. They cover classic Outlook for Windows, new Outlook for Windows, and Outlook on the web (including Outlook.com).
Which Steps Should You Follow?
| Outlook version | Where to import |
|---|---|
| Classic Outlook for Windows | File > Open & Export > Import/Export |
| New Outlook for Windows | People > Import contacts |
| Outlook on the web / Outlook.com | People > Manage contacts > Import contacts |
Microsoft notes that if the new Outlook steps don’t work, you may still be using classic Outlook, so try those steps instead. Either way, you start by saving your list as a CSV file.
Before You Start: Tidy Up Your Excel List
- Put each contact on its own row and each type of information (first name, last name, email, phone) in its own column.
- Give every column a clear name in the first row. Columns named Name, First Name, and Last Name match standard Outlook fields automatically. If you only want a single Name column, you can combine the first and last name columns in Excel before you save the file.
- Keep the contacts on a single worksheet. Outlook imports CSV files, and a CSV file can only hold one sheet.
Step 1: Save Your Excel List as a CSV File
- Open the workbook and click the worksheet with your contacts.
- Click File > Save As and choose where to save it.
- In Save as type, choose CSV (Comma delimited) (*.csv) and click Save.
- Excel warns that the file type doesn’t support workbooks with multiple sheets. Click OK. This only describes a CSV limitation, and your original .xlsx workbook isn’t changed.
- Excel may also say some features might be lost. Click Yes to save the current sheet as a CSV file.
- Close the CSV file.
Result: You now have a .csv copy of your contact list that Outlook can read. If you work with these files often, you can also set CSV files to open in Excel by default.
Tip for some countries: semicolons vs commas
Some locales use a different list separator by default. For example, Microsoft says German uses a semicolon, but Outlook doesn’t support semicolons as a field separator. If your CSV file uses semicolons, replace them with commas before you import.
Step 2: Import the CSV File Into Classic Outlook
- At the top of the Outlook ribbon, click File.
- Choose Open & Export > Import/Export.
- Choose Import from another program or file and click Next.
- Choose Comma Separated Values and click Next.
- Browse to your CSV file. Under Options, choose whether to replace duplicates, allow duplicates, or not import duplicates.
- Click Next and pick the destination folder. Contacts is usually selected already.
- Click Next and make sure the check box next to your file name is selected. Don’t click Finish yet.

If you’re asked for a password and you haven’t set one, Microsoft says to click Cancel to move to the next window. After importing, you can add the new contacts to a group; see how to edit a distribution list in Outlook.
Step 3: Map Your Columns to Outlook Fields
Mapping tells Outlook which column holds which type of information, so phone numbers and addresses land in the right fields.
- Click Map Custom Fields.
- Under From, you’ll see the column names from your CSV file. Under To, you’ll see Outlook’s contact fields. Columns that already match show under Mapped from.
- For columns that don’t match, drag them from the left pane onto the right field. For example, Microsoft shows dragging a column named “Cell Ph” onto Mobile Phone, which is under Other Address after you click its plus sign.
- Repeat for the rest, such as dragging Address to Home Street or Business Street.
- Click Finish.
Result: Your contacts are imported. To see them, choose the People icon at the bottom of the navigation bar.
How to Import Contacts in New Outlook or Outlook on the Web
- Select People in the navigation bar. In new Outlook, if People isn’t there, select More apps and then People.
- On the ribbon, select Import contacts. In Outlook on the web or Outlook.com, select Manage contacts > Import contacts.
- Select Browse, choose your CSV file, and select Open.
- Select Import.
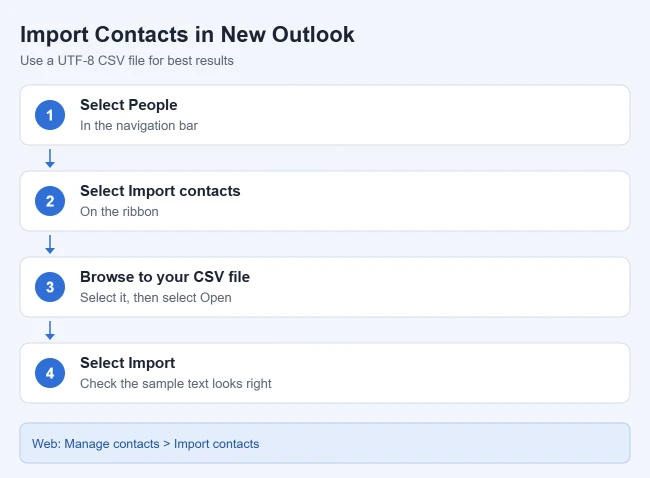
Result: Outlook adds the contacts from your file to your account. Before it finishes, the tool shows some example contacts so you can check the text looks right.
Why UTF-8 encoding matters
Microsoft recommends a CSV file with UTF-8 encoding, which works for all languages and alphabets. If your contacts include characters like Greek, Cyrillic, Arabic, or Japanese and the preview looks garbled, select Cancel, convert the file to UTF-8, and start again. In Excel, you can choose CSV UTF-8 (Comma delimited) in the Save as type list in Step 1.
Troubleshooting
- Contacts imported with blank fields: The columns weren’t mapped. Delete the imported contacts and import again, using Map Custom Fields in classic Outlook.
- Duplicates appeared: In classic Outlook, run the import again and, under Options, choose not to import duplicates or to replace them.
- Everything ended up in one column: Your file probably uses semicolons. Replace them with commas.
- Strange characters in names: Save the file as CSV UTF-8 and import again.
Frequently Asked Questions
Can Outlook import an .xlsx file directly?
No. Microsoft’s steps start by saving the workbook as a .csv file, because Outlook imports CSV files and not workbooks with multiple sheets.
Where do imported contacts go?
In classic Outlook, they go to the folder you pick in the wizard, which is Contacts by default. Open the People view to see them.
Do I need to know which Outlook I have?
It helps, since the menus differ. If you see File > Open & Export, you’re using classic Outlook. If you’re not sure which Office version you have, here’s how to check which version of Excel you’re using.

Matthew Burleigh has been writing tech tutorials since 2008. His writing has appeared on dozens of different websites and been read hundreds of millions of times.
After receiving his Bachelor’s and Master’s degrees in Computer Science he spent several years working in IT management for small businesses. However, he now works full time writing content online and creating websites.
His main writing topics include iPhones, Microsoft Office, Google Apps, Android, and Photoshop, but he has also written about many other tech topics as well.