Microsoft Powerpoint makes it easy for you to copy and paste entire slides or put them in a different order in a presentation.
But you might have a slide that you don’t need for your slideshow but that you don’t want to delete.
Our tutorial below will show you how to hide a selected slide in Powerpoint 2013 so that the slide is still technically part of the presentation but won’t be included when you are showing it to an audience.
How to Remove a Powerpoint Slide from View
- Open the Powerpoint file.
- Select the slide to hide.
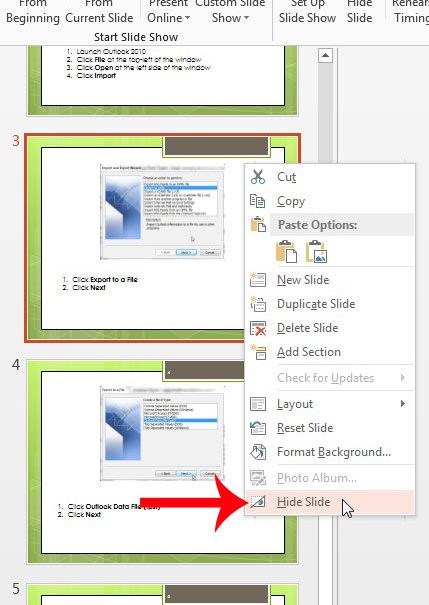
- Right-click on the selected slide, then choose Hide Slide.
Our guide continues below with additional information on how to hide a selected slide in Powerpoint 2013, including pictures of these steps.
Powerpoint presentations are typically created for a specific audience, which will dictate the information that you include on your slides.
But sometimes, you will need to show a presentation to two different groups, one of which does not need to know the information that is included on one of your slides.
Rather than delete that slide, you might instead need to learn how to hide a selected slide in Powerpoint 2013.
Hiding a slide, particularly one that requires a lot of work and is useful in other situations, is preferable to deleting a slide in certain situations.
This tutorial will have you select the slide that you want to hide, then hide it.
The hidden slide will still be visible in the thumbnail panel at the left side of the window but will not be displayed when you are viewing the presentation as a slideshow.
How to Hide a Microsoft Powerpoint Slide (Guide with Pictures)
Note that hiding a slide can be problematic if you have numbered your slides.
The hidden slide will not display when you are viewing the slideshow, but the slide numbers will not update to accommodate for the hidden slide.
So, for example, if you hide slide 3, then the slideshow will skip from slide 2 to slide 4, but the numbering will still exist as though slide 3 was a part of the slideshow.
In presentations that include hidden slides, it is probably best to remove slide numbers to avoid confusion.
Step 1: Open your slideshow in Powerpoint 2013.
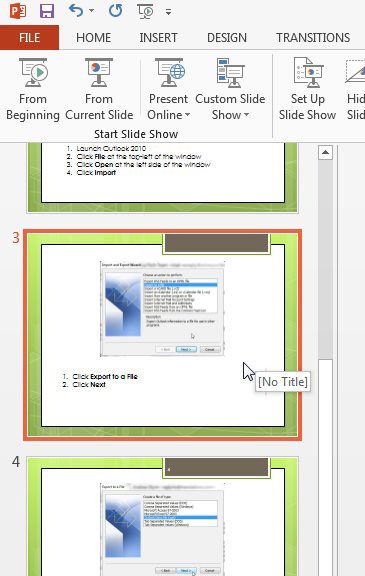
Step 2: Click the slide that you want to hide in the thumbnail panel at the left side of the window.
In this example, I am hiding slide 3.

Step 3: Right-click the selected slide, then click the Hide Slide option.

You can unhide a slide by simply following these steps again.
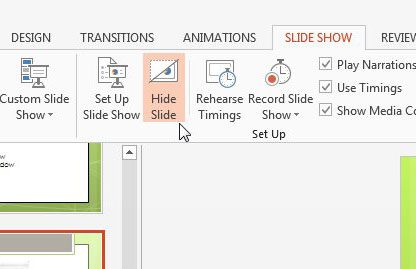
You can also hide a slide by clicking the Slide Show tab at the top of the window, then clicking the Hide Slide button in the Set Up section of the navigational ribbon.

Now that you know how to hide a selected slide in Powerpoint 2013, you will be able ot add and remove slides form different presentations as needed, without having to figure out some other kind of system so that you can add those same slides back in the future.
Do you need to include a video in your presentation? Learn how to embed YouTube videos in Powerpoint 2013 to give your presentation a multimedia boost.

Matthew Burleigh has been writing tech tutorials since 2008. His writing has appeared on dozens of different websites and been read over 50 million times.
After receiving his Bachelor’s and Master’s degrees in Computer Science he spent several years working in IT management for small businesses. However, he now works full time writing content online and creating websites.
His main writing topics include iPhones, Microsoft Office, Google Apps, Android, and Photoshop, but he has also written about many other tech topics as well.