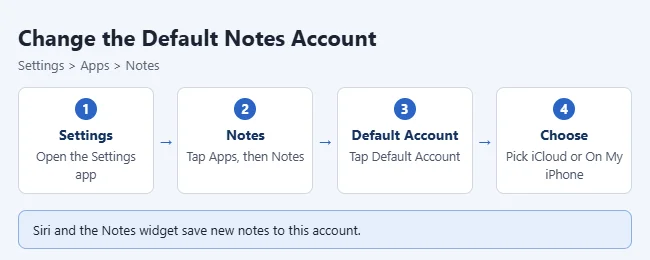
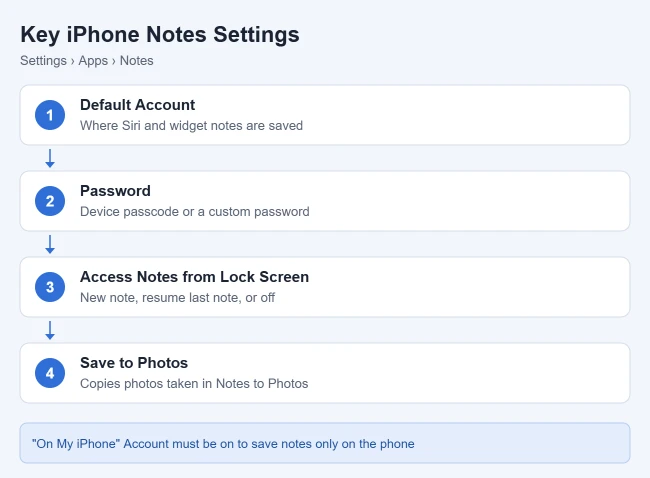
To change the default Notes account on iPhone, open Settings, tap Apps › Notes, tap Default Account, and choose an account such as iCloud or On My iPhone. That’s the account Siri and the Notes widget use for new notes. The same Notes settings screen also controls Lock Screen notes, note passwords and saving photos.
This guide walks through the Notes settings most people change: the default account, the local On My iPhone account, Lock Screen access, the Notes password and Save to Photos. The steps follow Apple’s guide to changing Notes settings on iPhone and apply to iOS 18 and later. On older versions, Notes is listed directly in Settings rather than under Apps.
How to Change the Default Notes Account
- Open the Settings app.
- Tap Apps, then tap Notes.
- Tap Default Account.
- Choose the account for new notes, such as iCloud, On My iPhone or an email account you’ve added for Notes.
Result: New notes you make with Siri or the Notes widget are saved to that account. Existing notes stay where they are.
Turn on the On My iPhone account
To keep notes only on your phone instead of in iCloud, go to Settings › Apps › Notes and turn on “On My iPhone” Account. It then appears as a choice under Default Account and as its own section in the Notes app. Notes in that account stay on the iPhone and don’t sync through iCloud.
How to Create a Note From the Lock Screen
- Open the Settings app and tap Apps › Notes.
- Tap Access Notes from Lock Screen.
- Choose Always Create New Note or Resume Last Note, or turn the option off.
Result: Opening Notes from the Lock Screen (for example, from Control Center) follows your choice. Turning it off prevents access to Notes from the Lock Screen.
Resume Last Note is handy for a running list, but it can show the last note you worked on to anyone holding your phone, so Always Create New Note is the safer pick for most people.
How to Set a Password for Locked Notes
- Open Settings › Apps › Notes.
- Tap Password. If you have more than one Notes account, choose the account.
- Tap Use Device Passcode or Use Custom Password.
- Optionally turn on Face ID or Touch ID.
Result: You can lock individual notes, then open them with your passcode or password (or Face ID or Touch ID).
Apple warns that if you forget a custom password and can’t use Face ID or Touch ID, Apple can’t help you get back into those notes. Resetting the password only applies to notes you lock afterward. See Apple’s guide to locking notes for which notes can be locked.
How to Save Photos Taken in Notes to the Photos App
- Open Settings › Apps › Notes.
- Turn on Save to Photos.
Result: Photos and videos you take with the camera inside Notes are also saved to your Photos library.
Other Notes Settings Worth Knowing
- Viewing: change the sort order, add lines or grids to new notes, and group notes by date.
- Mention Notifications: get alerts when someone mentions you in a shared note.
- Auto Convert to Tag: turn #text into a tag when you type a space.
- Search: choose whether Notes content appears in Search and widgets.
Frequently Asked Questions
Does changing the default account move my existing notes?
No. It only affects new notes created with Siri and the Notes widget. To move a note, open the Notes app and move it into a folder in the other account.
Why can’t I lock some notes?
Apple says you can’t lock notes with video, audio, PDF or file attachments, notes with tags, Quick Notes, notes that sync with other accounts, or notes shared in iCloud.
More iPhone Guides

Matthew Burleigh is the founder, head writer, and editor of Solve Your Tech, which he launched in 2012. He has written technology tutorials since 2008 and worked in IT since 2003, including small-business support, IT management, and consulting. He holds Bachelor’s and Master’s degrees in Computer Science from Arizona State University.
Matthew writes practical guides for Windows, iPhone and iPad, Microsoft Office, Outlook, Google apps, and Android. Solve Your Tech’s guides are tested on current devices or checked against official product documentation, with clear steps, sources, and update dates.
Read more about Matthew and how Solve Your Tech writes and updates its guides, or report a correction.