If your iPhone 5 cellular plan has a fixed amount of data or minutes each month, then you will likely pay additional money if you go over that allotment.
But it’s not always easy to know when you are approaching your limit, so it is helpful to keep track of it yourself so that you can modify your usage as needed.
Your iPhone 5 displays your call time and cellular data usage on the Cellular menu, but you may find that the numbers displayed there are not aligning with what you are seeing on your bill.
The information on the Cellular menu does not reset automatically each month, so the call time and the cellular data usage that you are seeing is for the period of time since your last reset.
If you would like to be able to use this information to monitor your usage, then you will need to reset these statistics at the start of each billing cycle. You can follow the steps outlined below to begin doing this.
Resetting Call Time and Cellular Data Usage on the iPhone 5
These steps were performed on an iPhone 5, in iOS 8. Instructions may be different for other versions of iOS.
For the best results, follow the steps below on the first day of your billing cycle. This will give you a much better idea of the amount of call time and cellular data that you are using during your billing cycle.
Additionally, if you are on a shared plan with friends or family members, their usage will not show up on your device.
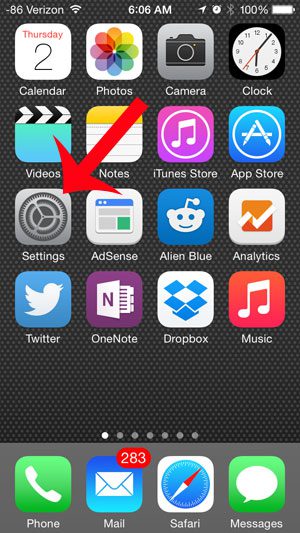
Step 1: Open the Settings menu.

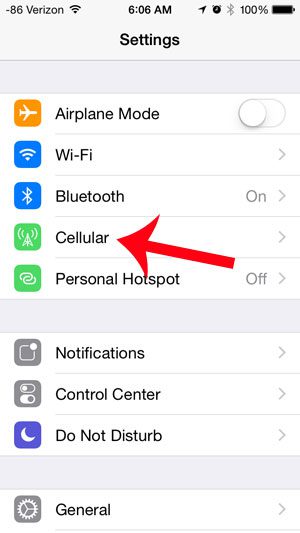
Step 2: Select the Cellular option.

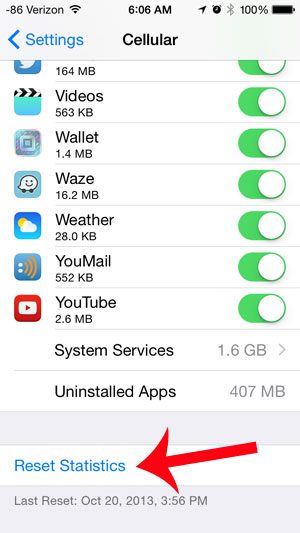
Step 3: Scroll to the bottom of the menu, then touch the Reset Statistics button.

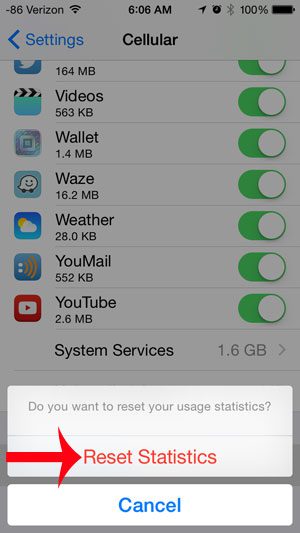
Step 4: Press the Reset Statistics button to confirm that you are aware that you will be resetting the usage statistics displayed on the Cellular menu.

Now that you know why the usage statistics in the Cellular menu on your iPhone 5 might be incorrect, you can reset those statistics so that you can see your usage over a specific period of time.
If one of the reasons for high data usage is a particular app being used while connected to a cellular network, then it might be a good idea to restrict that app so that it can only be used when connected to a Wi-Fi network. For example, read here to learn how to restrict Netflix to Wi-Fi on your iPhone 5.

Matthew Burleigh has been writing tech tutorials since 2008. His writing has appeared on dozens of different websites and been read over 50 million times.
After receiving his Bachelor’s and Master’s degrees in Computer Science he spent several years working in IT management for small businesses. However, he now works full time writing content online and creating websites.
His main writing topics include iPhones, Microsoft Office, Google Apps, Android, and Photoshop, but he has also written about many other tech topics as well.