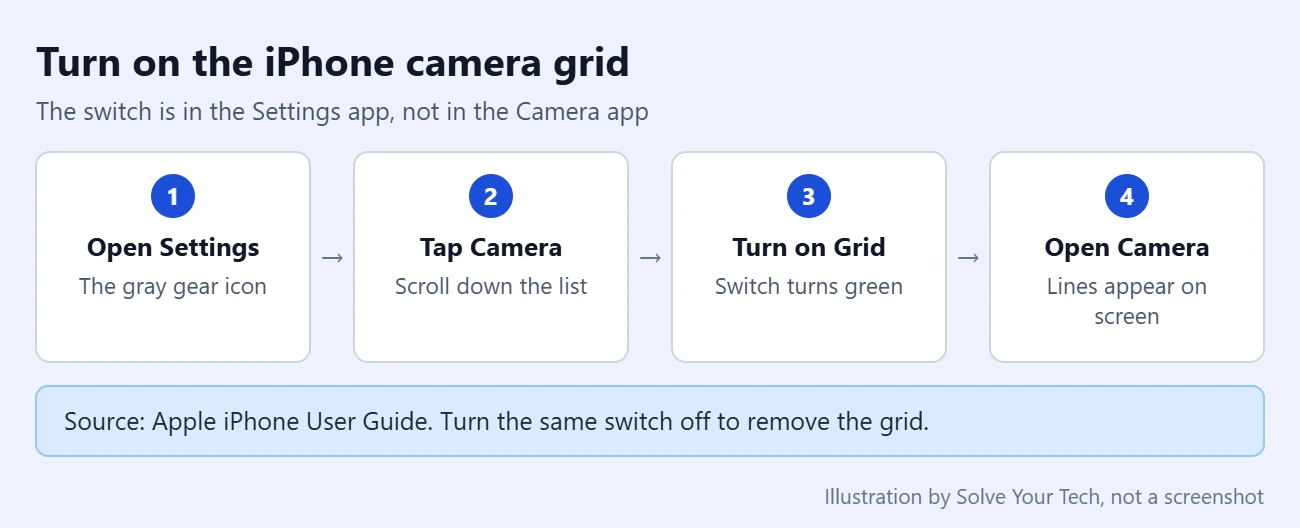
To get the grid on your iPhone camera, open the Settings app, tap Camera, and turn on Grid. The next time you open the Camera app, thin lines divide the screen into nine boxes so you can line up your shot.
The switch is in the Settings app, not the Camera app. This guide also covers the Level switch beside it, turning the grid off, and what to check if the lines don’t appear.
Quick Steps: Turn On the iPhone Camera Grid
- Open the Settings app.
- Scroll down and tap Camera.
- Turn on Grid.
- Open the Camera app and check for the lines.
Which iPhones and iOS Versions This Covers
These steps work on iOS 12 through iOS 27, so they cover almost any iPhone still in use. The Settings > Camera > Grid path has not changed in that time.
Two things change with the version:
- iOS 17 and later: Apple’s guide lists a second switch, Level, next to Grid.
- iOS 16 and earlier: Apple’s guide mentions only the Grid switch.
You do not need an Apple Account, an internet connection, or a particular iPhone model. The grid is a built-in Camera setting.
What the Grid Looks Like
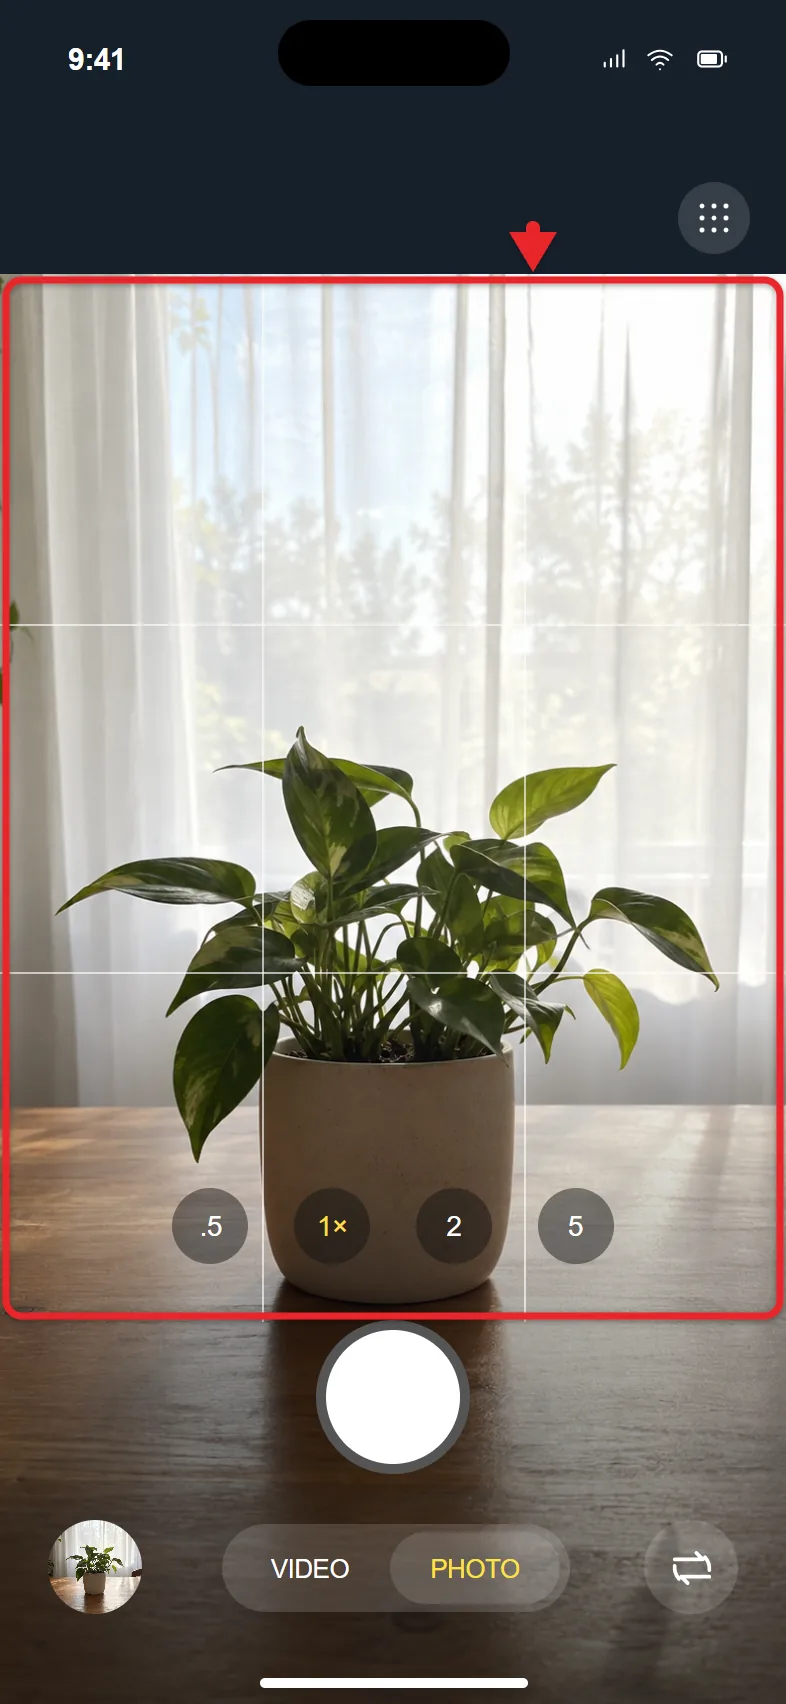
The grid is a set of thin lines over the camera view. If Camera was already open when you turned on Grid, close it and open it again to see the lines.
What the Grid Does and Does Not Do
The grid is a set of lines on the camera screen that help you straighten and compose your shot. In plain terms, it is a guide for your eyes while you frame the picture.
- It is one fixed layout. There is a single on or off switch. There is no documented setting for a different number of lines, a different color, or a different thickness in the built-in Camera app.
- It stays on. Grid is a Settings switch, so it remains on until you turn it off. You do not have to switch it on each time you open Camera.
- It is a framing guide. The lines are shown on the camera screen to help you aim. They are not an edit applied to your photo.
- It has no button in Camera. Apple’s instructions only point to the Settings app, so plan on changing it there.
Grid vs. Level: What Is the Difference?
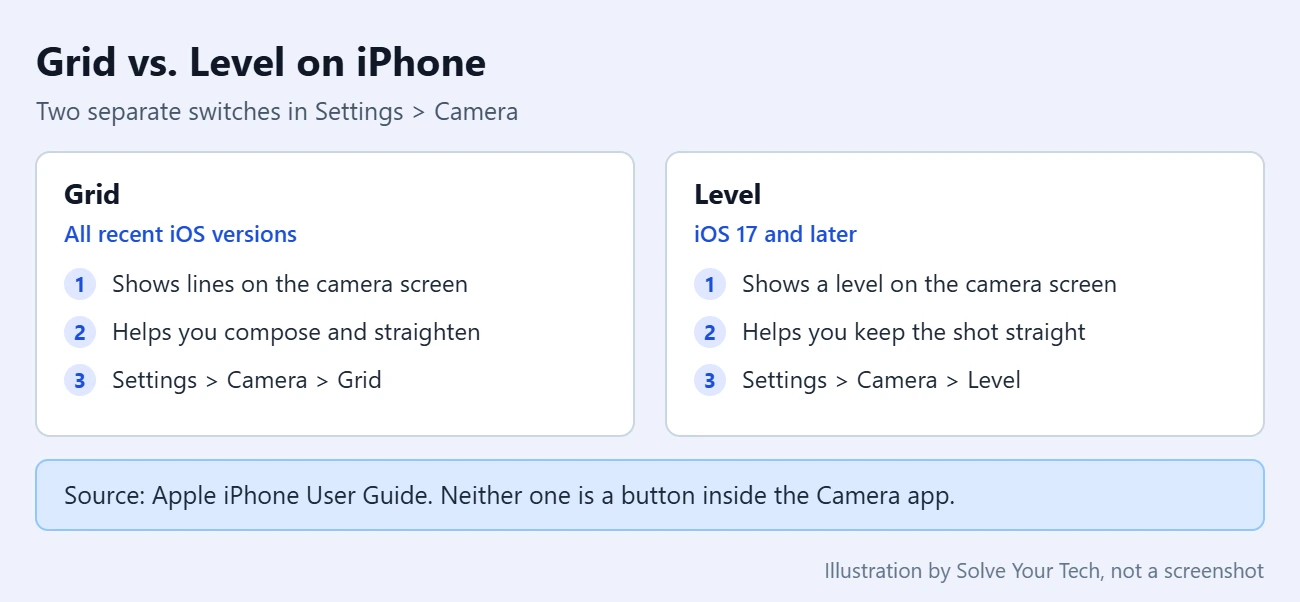
On iOS 17 and later, you can turn on Grid and Level in the same Camera settings screen. They are two separate switches, and you can use one, both, or neither.
| Switch | What it shows | Best for | Where Apple documents it |
|---|---|---|---|
| Grid | Lines across the camera screen | Placing your subject and keeping edges straight | iPhone User Guide for iOS 12 through iOS 27 |
| Level | A level indicator on the camera screen | Keeping the iPhone from tilting | iPhone User Guide for iOS 17 through iOS 27 |
To add the level, go to Settings > Camera and turn on Level. In the Camera app, a broken horizontal line appears in the middle of the screen when the phone is tilted slightly. It joins into one line and turns yellow when the phone is level.
To check whether a shelf or picture frame is straight, use the Level in the iPhone Measure app instead.
How to Use the Grid to Frame a Photo
The grid is most often used for the rule of thirds. That is a common photography guideline that says a picture often looks more balanced when the main subject sits along one of the lines, or where two lines cross, instead of in the exact center.
- Landscapes: Rest the horizon on the upper or lower horizontal line instead of across the middle.
- People: Put the person on the left or right vertical line and leave open space on the other side.
- Buildings: Compare walls, doors, and poles with the vertical lines to see whether the phone is tilted.
- Centered shots: Use the middle box to check that a sign, plate, or document is evenly spaced on all sides.
The rule of thirds is a starting point, not a requirement. If a centered photo looks better to you, take the centered photo.
The grid also helps you place a small subject, such as when you take pictures of the moon with iPhone.
It is useful when you take a long exposure photo on iPhone, since a level horizon keeps the blurred water or traffic looking intentional.
How to Turn the Grid Off
Nothing about this setting is permanent. To remove the lines, go back to Settings > Camera and turn off Grid. The switch turns gray and the lines are gone the next time you open Camera. Do the same with Level if you turned that on too.
Troubleshooting: The Grid Is Not Showing
- Check the switch again. Open Settings > Camera and confirm Grid is green. It is easy to tap Level or another nearby switch by mistake.
- Reopen the Camera app. Close Camera and open it again after changing the setting.
- Make sure you are in the built-in Camera app. The Grid switch belongs to Apple’s Camera app. Other camera apps, and the camera inside social or messaging apps, have their own settings and may not show it.
- Try Photo mode. If you do not see the lines in another mode, switch to Photo and look again.
- You cannot find Camera in Settings. Use the search field at the top of the Settings app and type Camera or Grid.
- You do not see a Level switch. Level is documented starting with iOS 17. On an older version you will only have Grid.
- Update iOS. If the switch is on and the lines still never appear, install the latest software. Apple’s Update your iPhone or iPad page has the steps.
The menu name has also changed over time. On very old iOS versions the Camera options were part of a combined Photos & Camera menu. If your iPhone shows that name, tap it and look for Grid there.
Camera Grid Questions
Why does my iPhone camera not have a grid?
The grid is turned off until you enable it. Open Settings, tap Camera, and turn on Grid. There is no grid button inside the Camera app. A black viewfinder with no grid at all is a separate fault; here is what to do when your iPhone won’t take pictures.
Can I change the grid style on iPhone?
No. The built-in Camera app has one Grid switch that is either on or off, with no style, color, or opacity options.
Does the grid show up in my photos?
No. The lines only appear on the camera screen while you frame the shot. They are not saved in your photos or videos.
Can I turn on the grid from Control Center?
No. The Grid switch is only in Settings > Camera, so change it there.
Can I straighten a photo I already took?
Yes. Open the photo in the Photos app, tap the edit button, and use the crop tools, which include a straighten control with a slider. Apple’s steps are in Crop, rotate, flip, or straighten photos and videos on iPhone.
Does the iPad camera have a grid too?
Yes. The iPad uses the same path; here’s how to turn the grid on or off in the iPad camera.
Source and Next Steps
The steps in this article come from Apple’s iPhone User Guide page Use iPhone camera tools to set up your shot.
While you are in the Camera settings, you can also learn how to make the iPhone camera keep your last settings. If the flash is spoiling your pictures, you can turn off the iPhone camera flash. Shooting video instead? Here is how to record 4K video on iPhone, and if your selfies come out mirrored, here is how to turn off the flipped selfie camera.

Matthew Burleigh is the founder, head writer, and editor of Solve Your Tech, which he launched in 2012. He has written technology tutorials since 2008 and worked in IT since 2003, including small-business support, IT management, and consulting. He holds Bachelor’s and Master’s degrees in Computer Science from Arizona State University.
Matthew writes practical guides for Windows, iPhone and iPad, Microsoft Office, Outlook, Google apps, and Android. Solve Your Tech’s guides are checked step by step against the device or app maker’s own documentation and tested on his own devices whenever he has the hardware or software, with clear steps, sources, and update dates.
Read more about Matthew and how Solve Your Tech writes and updates its guides, or report a correction.