To turn off the camera flash on an iPhone, open the Camera app and tap the Flash button (the lightning bolt) until it shows a line through it, which means Off. On iOS 26 and later, the Flash button sits in the top-right corner of the screen when you hold the phone upright, and a tap switches it between Off and Auto.
These steps are written for iOS 27, the current version, and also match iOS 26 on every iPhone that runs them. Older versions, from iOS 18 back to the iPhone 5’s iOS 10, put the Flash button in the top-left corner; those steps are further down. Apple explains the camera controls in its guide to iPhone camera tools.
Turn Off the Flash in the Camera App
- Open the Camera app and make sure Photo is selected in the mode list at the bottom.
- Find the Flash button, a lightning bolt in the top-right corner of the screen (top-left if you’re holding the phone sideways).
- Tap it. Each tap switches between Auto and Off. When it’s off, the lightning bolt has a diagonal line through it.
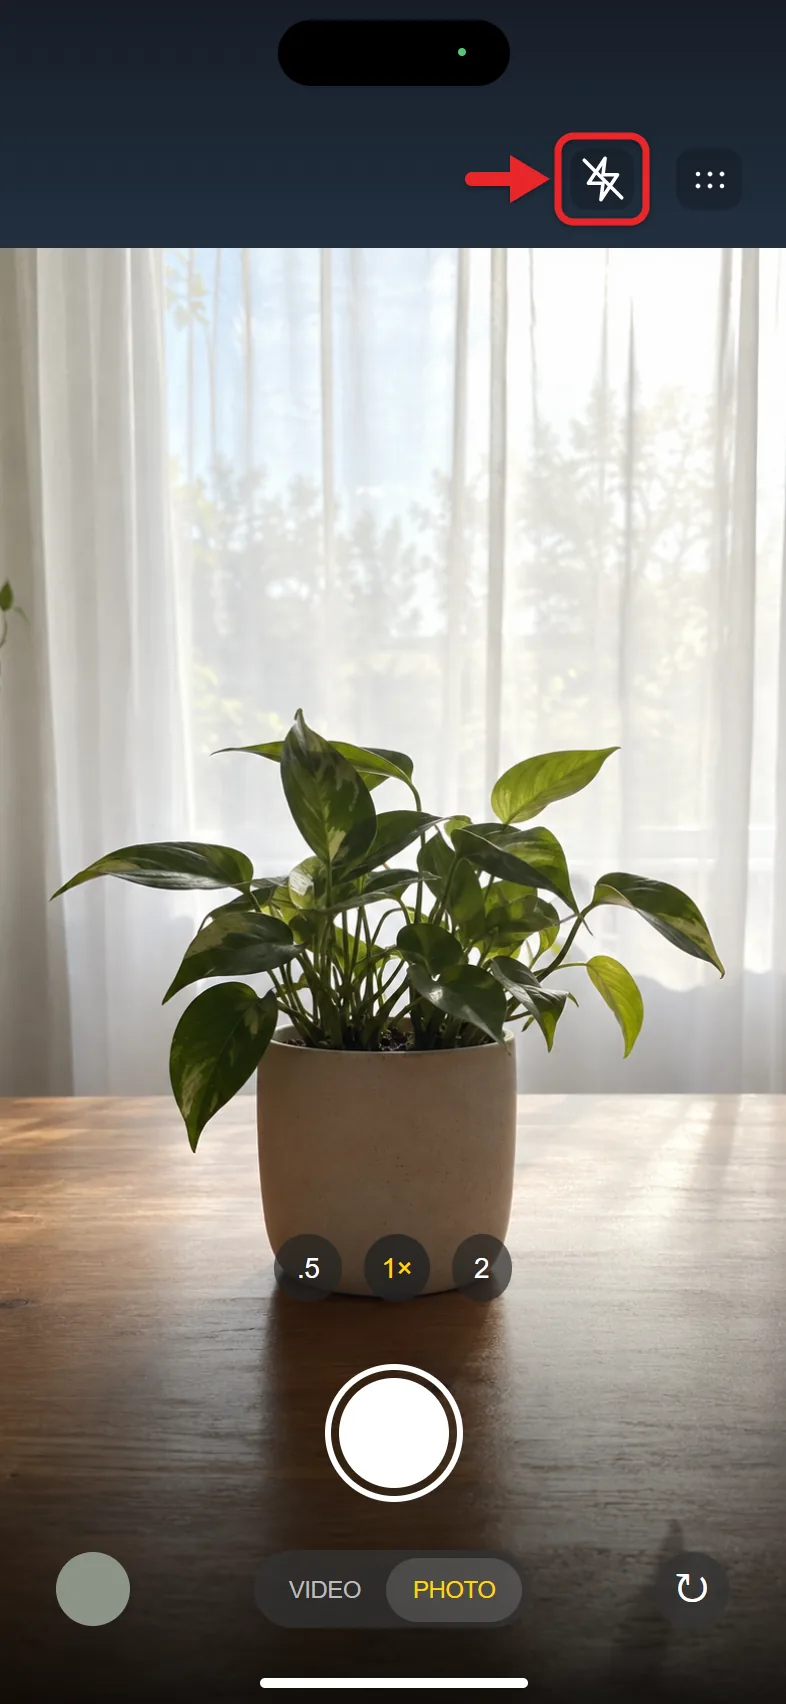
The flash won’t fire for your photos until you change the setting again. The Camera app keeps your choice, so it’s still off the next time you open it. You don’t need to turn anything on in Settings > Camera > Preserve Settings for this; that list covers things like the camera mode and Live Photo, not the flash.
To get to Camera faster when the phone is locked, learn how to open the camera from the Lock Screen.
Turn the Flash On (or Back to Auto)
A plain tap only switches between Auto and Off. To make the flash fire for every photo:
- Touch and hold the Flash button. A small menu opens with Auto, On, and Off.
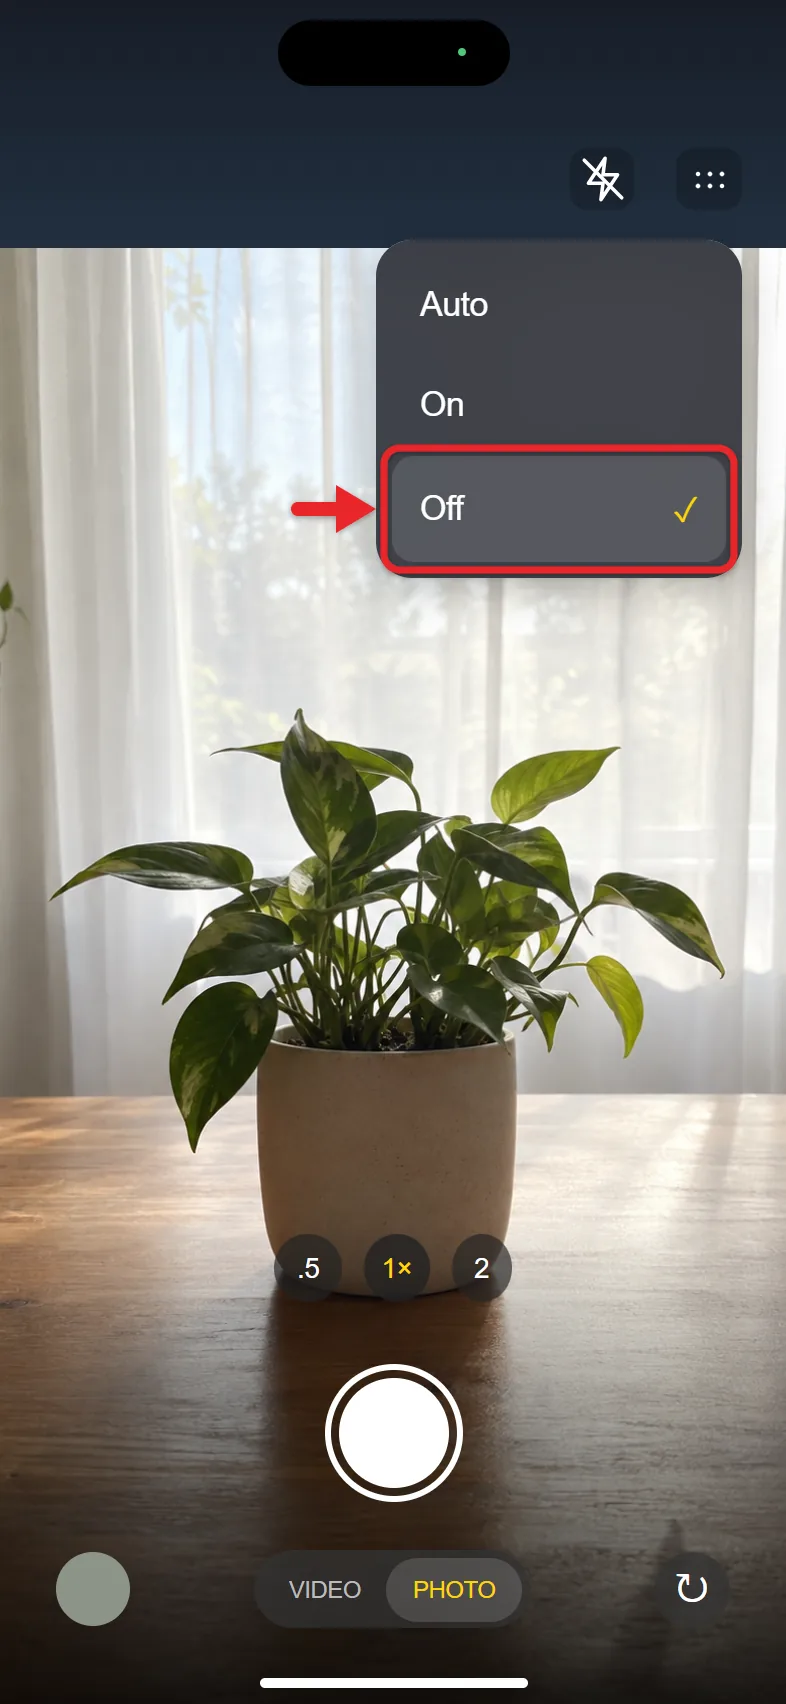
- Tap On. The flash now fires for every photo you take. Tap anywhere else on the screen if you want to close the menu without changing anything.
To return to the default, open the same menu and tap Auto.
If You Don’t See the Flash Button
The Flash button can be hidden in some camera modes, such as Panorama. Switch back to Photo first. If you still don’t see it, or a long press is hard for you, use the camera controls menu:
- In the Camera app, tap the controls button at the top of the screen (it looks like two rows of dots).
- Tap Flash to switch between Auto, On, and Off.
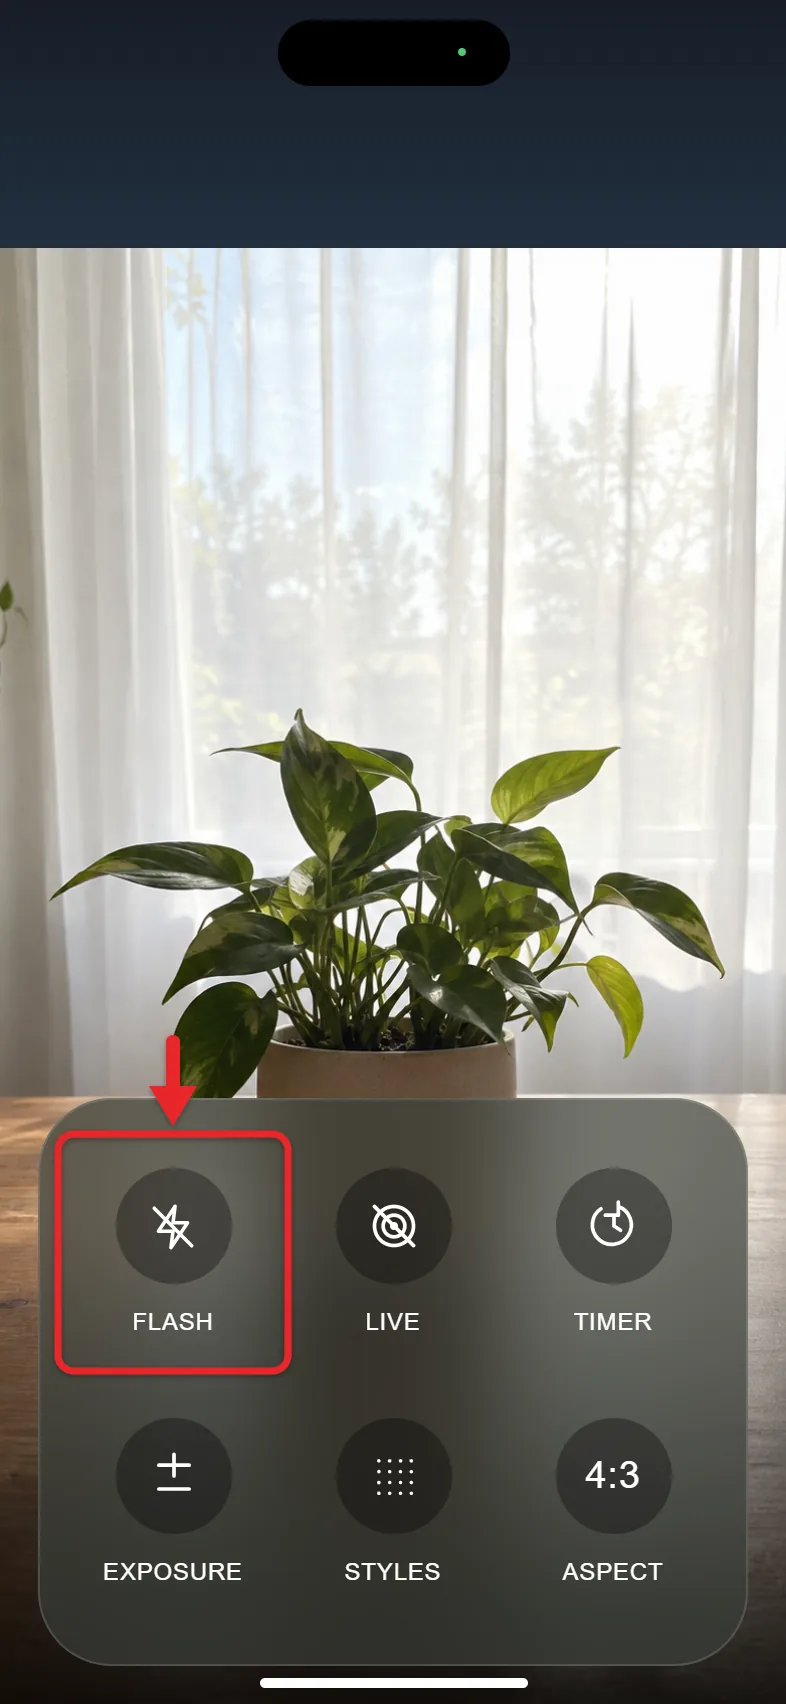
- Tap the viewfinder to close the menu.
What Auto, On, and Off Do
- Auto is the default. The iPhone decides when the scene is dark enough to need the flash.
- On fires the flash for every photo, even in bright light. This can help fill in shadows when your subject is lit from behind.
- Off never fires the flash.
Off is the right choice in museums, concerts, and other places that don’t allow flash photography. It’s also worth trying in dim rooms. Night mode works on iPhone 11 and later and turns on automatically when the camera detects low light. It brightens the photo with a longer exposure, which often looks more natural than a flash. Hold the phone steady while the Night mode timer counts down.
Night mode and the flash don’t work together. While Night mode is active, the flash isn’t, and turning the flash on turns Night mode off. If your dim photos suddenly look harsh, check whether the flash was set to On.
On an Older iPhone, Such as the iPhone 5
On older iOS versions, the Flash button is in the top-left corner of the Camera app. On an iPhone 5 running iOS 10:
- Open Camera.
- Tap the lightning bolt in the top-left corner. The words Auto, On, and Off appear across the top of the screen.
- Tap Off.
The iPhone 5 can’t update past iOS 10, so its Camera app looks different from the one described above. On a newer iPhone that is still on iOS 18 or earlier, the lightning bolt is also in the top-left corner, and tapping it turns the flash off. To see all three choices there, tap the arrow at the top of the screen to show the camera controls, then tap the Flash button in that row.
If the Flash Still Goes Off
- It’s set to Auto, not Off. Auto fires whenever the iPhone thinks the scene is too dark. Tap the button until you see the line through the lightning bolt.
- The light is on while you record video. In Video mode, the flash works as a steady light rather than a quick burst, and you control it from the Flash button while Video is selected. To switch that steady light off, follow the steps for turning off the light when recording video on iPhone.
- You’re using a different camera app. The setting above applies to Apple’s Camera app. Instagram, Snapchat, and other apps with their own camera have their own flash button, usually a lightning bolt in that app’s camera screen.
- The light blinks when notifications arrive. That’s the LED flash for alerts, an accessibility setting that has nothing to do with the Camera app. You can turn flash notifications on or off separately.
- The light stays on. That’s the flashlight. Open Control Center and tap the flashlight button, or follow the steps for turning off the flashlight on iPhone.
If the flash won’t fire when you want it, the iPhone may be too warm. The camera flash can be temporarily disabled when the iPhone gets too hot. Let it cool down, then try again.
Frequently Asked Questions
Why does my iPhone flash keep turning back on?
It’s probably set to Auto, which fires the flash on its own in dim light. Set it to Off and it stays off, even after you close and reopen the Camera app.
Does turning off the flash make photos worse?
Not usually. In low light, Night mode on newer iPhones brightens photos without the harsh shadows and red eyes a flash can cause. A flash still helps when the subject is moving fast in the dark, because Night mode needs a still subject.
Can I turn off the flash from Settings?
No. The flash setting for photos lives in the Camera app itself. The Settings > Camera screen controls things like formats, grid lines, and Preserve Settings, not whether the flash fires. To make Camera remember other choices, such as the last mode you used, save the camera mode on an iPhone.
Does the front camera have a flash?
The front camera doesn’t have an LED flash. Instead, the iPhone brightens the screen to light your face when you take a selfie in the dark. You turn that on and off with the same Flash button while the front camera is active.

Matthew Burleigh is the founder, head writer, and editor of Solve Your Tech, which he launched in 2012. He has written technology tutorials since 2008 and worked in IT since 2003, including small-business support, IT management, and consulting. He holds Bachelor’s and Master’s degrees in Computer Science from Arizona State University.
Matthew writes practical guides for Windows, iPhone and iPad, Microsoft Office, Outlook, Google apps, and Android. Solve Your Tech’s guides are checked step by step against the device or app maker’s own documentation and tested on his own devices whenever he has the hardware or software, with clear steps, sources, and update dates.
Read more about Matthew and how Solve Your Tech writes and updates its guides, or report a correction.