Some of the presentations that you will create in Powerpoint 2010 are time or date-sensitive.
Whether this is because the presentation is updated on a regular basis, or because your audience needs to see the date and time on the slides, there are several reasons why you might be looking for a way to include the date and time on your slides in Powerpoint 2010 without having to enter it manually.
Fortunately, this is something that can be done with one of the insertion tools in the program.
So continue below to see the steps required to place the time and date in the footer of either a single slide, or every slide in your presentation.
If you are giving a presentation and don’t want to worry about manually advancing your slides, then read more in this Powerpoint slide show timing guide to find out about a helpful option in the application.
How to Include the Date and Time in the Footer in Powerpoint 2010 (Guide with Pictures)
The steps in this article are going to show you how to automatically insert the date and time into the footer of your slides.
Adding the date and time to your slides in this manner will cause them to update automatically.
Step 1: Open the slideshow in Powerpoint 2010.
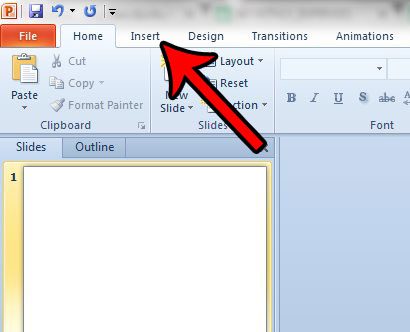
Step 2: Click the Insert tab at the top of the window.

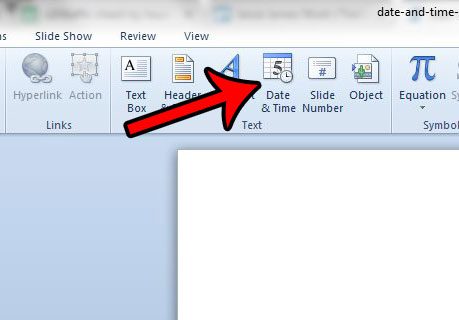
Step 3: Click the Date & Time button in the Text section of the ribbon.

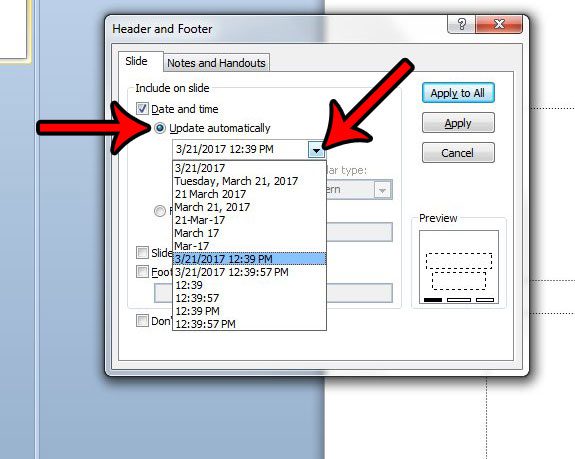
Step 4: Check the box to the left of Date and time, then click the dropdown menu under Update automatically and choose your preferred format.

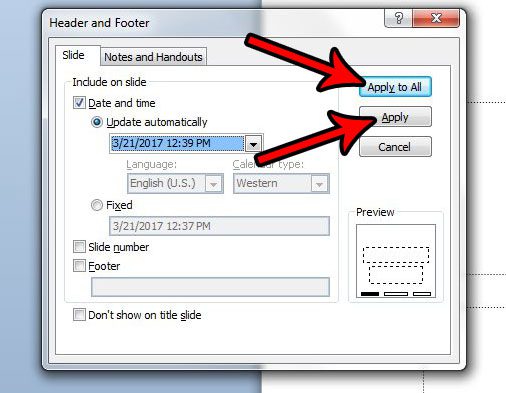
Step 5: Click the Apply to All button if you want to show the date and time on every slide, or click the Apply button if you only want to show it on the current slide.

Now that you know how to modify Powerpoint so that it automatically shows the current date on your slides, you will be able ot include this information and not have to worry about manually updating it all the time.
Would your presentation look better if it was in portrait orientation instead of landscape? Learn how to switch the page orientation in Powerpoint 2010 if your slide content is better suited to a different layout.

Matthew Burleigh has been writing tech tutorials since 2008. His writing has appeared on dozens of different websites and been read over 50 million times.
After receiving his Bachelor’s and Master’s degrees in Computer Science he spent several years working in IT management for small businesses. However, he now works full time writing content online and creating websites.
His main writing topics include iPhones, Microsoft Office, Google Apps, Android, and Photoshop, but he has also written about many other tech topics as well.