Google Docs has a lot of different settings and options that let you format a document. You may have already figured out how to add a horizontal line in Google Docs if you want to include some separation between paragraphs, or maybe you followed these steps to add a page break, but you might be wondering how to insert a vertical line in Google Docs if you have columns and need a way to make their separation a bit more clear.
Formatting a document with columns can be useful for certain types of articles, or you may be working on a project that requires the document to be split into columns. However, the addition of one or two columns to your document might not provide the full effect that you want, which can leave you looking for another way to visually separate these document elements.
One way to do this involves the addition of a line between the columns. But rather than trying to draw a line there or implement it in another way, you can take advantage of a special setting in Google Docs’ column menu that lets you automatically add a separating line between your document’s columns.
How to Insert Vertical Line in Google Docs
- Open your document.
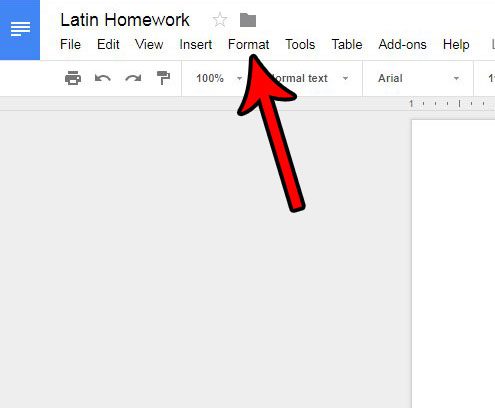
- Select Format.
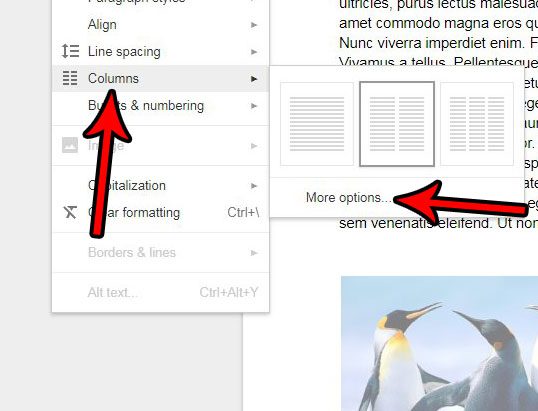
- Choose Columns, then More options.
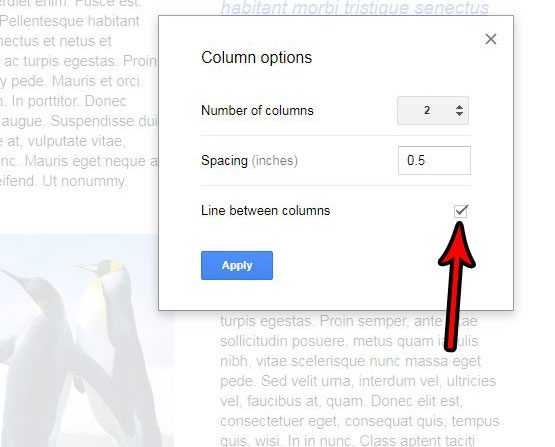
- Check the Line between columns box, then click Apply.
Our article continues below with additional information on displaying a vertical line between columns in Google Docs, including pictures of these steps.
Our guide on how to split a Google Doc in half can provide additional information on the topic of using columns in your document.
How to Separate Columns with a Line in Google Docs (Guide with Pictures)
The steps in this article assume that you currently have a document with columns in Google Docs and that you want to add a line between those columns. If you haven’t added the columns to your document yet, then this article can show you how.
Step 1: Sign into your Google Drive at https://drive.google.com/drive/my-drive and open the file to which you would like to add a separating line between columns.
Step 2: Choose the Format tab at the top of the window.

Step 3: Select the Columns option, then click the More options item.

Step 4: Check the box to the right of Line between columns, then click the Apply button.

If you want to remove that column later, simply return to that same menu and uncheck the Line between columns box instead.
Related: How to Do Hanging Indent on Google Docs
More Information on How to Insert a Vertical Line in Google Docs
- This method relies on the fact that you are using columns in your document. if you aren’t using columns and still need a vertical line, then your best option involves adding a border to a paragraph. You can find this option on the Format > Paragraph styles > Borders and shading menu.
- Adding a horizontal line in Google Docs is accomplished from the Insert menu, as indicated above. If you want to delete a horizontal line in a Google Docs document, then you can place your cursor on the line below it, then press the Backspace key on your keyboard.
Want to make your columns wider? Switch your document to the landscape orientation so that the width of each column increases.
Related: Google Docs Space After Paragraph – How to Add or Remove
Continue Reading

Matthew Burleigh has been writing tech tutorials since 2008. His writing has appeared on dozens of different websites and been read over 50 million times.
After receiving his Bachelor’s and Master’s degrees in Computer Science he spent several years working in IT management for small businesses. However, he now works full time writing content online and creating websites.
His main writing topics include iPhones, Microsoft Office, Google Apps, Android, and Photoshop, but he has also written about many other tech topics as well.