Adding a horizontal line in Google Docs is a common thing to do when you want to separate sections of your document. It’s so common that Google Docs even has a tool that specifically lets you do it.
There are a number of different ways that you can visually separate elements of your document, but one of my personal favorites is the horizontal line. When used sparingly, it can not only look nice but provides a clear indication that a new section of the document is starting.
You might be used to adding horizontal lines to a document in other word processing programs, but some of the methods that work in those applications won’t work in Google Docs. So continue reading below to see how you can add a horizontal line to a document in Google Docs.
How to Add Line in Google Docs
- Open your Google Docs file.
- Click where you want to add the line.
- Choose Insert.
- Select Horizontal line.
Our guide continues below with additional information on adding a horizontal line in Google Docs, including a couple of other methods that you might find preferable to the basic one described above.
Last update on 2025-07-02 / Affiliate links / Images from Amazon Product Advertising API | As an Amazon Associate, I earn from qualifying purchases.
Need others to view or edit your files? Find out about Google Docs, Sheets, and Slides sharing to see how useful it can be for group collaborations.
Related: Would you like to make it easier to open Google Chrome? Our Google Chrome shortcut on desktop article can show you one way to do it.
Option 1 – How to Add a Horizontal Line to a Document in Google Docs (Guide with Pictures)
The steps in this article were performed in the Google Chrome version of Google Docs, but the steps should be the same in other desktop Web browsers.
Step 1: Go to your Google Drive at https://drive.google.com/drive/my-drive and open the file to which you want to add a horizontal line.
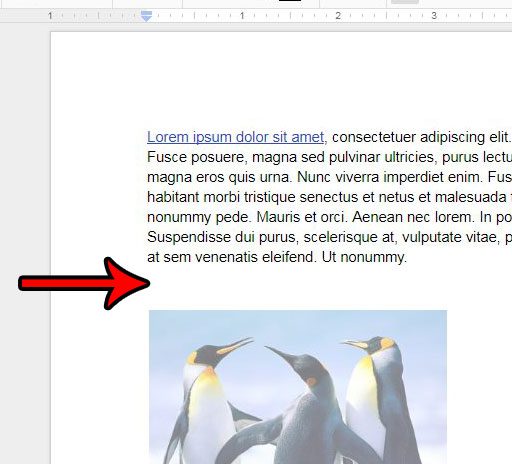
Step 2: Click in the spot in the document where you want to add the horizontal line.
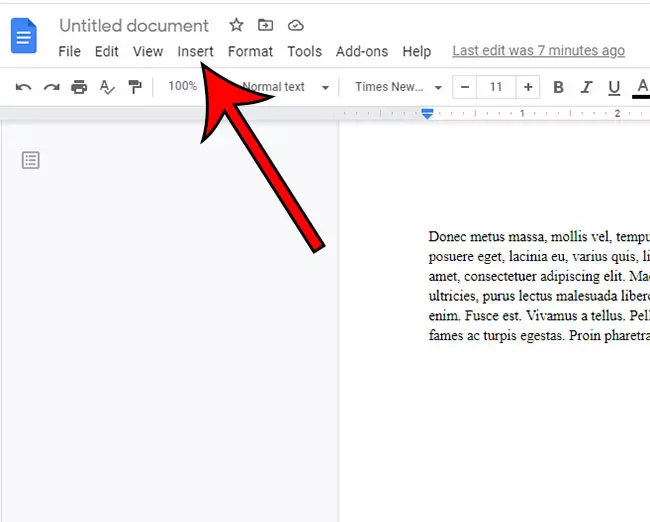
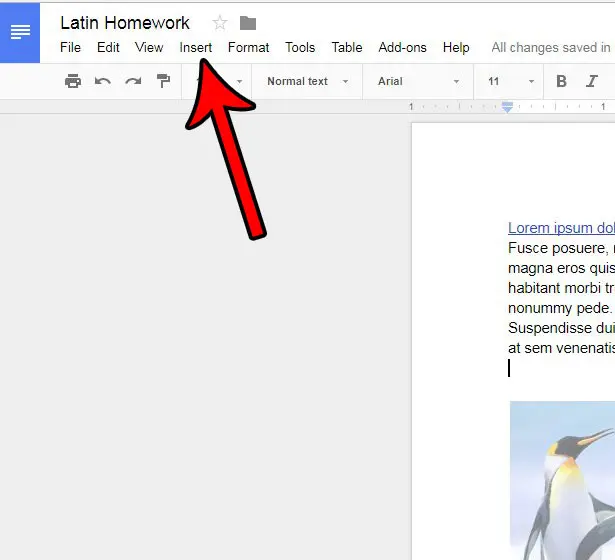
Step 3: Click the Insert tab at the top of the window.
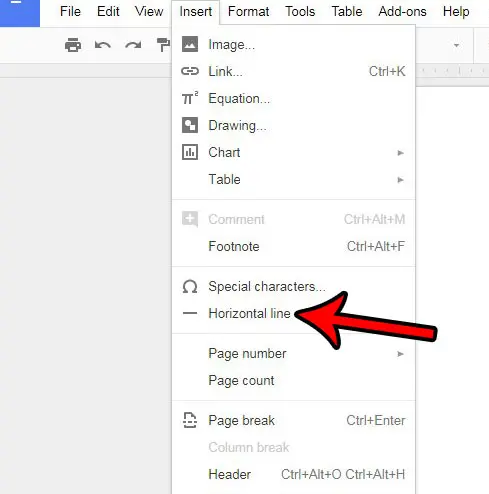
Step 4: Select the Horizontal line option from the menu.
Note that the horizontal line is added to your document as a character, so you can delete it by positioning the cursor behind the horizontal line, then pressing the Backspace key on your keyboard.
Now that you know the how to add line in Google Docs steps using the options in the menu, you might like to know about some other methods.
While the method described above is the fastest and simplest way to insert a horizontal line in Google Docs, there are a couple of other options as well.
Do you need to split your document in half? Our how to split page in Google Docs tutorial can show you how to do it.
Option 2 – How to Add a Paragraph Border in Google Docs
While this isn’t technically the same thing as adding a horizontal line, it does offer a similar effect. Plus you can customize paragraph borders a little bit, which can be preferable to some Docs users.
Step 1: Open your Google Doc.
Step 2: Click where you want the line in the document.
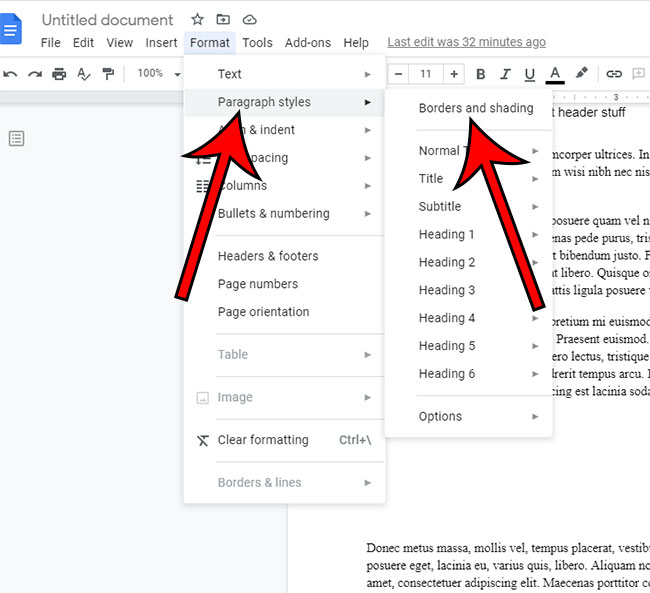
Step 2: Select the Format tab.
Step 4: Choose Paragraph Styles, then Borders and shading.
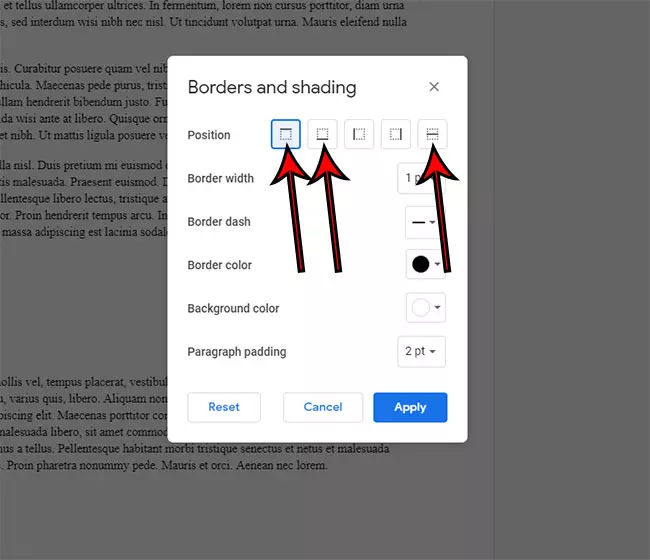
Step 5: Choose the Top, Bottom, or Between option next to Position.
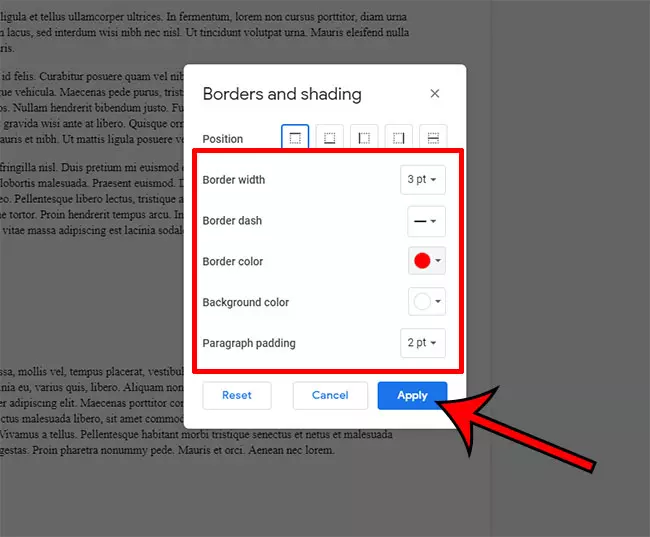
Step 6: Customize the appearance of the horizontal line as needed, then click the Apply button.
You will have the ability to change the Border width, Border dash, Border color, Background color, and Paragraph padding of your horizontal line.
The final method for adding a horizontal line to your document is by using the Drawing tool, which we discuss in the next section.
Our insert text box Google Docs tutorial can show you another useful action to take using the Drawing tool in Google Docs.
Option 3 – How to Draw a Horizontal Line in Google Docs
This is likely the most complicated way of adding a line in Google Docs, but it can be effective, and it offers you some additional options because it will technically be a drawing.
Step 1: Open the document.
Step 2: Choose where to add the line.
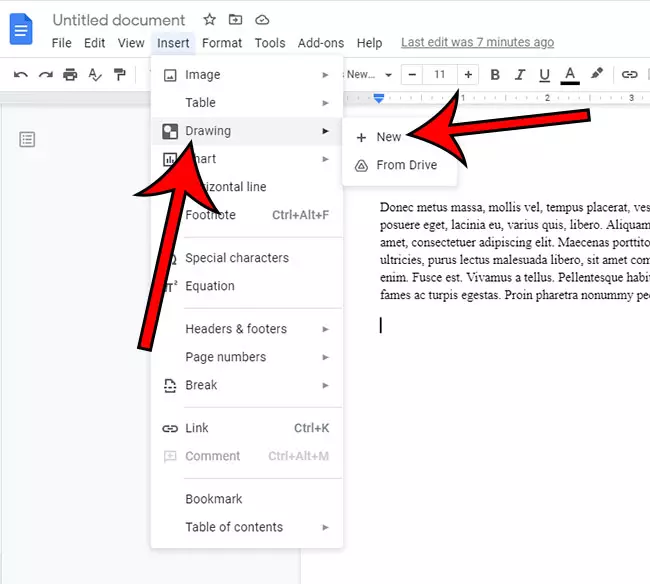
Step 3: Click the Insert tab.
Step 4: Select Drawing, then New.
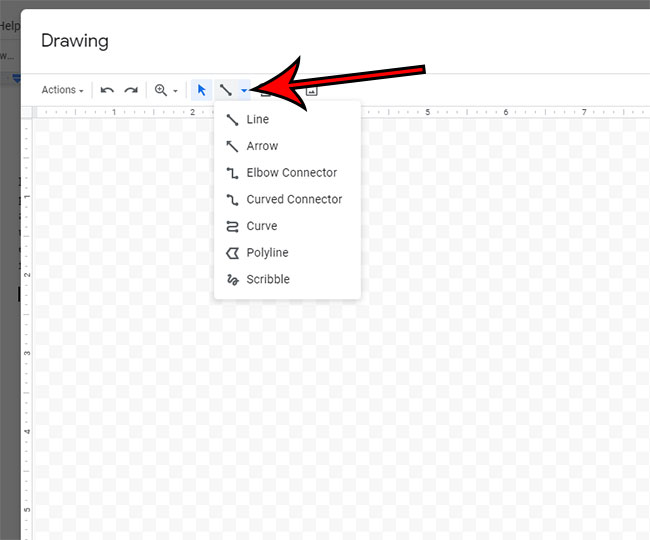
Step 5: Click the downward facing arrow to the right of the Line button, then select a line type.
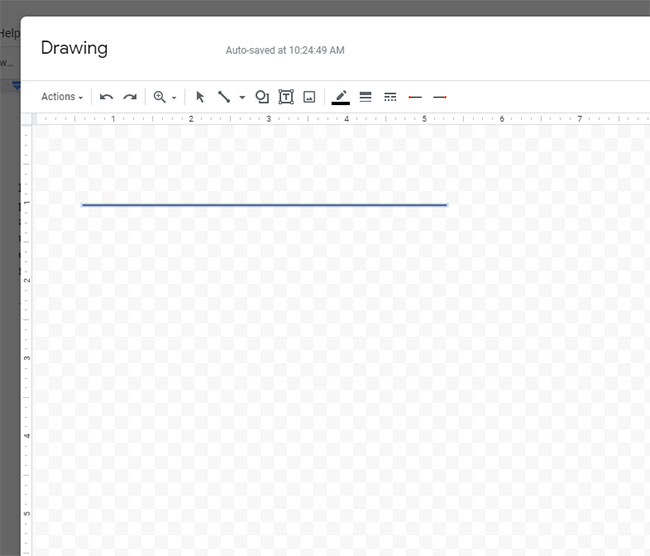
Step 6: Click where you want to start the line, then hold down the Shift key and draw the line.
Holding down the Shift key will force the line to stay horizontal. Otherwise you will be drawing freehand, which may not result in the type of line that you want.
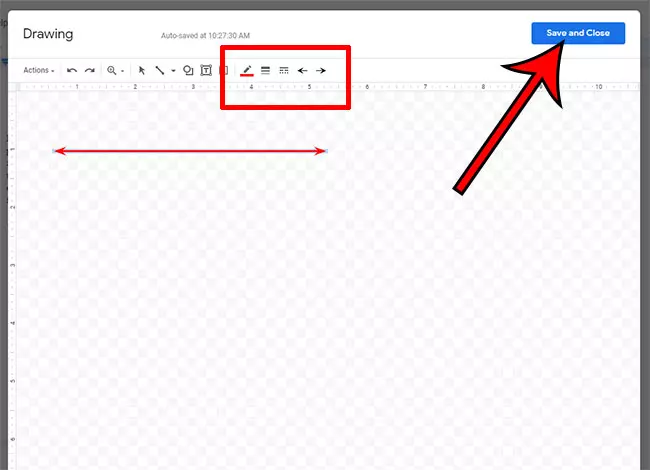
Step 7: Use the line formatting options in the toolbar to customize the appearance of the line, then click Save and close when you are finished.
You can always open the drawing back up if you need to change something by double clicking on the line in the document.
The text wrapping feature in Google Sheets can be a convenient way to format your text. You can read our Google Sheets text not wrapping article for more information on it, including ways to troubleshoot problems with it.
How to Remove a Horizontal Line in Google Docs
The fastest and easiest way to remove a line that you have added to your document is to click on the line below it, then press the Backspace key on your keyboard.
If you added the line via the Insert menu, then you could also use your mouse to highlight the line, then press Backspace or Delete to remove it that way. However, this option of selecting and deleting won’t work if the line was added as a paragraph border.
If you tried each of our options above when learning how to insert a horizontal line in Google Docs, then you likely found one that was best suited to how you use Google Docs. Below are some questions that you may have after reading this article.
Do you often use tables in your documents? Find out how to insert a row in Google Docs if you need to add more information to the middle of one of those tables.
Frequently Asked Questions About How to Insert a Horizontal Line in Google Docs
How do I make a vertical line in Google Docs?
While this article focused mainly on how to add a line in Google Docs that is horizontal, you can get some vertical lines in your document, too.
You can add a line between document columns by going to Format > Columns > More options and checking the box next to Line between columns.
You can add a border line to a paragraph by going to Format > Paragraph styles > Borders and shading then choosing the settings for the the left or right border.
Is there a keyboard shortcut for a horizontal line in Google Docs?
No, there is not keyboard shortcut in Google Docs for adding a horizontal line. You can underline selected text by pressing Ctrl + U, however, or you can strikethrough selected text with Alt + Shift + 5.
How do I remove a horizontal line in Google Docs?
Click at the start of the line below the horizontal line, then press the Backspace key on your keyboard to delete it.
As mentioned earlier, you may also be able to select the line and delete the selection as well. However, whether or not you are able to use that method will depend on how you chose to insert a horizontal line in your document.
There are many other objects and items that you can add to your documents, some of which aren’t visible. For example, learn how to add a page break in Google Docs if you need to start the next page of your document before Google Docs automatically does it for you.
Related: How to Remove Strikethrough in Google Docs
Continue Reading

Matthew Burleigh has been writing tech tutorials since 2008. His writing has appeared on dozens of different websites and been read over 50 million times.
After receiving his Bachelor’s and Master’s degrees in Computer Science he spent several years working in IT management for small businesses. However, he now works full time writing content online and creating websites.
His main writing topics include iPhones, Microsoft Office, Google Apps, Android, and Photoshop, but he has also written about many other tech topics as well.


