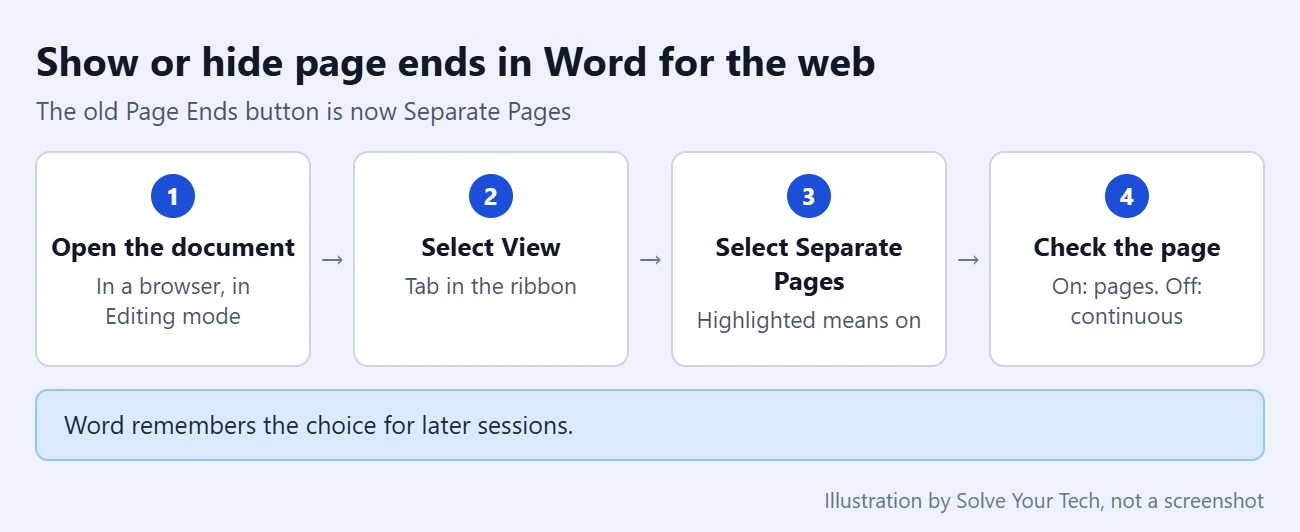
The Page Ends button no longer appears in Word Online, which Microsoft now calls Word for the web. Microsoft replaced it with Separate Pages. To show or hide where each page ends, open your document, select the View tab, and select Separate Pages to turn it on or off.
When Separate Pages is on, the document is split into individual pages, so you can see exactly where one page stops and the next begins. When it is off, the text runs as one continuous page. The steps below cover both, along with what to do when the button is missing.
What Happened to Page Ends in Word Online?
Older versions of Word Online showed the document as one long page. The Page Ends button on the View tab added a thin horizontal line wherever a page finished. Clicking it again removed the lines.
In 2024 Microsoft announced a new Separate Pages view for Word for the web and made it the default. According to Microsoft’s Separate Pages announcement, the view shows your document across separate pages, the same way Word does on Windows, Mac, iPhone, and Android. The button that controls it sits on the View tab, where Page Ends used to be.
So the job is the same, but the label and the look are different. Instead of a line drawn across a continuous page, you now get real page edges. Some of Microsoft’s documentation also refers to this as Page View.
Before You Start
- You need a document open in Word for the web in a desktop browser. Microsoft’s announcement listed Edge and Chrome first and said Firefox and Safari support would follow.
- The document should be in Editing mode. If it opened in a read-only or viewing mode, the View tab may offer fewer options.
- This setting only changes what you see on the screen. It does not add or remove page breaks, and it does not change the text.
How to Turn Separate Pages On or Off in Word for the Web
- Open your document in Word for the web. You can start from Microsoft 365 for the web or from OneDrive.
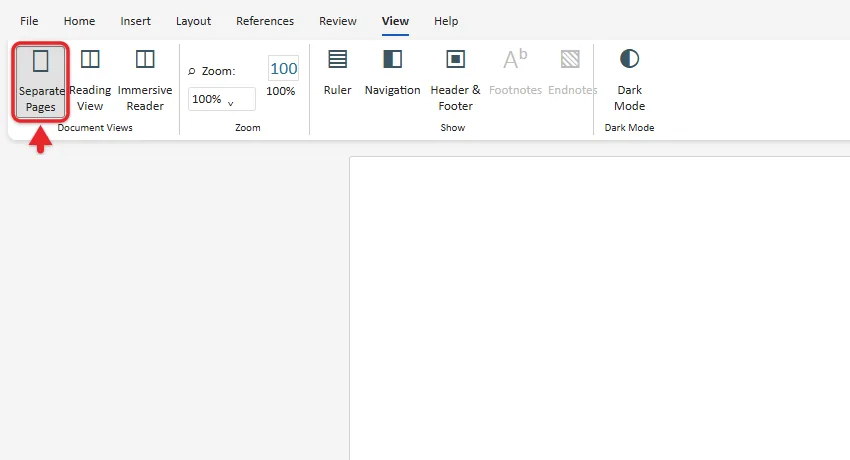
- Select the View tab in the ribbon, which is the row of tabs and buttons at the top of the document.
- Find the Separate Pages button. It looks highlighted or selected when the view is on. Microsoft notes that it is on by default.
- Select Separate Pages to switch. If it was on, the pages join into one continuous page. If it was off, the document splits back into pages.
- Scroll through the document to confirm the change.
The button is in the same tab whether you use the Single Line ribbon or the Classic ribbon. Its position within the tab can differ between the two layouts.
If the View tab looks cramped, you can show the full ribbon in Word Online so every button has its own spot.
Which Setting Should You Use?
Leave Separate Pages on when the layout matters. Full support for columns, headers and footers, and text wrapping depends on this view. It is also the easiest way to see how much text fits on each page.
Turn it off when you want to read or type without interruptions. Microsoft gives documents with long tables as one example where the continuous view can be handier.
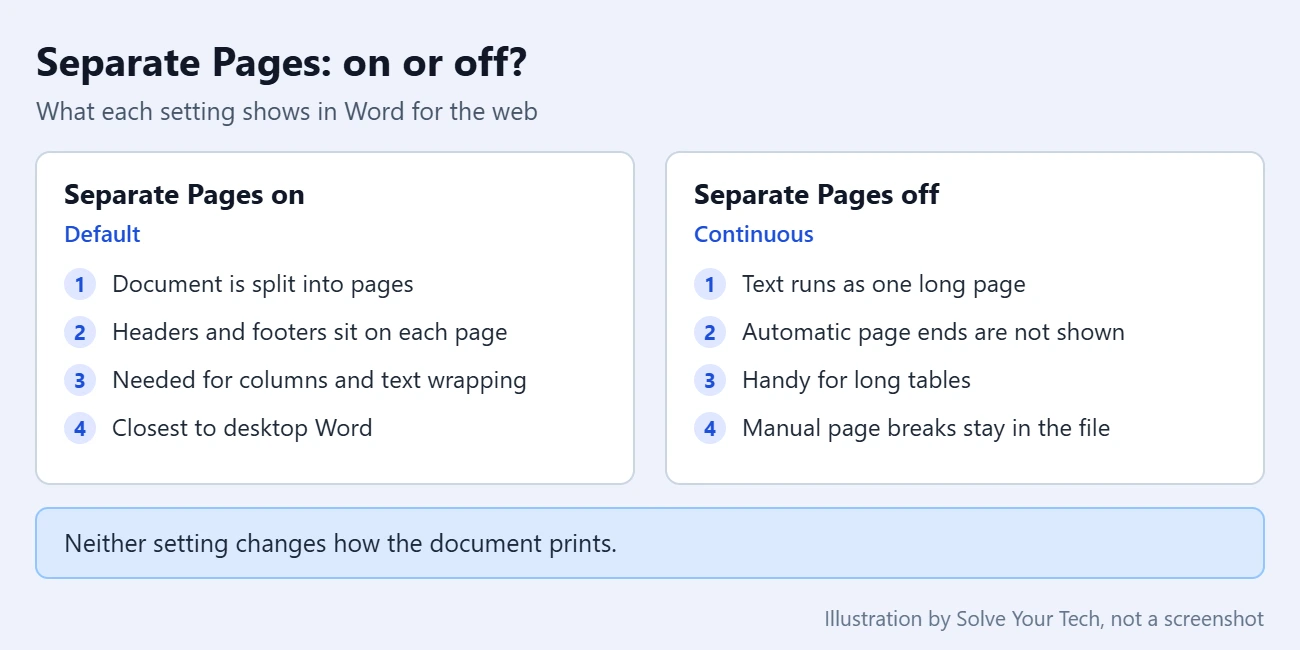
One thing to know before you switch it off: reports in Microsoft’s community forums say the continuous view no longer draws a line or gap where each page ends. If you relied on the old Page Ends lines, the closest match today is to keep Separate Pages on.
How to Confirm the Change and Undo It
With Separate Pages on, you should see a clear edge at the bottom of each page and the top of the next one. With it off, the text flows without those edges.
To undo the change, go back to View and select Separate Pages again. Nothing in the document is altered either way, so you can switch as often as you like.
Your choice is saved for later sessions. That means a document may open in the continuous view because you turned Separate Pages off some time ago.
Automatic Page Ends vs. Manual Page Breaks
It helps to know which kind of page end you are looking at.
- Automatic page breaks are added by Word when a page fills up. You cannot delete them. They move as you add or remove text.
- Manual page breaks are ones that you or another editor inserted to force a new page. These can be deleted.
To add a manual break in Word for the web, click where you want the page to end and choose Insert > Page Break, as described in Microsoft’s page break instructions.
To remove one, Microsoft’s guide to removing a page break says to select the page break in Editing view and press Backspace. Deleting a break changes where the following text sits, so check the pages after it. If a break leaves a blank page behind, check the common causes in deleting an empty page in Word.
To remove a whole page of text rather than a break, delete a page in Word instead.
Section breaks are different. They are a desktop-only feature, so open the document in the Word desktop app if you need to add or remove one.
Troubleshooting
There is no Page Ends button
That is expected. Look for Separate Pages on the View tab instead. Older guides and screenshots still show the previous name.
Separate Pages is missing too
- Check that the document is in Editing mode and not a read-only view. Word for the web opens password-protected files and files with restricted editing as read-only, according to Microsoft.
- Widen the browser window. On a narrow window, ribbon buttons can be tucked into an overflow menu at the end of the ribbon.
- Try a current version of Edge or Chrome, the browsers Microsoft listed first for this view.
- Reload the page. Word for the web is updated by Microsoft on its own schedule, so the ribbon can change without notice.
The pages do not match my printout
Separate Pages does not always show the exact print layout. Use Reading View or the print preview to see how the document will look on paper or as a PDF. If the page dimensions are the problem, change the paper size in Word Online.
To create that PDF in the browser, save as a PDF from Word Online.
My document turned into one long page
Separate Pages was probably turned off, and Word remembered it. Select View > Separate Pages to bring the pages back.
What About the Desktop Version of Word?
The Word desktop app has no Page Ends or Separate Pages button. In Print Layout view it always shows pages, and you can choose whether to show the gap between them. Go to File > Options > Display and check or clear Show white space between pages in Print Layout view. That option shows the top and bottom margins of each page, including headers and footers.
If the desktop app shows one long sheet with no page edges, you’re in Web Layout or Draft. Here’s how to switch a Word document back to Print Layout.
Frequently Asked Questions
Is Page Ends still available in Word Online?
Not under that name. Word for the web now has a Separate Pages button on the View tab. Turning it on shows each page on its own, which tells you where every page ends.
Does turning off Separate Pages delete my page breaks?
No. It is a view setting. Manual page breaks stay in the document, and Word still divides the text into pages when you print or switch the view back on.
Will the page edges show up when I print?
No. The page edges on the screen only mark where pages begin and end. They are not printed.
Why can I not see headers and footers?
Headers and footers rely on the Separate Pages view. Turn it on, then double-click the top or bottom of a page to edit the header or footer.
Does this setting affect other people who open the document?
It’s a saved preference, not a change to the file. It should only control what you see, but Microsoft does not spell out how it behaves for other editors, so do not rely on it to control someone else’s view.
Next Step
Once your pages are visible, check how the text fills them. If the edges of the page look too tight or too wide, you can set 1-inch margins in Word.

Matthew Burleigh is the founder, head writer, and editor of Solve Your Tech, which he launched in 2012. He has written technology tutorials since 2008 and worked in IT since 2003, including small-business support, IT management, and consulting. He holds Bachelor’s and Master’s degrees in Computer Science from Arizona State University.
Matthew writes practical guides for Windows, iPhone and iPad, Microsoft Office, Outlook, Google apps, and Android. Solve Your Tech’s guides are checked step by step against the device or app maker’s own documentation and tested on his own devices whenever he has the hardware or software, with clear steps, sources, and update dates.
Read more about Matthew and how Solve Your Tech writes and updates its guides, or report a correction.