Many of the people that email you every day probably use some kind of email signature.
It’s a good way to provide important information in a professional manner; plus, since a signature is added automatically, you don’t need ot remember to do it every time.
Our how to add signature in Outlook 2016 tutorial below will show you how to set up your own signature that you can add to the emails you write to other people.
How to Create a Signature in Outlook 2016
- Open Outlook.
- Click File.
- Choose Options.
- Select Mail.
- Click Signatures.
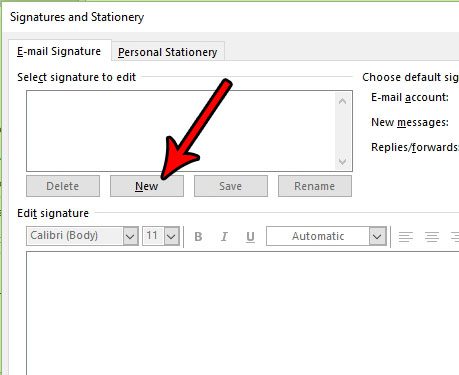
- Choose New.
- Give the signature a name and click OK.
- Add the signature content and click OK.
Our guide continues below with additional information on how to add signature in Outlook 2016 applications, including pictures of these steps.
Related Topic: This how to do hanging indent on Google Docs guide will show you some of the different formatting options in that application.
When you send an email to someone you give them the ability to reply to that email if they want to contact you. But sometimes, you may want them to have other ways to get in touch with you, such as a phone number, address, website, or social media profile. In this situation, an email signature is perfect.
Our guide below will show you how to create a signature in Outlook 2016. This signature will be added automatically whenever you create a new email.
You have the ability to customize that signature with links, pictures, and text, and you can even change the formatting of the text if you want it to be a different color or a different font.
If you’ve been wanting to set up your own website, then read more here about doing so for free with a tool from Google.
How to Add a Microsoft Outlook 2015 Signature (Guide with Pictures)
The steps in this article assume that you have already set up an email account in Outlook 2016, and that you want to create a signature that will automatically be added to all of the new email messages and replies that you create. These signatures can include text and media, such as pictures or links.
Your signature can include a number of different elements aside from just text.
You can add pictures, links to websites or social media profiles, and you can even use a custom font.
A signature that you create in Outlook 2016 will only be included when you send an email from Outlook. If you use this email account to send messages from a Web browser or your phone, this signature will not be included.
If you have a Gmail account, then you can add a signature to Gmail for sending from a Web browser, or you can create a signature on your iPhone.
Step 1: Open Outlook 2016.
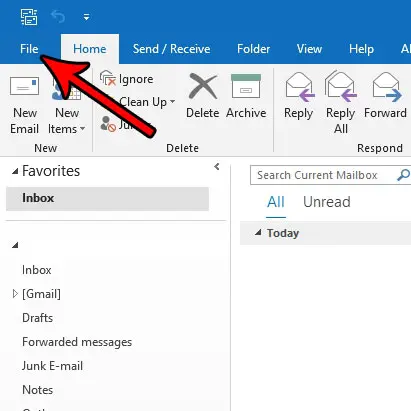
Step 2: Click the File tab at the top-left corner of the window.
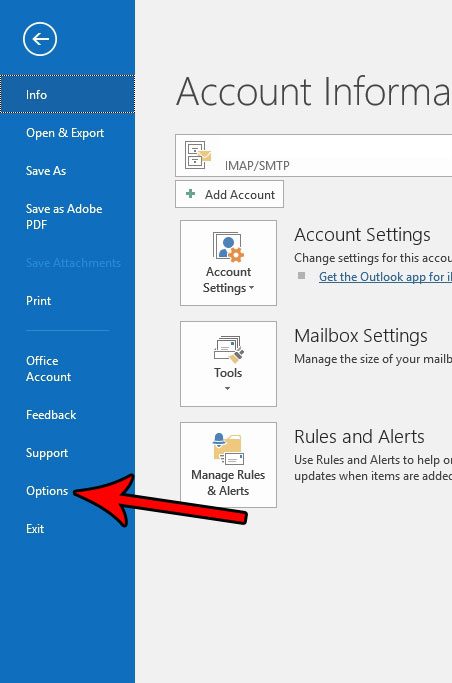
Step 3: Click the Options button in the column at the left side of the window.
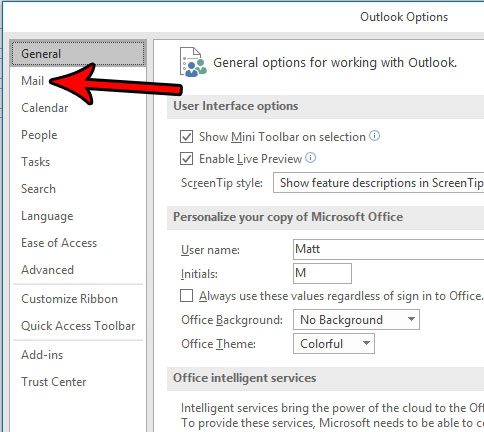
Step 4: Select the Mail tab on the left side of the window.
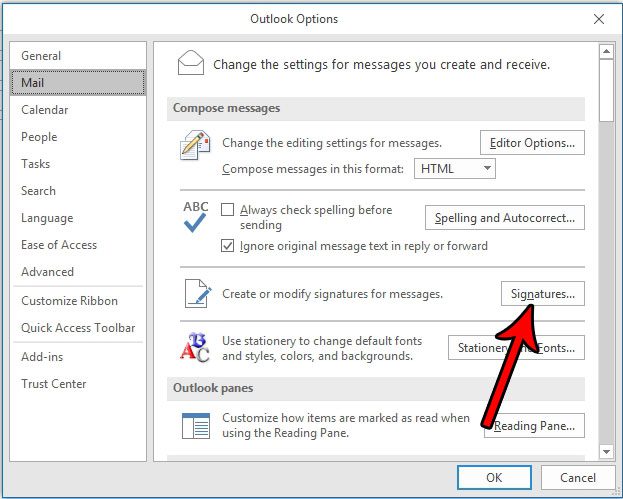
Step 5: Click the Signatures button.
Step 6: Click the New button.
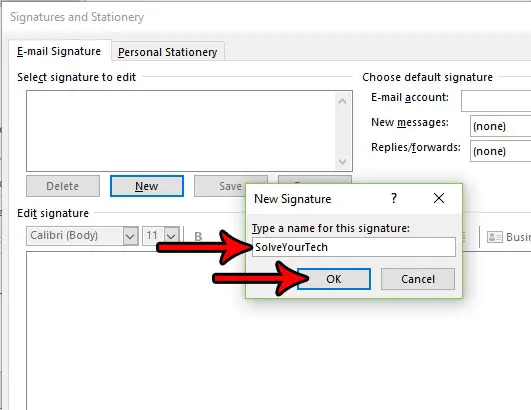
Step 7: Enter a name for the signature, then click the OK button.
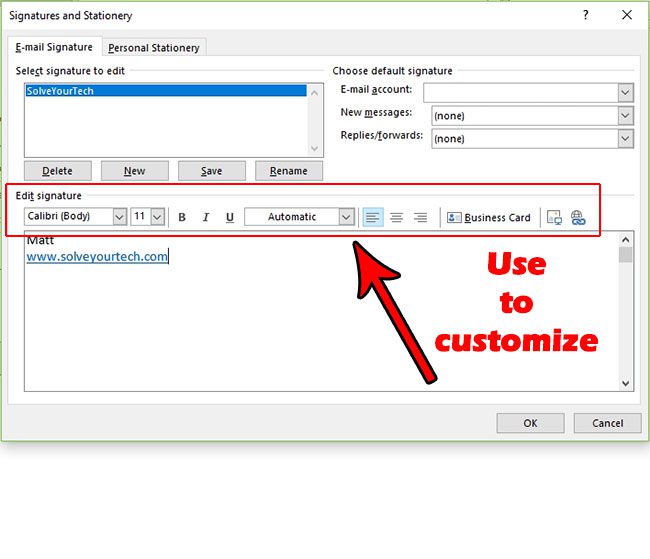
Step 8: Enter the content of your signature into the field at the bottom of the window, then click the OK button.
Now that you have completed our how to add signature in Outlook 2016 guide, you will be able to customize your own signature so that you can include all of the information and links that you want your contacts to be able to view and interact with.
Note in the image above that there is a toolbar above the signature field that contains a number of different ways that you can customize your signature.
In this example, I have added a hyperlink, which you can do by clicking the button at the far-right of the toolbar. There is a button for an image directly to the left of the link button.
You can also use different fonts for your signature.
If you don’t have the right one, such as if you want a cursive font, then you can always download and install them from a number of different online resources, such as Google Fonts.
Do you need an email to be sent at a specific time, but you’re aren’t going to be around to send it? Find out how to delay delivery in Outlook 2013 and have an email go out whenever you want it to.

Matthew Burleigh has been writing tech tutorials since 2008. His writing has appeared on dozens of different websites and been read over 50 million times.
After receiving his Bachelor’s and Master’s degrees in Computer Science he spent several years working in IT management for small businesses. However, he now works full time writing content online and creating websites.
His main writing topics include iPhones, Microsoft Office, Google Apps, Android, and Photoshop, but he has also written about many other tech topics as well.