Some of the features in Google Sheets are meant to make data easier to read on the screen, like cell merging, while others can affect the display of your data in another format, such as on a Web page.
When you are making a Web page and adding a picture to it, one of the values that you should define is the alt text for the image. This is the text that is displayed if the picture doesn’t load properly or if someone is using a screen reader to read all of the information on a page.
When the screen reader encounters a picture, it will read the alt text that is set for the picture.
Some other applications use alt text for screen readers, too, including Google Slides.
So if you are creating a presentation and want to ensure that the pictures that you have added to your slides can be read by the screen reader, then our guide below will show you how to set alt text for that picture.
How to Set Alt Text for a Picture in Your Google Slides Presentation
The steps in this article were performed in the desktop version of the Google Chrome Web browser, but should work in other desktop Web browsers as well.
By adding alt text to a picture you will be able to ensure that people using screen readers will be able to hear a description of the picture that you enter, so be sure to describe the picture as best as you can in the alt text.
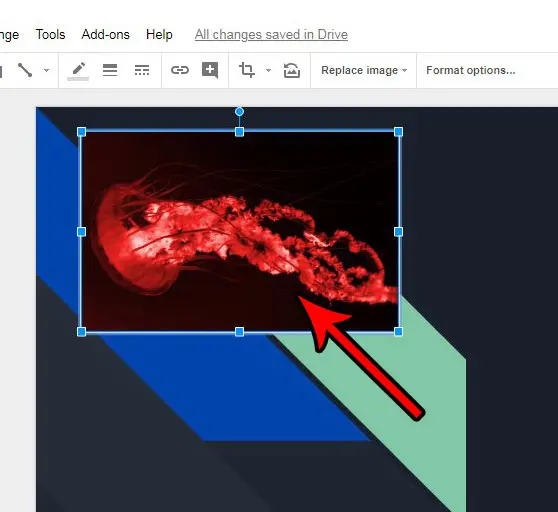
Step 1: Sign into your Google Drive and open the presentation file containing the picture to which you wish to add the alt text.
Step 2: Click the picture to select it.

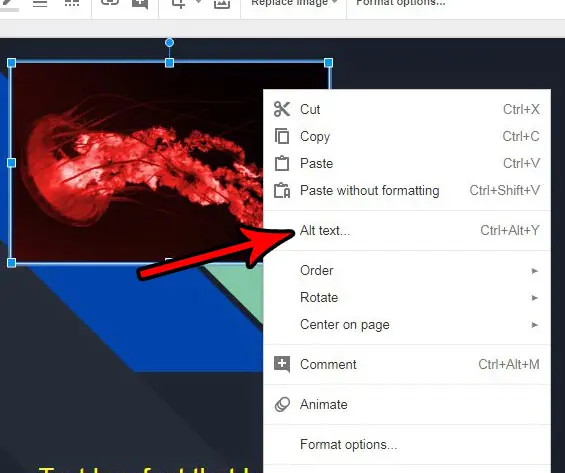
Step 3: Right-click the selected picture, then choose the Alt text option from the menu.

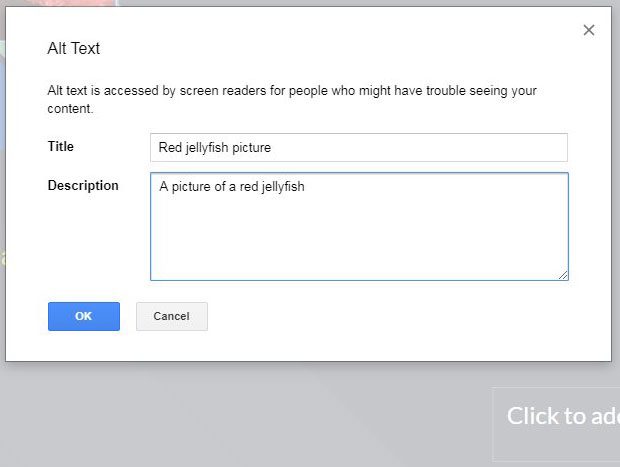
Step 4: Enter a title for the picture into the Title field, then enter a description of the picture into the Description field. Once you are done, click the OK button.

Note that you can also add alt text to a selected picture by pressing Ctrl + Alt + Y on your keyboard.
Have you made a lot of changes to a picture in your slide, but you want to stop over with the default version of the image? Find out how to reset a picture in Google Slides to revert all of the changes that you have applied to it.
Continue Reading
- How to merge cells in Google Sheets
- How to wrap text in Google Sheets
- How to alphabetize in Google Sheets
- How to subtract in Google Sheets
- How to change row height in Google Sheets

Matthew Burleigh has been writing tech tutorials since 2008. His writing has appeared on dozens of different websites and been read over 50 million times.
After receiving his Bachelor’s and Master’s degrees in Computer Science he spent several years working in IT management for small businesses. However, he now works full time writing content online and creating websites.
His main writing topics include iPhones, Microsoft Office, Google Apps, Android, and Photoshop, but he has also written about many other tech topics as well.