When you initially set up your Apple TV, part of the setup process involved connecting to a wireless network. But if you get a new router, or if you want to use the Apple TV somewhere else, then you will need to be able to connect it to a different network.
The menus on the Apple TV can be a little confusing if you do not change the settings on the device very often, but you can follow our few short steps below to connect your Apple TV to a wireless network.
Connecting to Wi-Fi on the Apple TV
This tutorial will assume that you have a wireless network in your home, and that you know the name and password for it.
Step 1: Turn on the Apple TV and your television, then switch the TV to the input channel to which the Apple TV is connected.
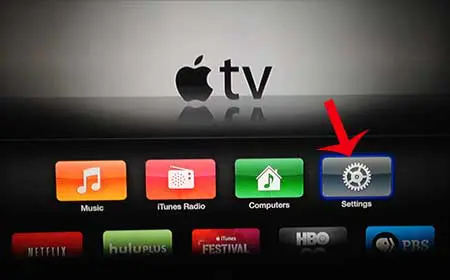
Step 2: Select the Settings icon.
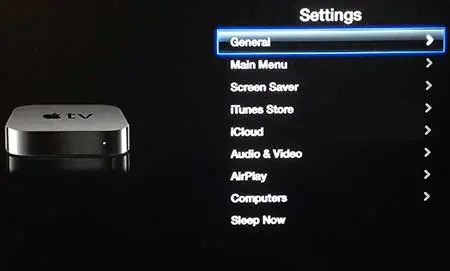
Step 3: Select the General option at the top of the screen.
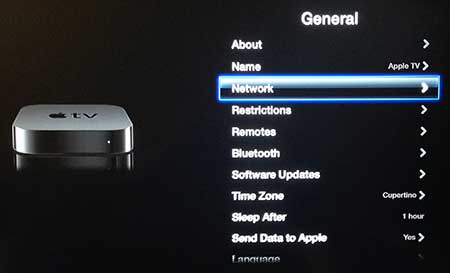
Step 4: Scroll down and select the Network option.
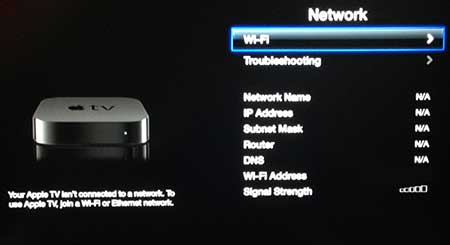
Step 5: Select the Wi-Fi option at the top of the screen.
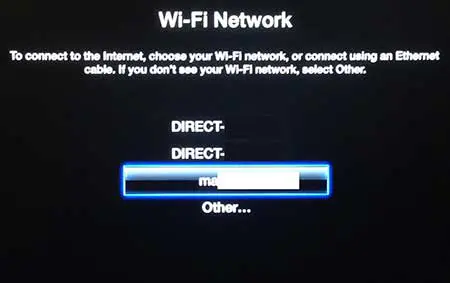
Step 6: Select your network from the list of available networks.
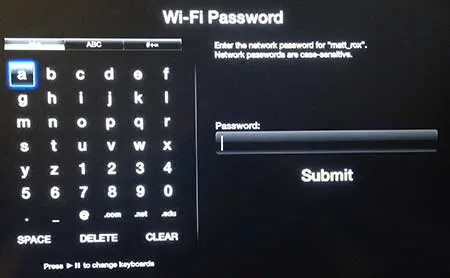
Step 7: Enter the password for the wireless network, then select the Submit button to connect to the network.
Now that you know how to connect your Apple TV to a wireless network, you can start to use all of the features on the device that require that type of network connection.
Do you have an Amazon Prime account and wish you could watch those videos on your Apple TV? Read this article to learn how.

Matthew Burleigh has been writing tech tutorials since 2008. His writing has appeared on dozens of different websites and been read over 50 million times.
After receiving his Bachelor’s and Master’s degrees in Computer Science he spent several years working in IT management for small businesses. However, he now works full time writing content online and creating websites.
His main writing topics include iPhones, Microsoft Office, Google Apps, Android, and Photoshop, but he has also written about many other tech topics as well.