A wireless network is an incredibly useful thing to have in your home or office, as it means that any device with wireless networking capabilities can access the Internet and network resources.
But not every device that can connect to the Internet has the ability to join a wireless network, including many desktop computers.
Fortunately, there are wireless network adapters that you can connect to a USB port on your computer that will allow you to access your wireless network.
As an Amazon affiliate, I earn from qualifying purchases.
Connect to a Wireless Network with a Wired Computer
The solution to this problem is going to require you to purchase a wireless network adapter, but you can find some good ones for very low prices. Many of them will work simply by plugging them in, while others will require you to install some software to get them up and running.
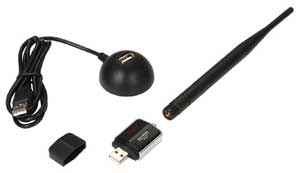
The one that I am using on my Windows 8 desktop computer at home is this Rosewill USB 2.0 external adapter. The installation of this thing couldn’t have been any simpler; I put all of the pieces together and connected it to a USB port on my computer.
Windows 8 recognized it without a problem (I didn’t even need to use the installation disc), and I was connected to my wireless network within minutes. It is also compatible with earlier versions of Windows as well.
This MediaLink Wireless N USB adapter is a good choice as well, and costs roughly as much as the Rosewill mentioned above.
As with the Rosewill, this device has literally thousands of positive reviews, many of which praise the ease with which it can be installed.
For people that are worried about the size of the Rosewill’s antenna, this smaller option from Medialink might be a better choice. The MediaLink can also be installed in Windows 7 without even using the installation CD, which makes the process that much simpler.
Specific instructions for how to connect a non-wireless computer to a wireless network are going to vary based upon the particular brand of wireless USB adapter that you purchase, but will follow these general steps.
Step 1: Purchase the wireless USB adapter.
Step 2: Unpack the adapter, assemble it and read the included instructions. If the adapter indicates that your operating system doesn’t require driver installation, you can just plug in the adapter and let Windows find the drivers automatically. If not, you will need to continue to the next step and install the drivers from the included installation CD.
Step 3: Insert the installation CD into the disc drive on your computer, then follow the on-screen prompts. Usually you will not be connecting the adapter itself until specifically instructed to do so by the installation wizard.
Step 4: Connect the wireless adapter when prompted.
Step 5: Select your wireless network from the list of networks in range.
Step 6: Enter the password for your wireless network.
Now that you know how to connect a non-wireless computer to a wireless network, you can take advantage of this functionality to connect nearly any type of computer to nearly any type of network.
Again, these are very generic instructions, as each individual adapter will be slightly different. But for most of the better options out there, the installation will follow this general structure.

Matthew Burleigh has been writing tech tutorials since 2008. His writing has appeared on dozens of different websites and been read over 50 million times.
After receiving his Bachelor’s and Master’s degrees in Computer Science he spent several years working in IT management for small businesses. However, he now works full time writing content online and creating websites.
His main writing topics include iPhones, Microsoft Office, Google Apps, Android, and Photoshop, but he has also written about many other tech topics as well.
