To set up the HP Photosmart 6510 for wireless printing, connect the printer to your Wi-Fi network from its touchscreen with the Wireless Setup Wizard, then install HP’s software on your computer and choose a wireless (network) connection. You’ll need your Wi-Fi network name and password.
Below are the printer steps from HP’s Photosmart 6510 user guide, the computer side, a WPS shortcut, how to switch a USB-connected printer to wireless, and how to confirm the connection worked.
In this article:
- Before You Start
- Step 1: Connect the Printer to Wi-Fi
- Step 2: Install the Software on Your Computer
- Faster Option: Use WPS
- Step 3: Check the Wireless Connection
- Switch a USB-Connected Printer to Wireless
- If the Printer Won’t Connect
- Frequently Asked Questions
Before You Start
- Unpack the printer, plug it in, and finish the on-screen setup for ink and paper. HP’s Photosmart 6510 setup page has a video for this part.
- Have your Wi-Fi network name and password ready.
- Place the printer within range of your wireless router.
Step 1: Connect the Printer to Wi-Fi
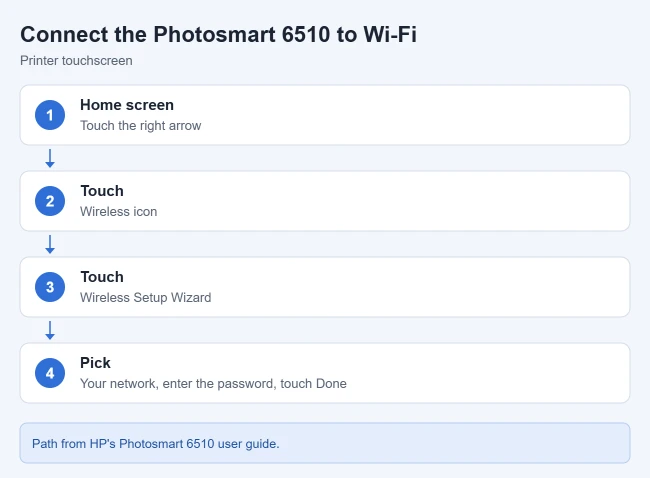
- On the printer’s Home screen, touch the right arrow key.
- Touch the Wireless icon. If a wireless status screen opens, touch Settings.
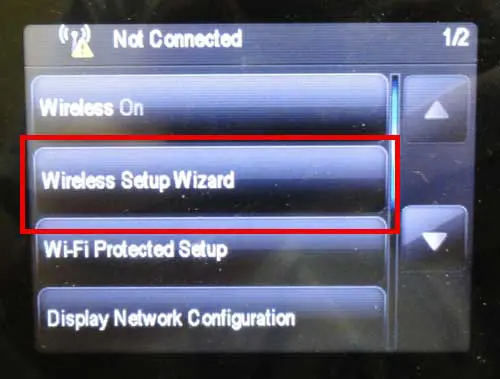
- Touch Wireless Setup Wizard.
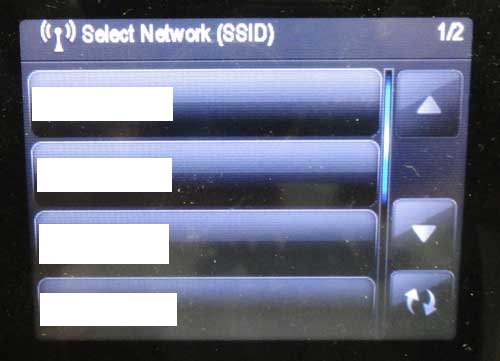
- Select your network from the list.
- Enter your Wi-Fi password, then touch Done.
Result: The printer joins your network and confirms the connection on its screen. The Wireless icon on the printer shows the status and signal strength. If more than one of these printers is on your network, you can change the AirPrint name on the Photosmart 6510 to tell them apart.
Step 2: Install the Software on Your Computer
- Go to HP’s setup page for the Photosmart 6510. It detects your operating system and lists the software available for it.
- Download and run the software, or use the installation disc that came with the printer.
- Accept the terms, then choose Wireless (network) when asked how the printer connects.
- Let the installer find the printer on your network, then finish setup.
Result: The Photosmart 6510 appears in your computer’s printer list as a network printer, and you can print to it from any app over Wi-Fi.
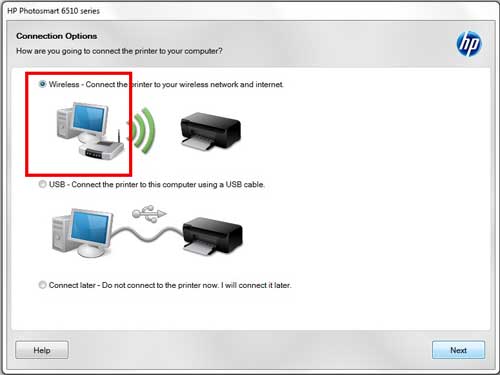
In our original setup on Windows, the installer showed the connection screen above. If it can’t find the printer, keep it open and check the printer’s IP address (see Step 3) so you can enter it.
Faster Option: Use WPS
If your router has a WPS button, HP’s user guide describes connecting without typing a password:
- Touch the right arrow on the Home screen, then the Wireless icon.
- Touch WiFi Protected Setup, then Push Button.
- Press and hold the WPS button on your router.
Result: The printer and router pair, and the printer joins the network. The guide also lists a PIN method under the same menu for routers that use a WPS PIN.
Step 3: Check the Wireless Connection
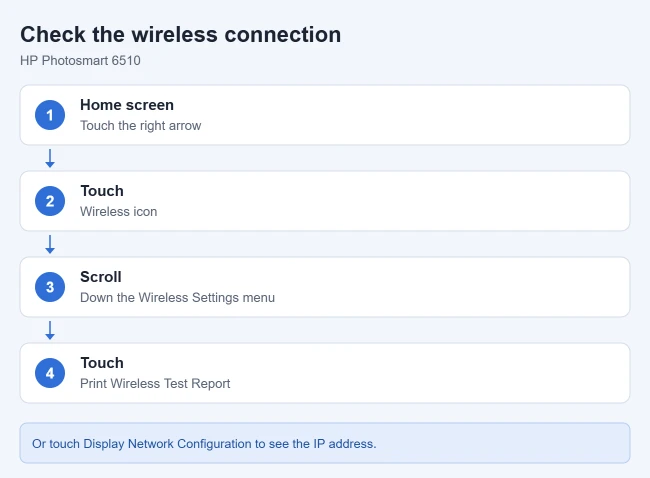
- On the Home screen, touch the right arrow, then the Wireless icon.
- On the Wireless Settings menu, scroll down with the down arrow.
- Touch Print Wireless Test Report, or touch Display Network Configuration.
Result: The report or screen shows whether the printer is connected and lists its network details, including the IP address you may need on the computer side.
Switch a USB-Connected Printer to Wireless
Already using the Photosmart 6510 over USB? HP’s user guide covers converting it:
- Windows: From the Start menu, open All Programs > HP > HP Photosmart 6510 series, click Printer Setup & Software Selection, and then click Convert a USB connected printer to wireless.
- Mac: Run the Wireless Setup Wizard on the printer, then use HP Setup Assistant in Applications/Hewlett-Packard/Device Utilities.
These menu names come from the HP Photosmart 6510 series user guide and match the original HP software for this printer.
If the Printer Won’t Connect
- Run the Wireless Setup Wizard again and re-enter the password carefully. Wi-Fi passwords are case-sensitive.
- Print a wireless test report to see what the printer reports about your network.
- Move the printer closer to the router and restart both.
- HP’s setup page links to its guides for troubleshooting a Wi-Fi connection to an HP printer.
Frequently Asked Questions
Do I need a USB cable to set up the Photosmart 6510 wirelessly?
No. You connect the printer to Wi-Fi from its touchscreen, then install the software on your computer over the network.
How do I find the printer’s IP address?
Touch the right arrow, then Wireless, scroll the Wireless Settings menu, and touch Display Network Configuration or print a wireless test report.
Can I connect more than one computer?
Yes. Once the printer is on your network, install the software on each computer and choose the wireless connection.
Related: How to Check Ink Levels on the HP Photosmart 6510. To send scans from the printer to your PC, see how to scan to a computer from the Photosmart 6510.

Matthew Burleigh has been writing tech tutorials since 2008. His writing has appeared on dozens of different websites and been read hundreds of millions of times.
After receiving his Bachelor’s and Master’s degrees in Computer Science he spent several years working in IT management for small businesses. However, he now works full time writing content online and creating websites.
His main writing topics include iPhones, Microsoft Office, Google Apps, Android, and Photoshop, but he has also written about many other tech topics as well.