Microsoft makes both the Windows 10 operating system and the Xbox One gaming console, so it only makes sense that it’s possible to use both products together. The Xbox One controller is also a great way to play many different video games, so it’s useful to have it as an option for playing games on your computer. But you may be wondering how to connect an Xbox One controller in Windows 10 if you are having difficulty setting it up.
The Xbox controller is a great way to play games on your PC. Provided that you have the correct version of the Xbox controller (the one with Bluetooth) and your Windows PC is up to date, then using the controller on your computer is possible.
If you had previously tried to make this connection and were having trouble, then it may be due to the method that you used to connect the controller to the computer. Our guide below uses a method involving the Control Panel, not the Settings menu, and could help you to install the controller if you have been having trouble.
The steps in this article were performed using a Bluetooth Xbox One Controller (like this one from Amazon) and a Windows 10 laptop.
Connecting Xbox One Controller to Windows 10
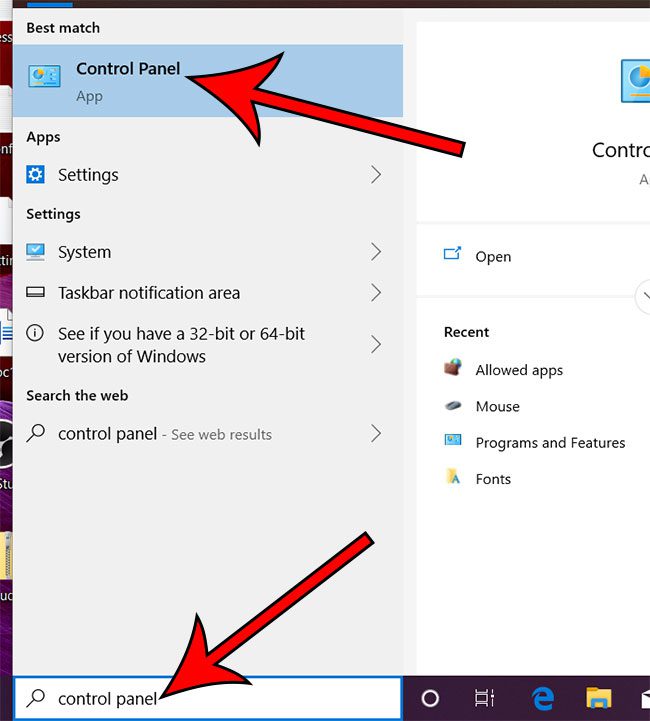
- Click the search field at the bottom of the window, type “Control Panel” then click the “Control Panel” result.
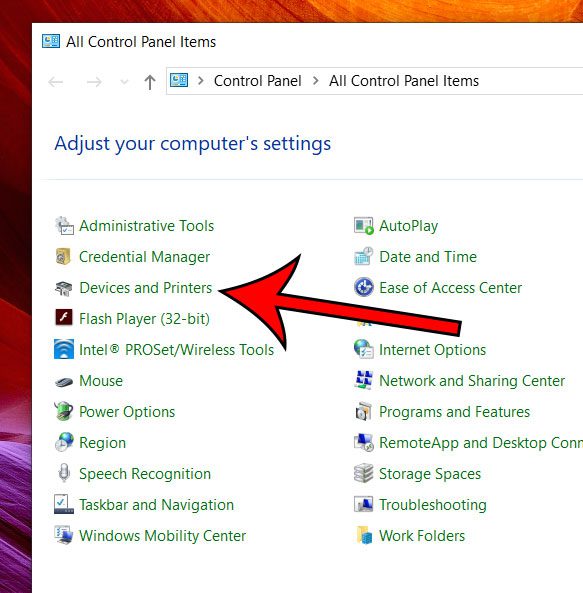
- Select Devices and Printers.
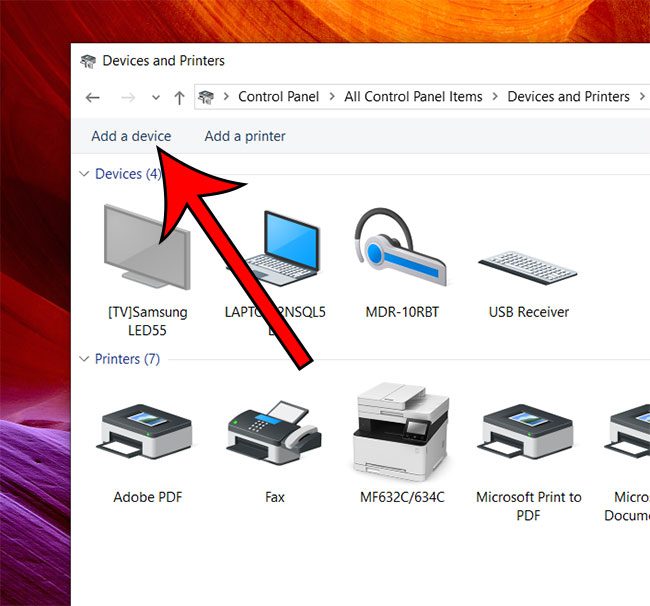
- Click the Add a device button.
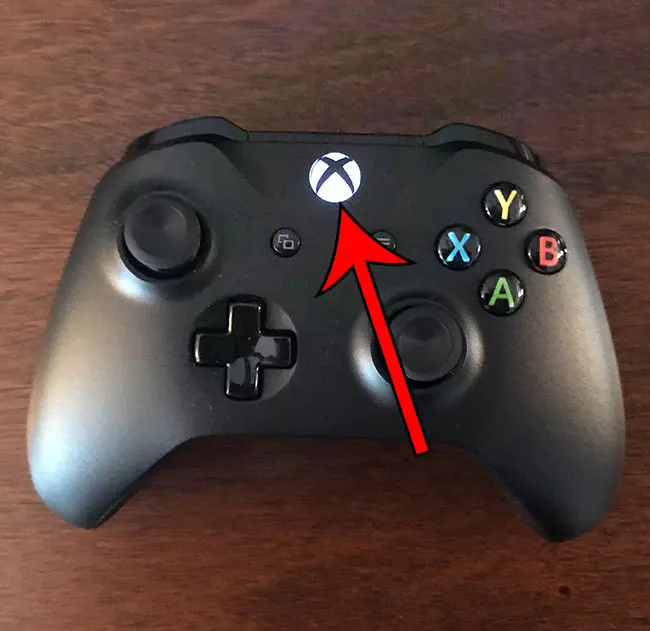
- Press the Xbox button on your Xbox controller.
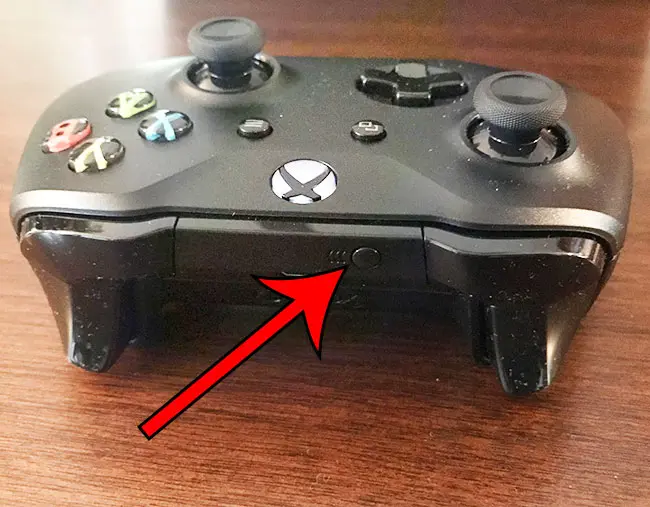
- Press and hold the Sync button on the back of the controller.
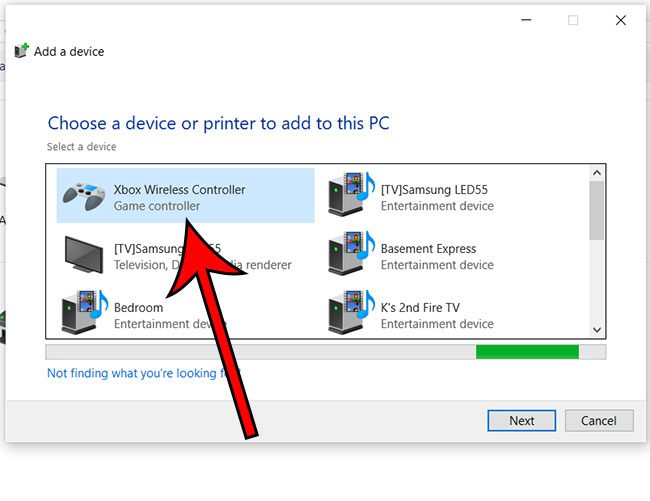
- Click the Xbox gaming controller option in the Add a device window, then click the Next button.
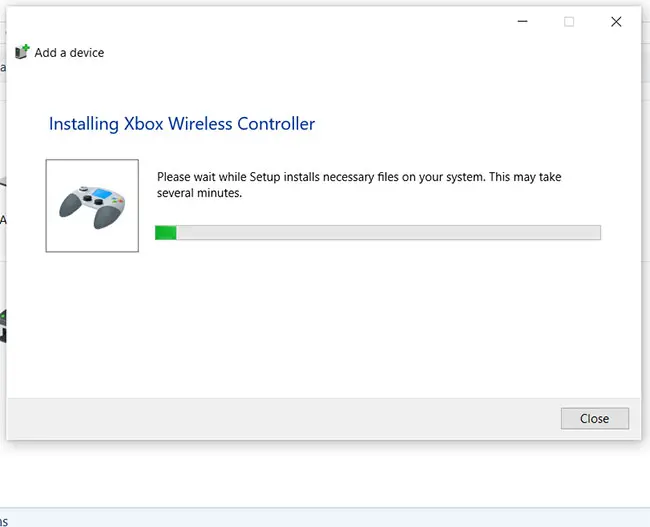
- Wait for the controller files to be installed.
Our article continues below with additional information on how to connect Xbox One controller to Windows 10, including pictures of these steps.
Pairing an Xbox One Controller with Windows 10 Using the Control Panel (Guide with Pictures)
The steps in this article assume that you have a Bluetooth Xbox One controller and that your Windows 10 PC is up to date.
Step 1: Click in the search field at the bottom of your screen, type “Control Panel” then click the top result.
Step 2: Choose the Devices and Printers option.
Step 3: Select the Add a device option at the top of the window.
Step 4: Press the Xbox button on the controller.
Step 5: Press and hold the sync button on the back of the controller.
Step 6: Choose the Xbox controller from the list of devices, then click Next.
Your computer should then indicate that it’s installing some files for the controller, then it should be ready to use.
Did you know that you can configure Windows 10 to update other Microsoft products while it updates Windows 10? Find out where to enable that setting and make updating your computer a bit easier.
How to Connect an Xbox One Controller in Windows 10 with an Xbox Wireless Adapter
While the easiest method for connecting an Xbox controller to Windows 10 is if you have the Bluetooth model of the controller, you aren’t out of luck if you have the non-Bluetooth Xbox controller. However, you are going to need this Xbox One wireless adapter first.
Once you have the wireless adapter you only need to plug it into a USB 2.0 or USB 3.0 port on your computer. Depending on where your USB ports are, or if the adapter is blocked by any metallic objects, then you may need to use the included USB cable to connect the controller to PC. Windows 10 has the drivers for this adapter by default, so you will just need to wait for a minute or two while that driver is installed.
Once you have connected the wireless adapter you can press the button on the adapter, then turn on the Xbox One controller and press its pairing button.
When the LED on your controller and the wireless adapter are both solid then you will know that the controller is connected to Windows 10.
More Information on Connecting an Xbox One Wireless Controller to a PC
The steps in this article provide the method for connecting your Xbox One controller to your PC. Creating this connection does not automatically connect your Xbox to your PC. If you are trying to take advantage of the integrations that these devices have, however, then there isn’t really much extra that you need to do.
Windows 10 has an Xbox app that you can use to connect to your Xbox One over your local network. This even lets you do stuff like stream from your Xbox to your Windows 10.
The method that we discuss in this article for connecting your Xbox One controller to your PC may only be necessary if you aren’t able to do it the easier way. This involves clicking the Windows button at the bottom left of the screen, clicking the gear icon, then selecting the Devices option. From there you can click the Bluetooth & Other Devices tab and select the Bluetooth or other device option.
As with the other methods we discuss, you will need to put the Xbox One controller into pairing mode by pressing the pairing button on the top of the controller.
If you have a regular Xbox wireless controller from the Xbox 360, then you may still be able to connect it to Windows 10. However, you will need the Xbox 360 wireless adapter, which is a little tougher to come by. This link has the Xbox 360 controller and its corresponding adapter.
Additional Sources

Matthew Burleigh has been writing tech tutorials since 2008. His writing has appeared on dozens of different websites and been read over 50 million times.
After receiving his Bachelor’s and Master’s degrees in Computer Science he spent several years working in IT management for small businesses. However, he now works full time writing content online and creating websites.
His main writing topics include iPhones, Microsoft Office, Google Apps, Android, and Photoshop, but he has also written about many other tech topics as well.