There are a lot of different utility applications that can help you to remove unwanted or unneeded files from your Mac.
One company that makes many of the better applications for these purposes is MacPaw.
Our tutorial below will show you how to use the Space Lens feature in CleanMyMac X to remove files from your computer.
How to Clean Up Files with Space Lens
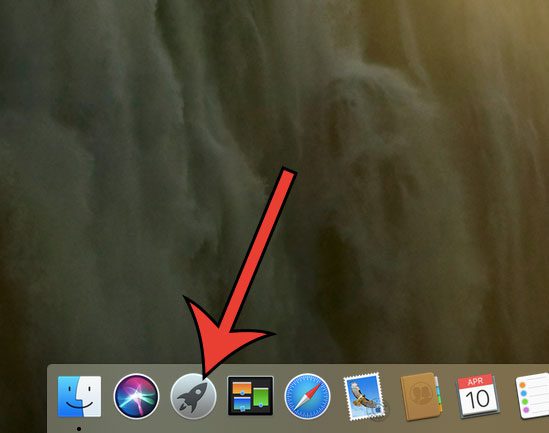
- Open LaunchPad.
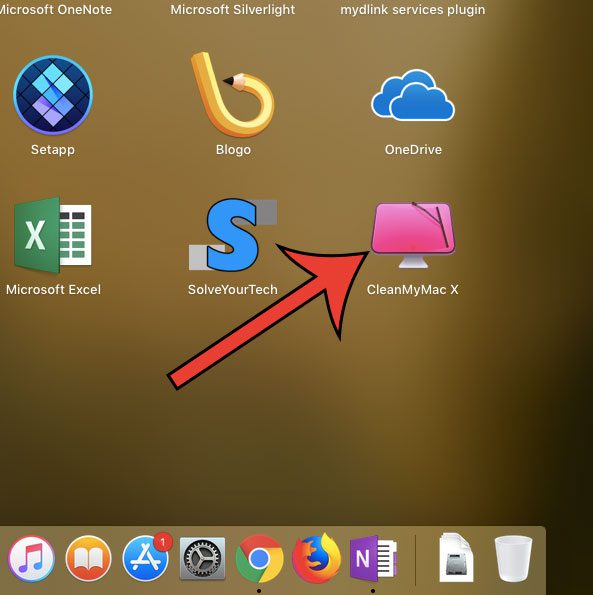
- Select the CleanMyMac X option.
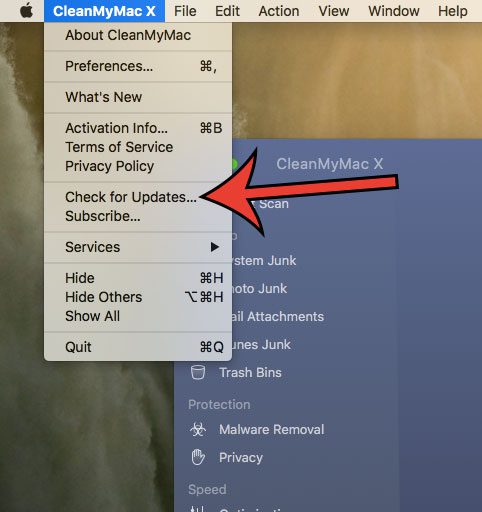
- Choose Clean My Mac X at the top of the screen, then click Check for updates.
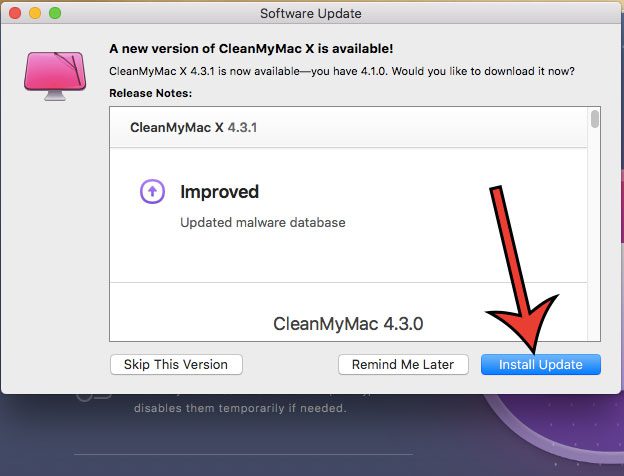
- Click Install Updates.
- Choose the Space Lens tab.
- Select the Scan button.
- Choose the files to delete.
- Click the Remove button.
Our guide continues below with additional information on how to use Space lens, including pictures of these steps.
The CleanMyMac X software (check out our review here) is one of the best and most comprehensive applications available for keeping your Mac’s storage free. Recently they have released an application called Space Lens that is part of the CleanMyMac utility.
The Space Lens feature provides you with a way to get a visual representation of how the space on your hard drive is being used, while also providing a means for deleting certain types of files. So continue below to see how to use Space Lens and get an idea of what it can do to help clean up your Mac.
How to Use Space Lens (Guide with Pictures)
The steps below assume that you have downloaded and installed CleanMyMac. You can click this link to download it from MacPaw.
We will also assume that you don’t have the Space Lens feature activated yet, so the first couple of steps will involve updating CleanMyMac X.
Step 1: Click the Launchpad icon at the bottom of the screen.
Step 2: Select the CleanMyMac X icon to launch the app.
Step 3: Select the CleanMyMac X option at the top of the screen, then choose the Check for Updates option.
Step 4: Click the blue Install Update button at the bottom-right of the window.
Once the update has been completed you will be able to click a button to close and relaunch the app.
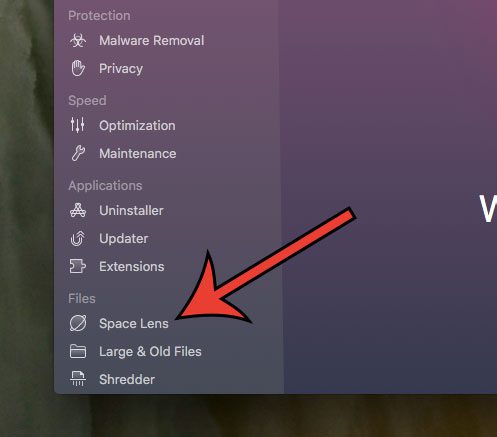
Step 5: Select the Space Lens tab at the left side of the window.
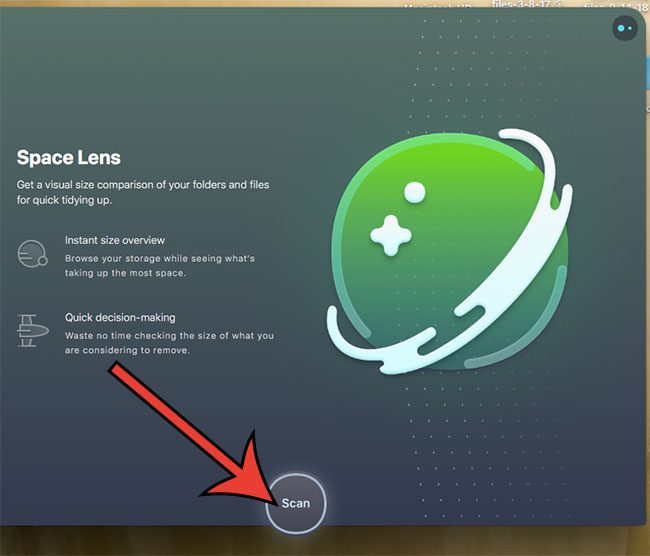
Step 6: Click the Scan button at the bottom of the window to start the Space Lens scan.
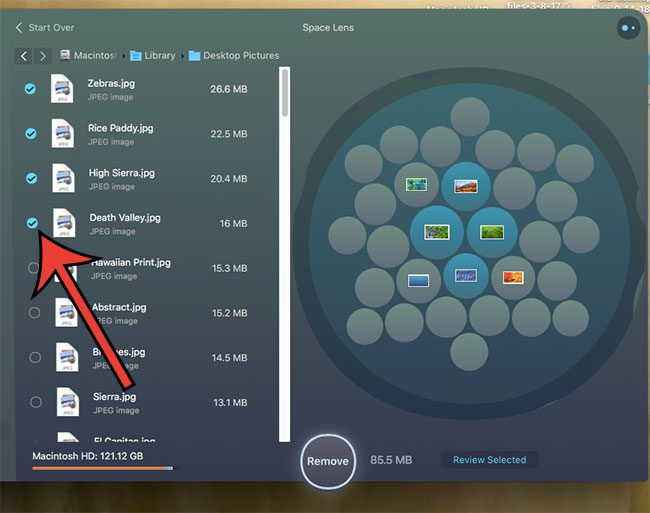
Step 7: Click the circle to the left of any of the results that you want to remove from your computer, then click the Remove button to delete it from your computer, or click the Review Selected button to see what the file is.
Note that the first screen of results here is going to be your top-level folders, many of which you can’t and shouldn’t delete. If you click one of the arrows to the right of these folders you will find individual items in those folders that you are able to delete.
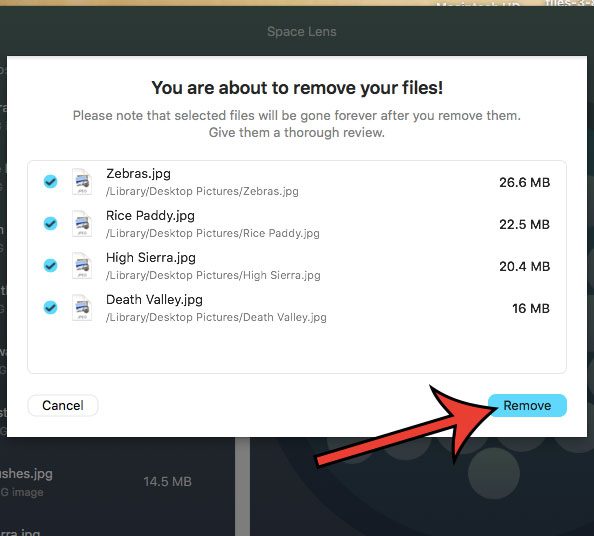
Step 8: Click the Remove button to confirm that you wish to delete all of the files that you selected.
If you are ready to try out Space Lens and CleanMyMac X, then you can download it directly here.
If you wish to find out more about CleanMyMac X and see the sorts of features that it includes, you can visit its product page on MacPaw’s site for additional information.
Space Lens Impressions
After experimenting with Space Lens and seeing what it can do in conjunction with the other tools in CleanMyMac X, I find it to be a good addition.
The visual representation of the files in a folder presents a clear and simple way to tell which files within a folder are taking up the most space.
I like that you aren’t able to select important folders or files, making it far less likely that you will delete a really important system file.
The default sorting with the largest files at the top of the column makes it easier to find the files taking up the most space on the hard drive.
After you have finished selecting files to delete with Space Lens, your inclination is going to be to simply click the Remove button.
However, clicking the Review Selected option is actually a better idea, as it summarizes all of the files that you might have selected across the different folders on your computer. You can even deselect files that you’ve changed your mind about.
In conclusion, I like the addition of Space Lens to the CleanMyMac X application, and I will definitely be incorporating it into my Mac file-cleaning routine.
When you need to be able to work with others in Google Drive, then this file share Google Drive article can show you how ot set that up.

Matthew Burleigh has been writing tech tutorials since 2008. His writing has appeared on dozens of different websites and been read over 50 million times.
After receiving his Bachelor’s and Master’s degrees in Computer Science he spent several years working in IT management for small businesses. However, he now works full time writing content online and creating websites.
His main writing topics include iPhones, Microsoft Office, Google Apps, Android, and Photoshop, but he has also written about many other tech topics as well.