A lack of hard drive space is a common affliction for MacBook owners. The computer is so well-suited for creating and consuming media files that it is easy for those large files to quickly fill up your hard drive. So when you reach the point where there isn’t enough room for your next project, you will start looking for ways to remove the larger, older files from your MacBook that you aren’t using anymore.
But this can be tricky, as these files might be stored in locations that are tough to find. Fortunately there is a program called CleanMyMac that you can download and install which will search for those files automatically. You can read more about CleanMyMac and download it from MacPaw’s website, then see how to use one of its tools to locate and remove large files from your computer.
How to Search for and Delete Large Old Files from Your Mac
The steps in this guide were performed on a MacBook Air, in macOS Sierra. This guide uses the CleanMyMac software to locate and delete these files. You can download CleanMyMac here. Once you have downloaded and installed the program, you can continue with the steps below.
Note that CleanMyMac won’t automatically delete the files when you first locate them. You will be able to see the list of large files that it has located and you can choose to delete these files on an individual basis.
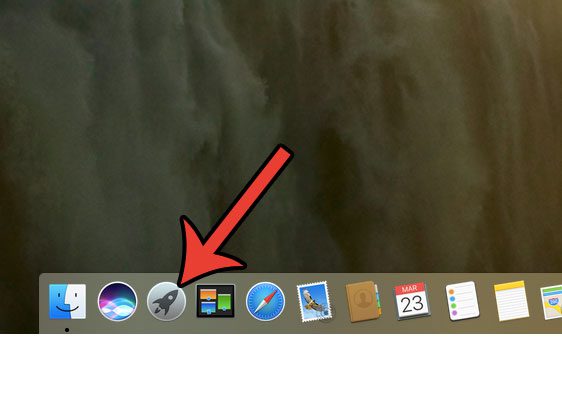
Step 1: Click the Launchpad icon in the dock at the bottom of the screen.
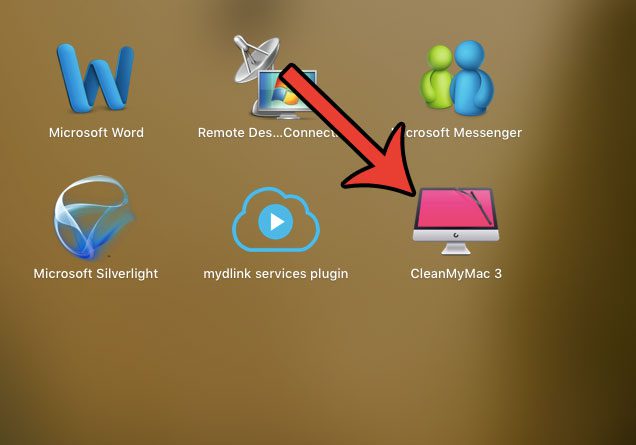
Step 2: Click the CleanMyMac program icon.
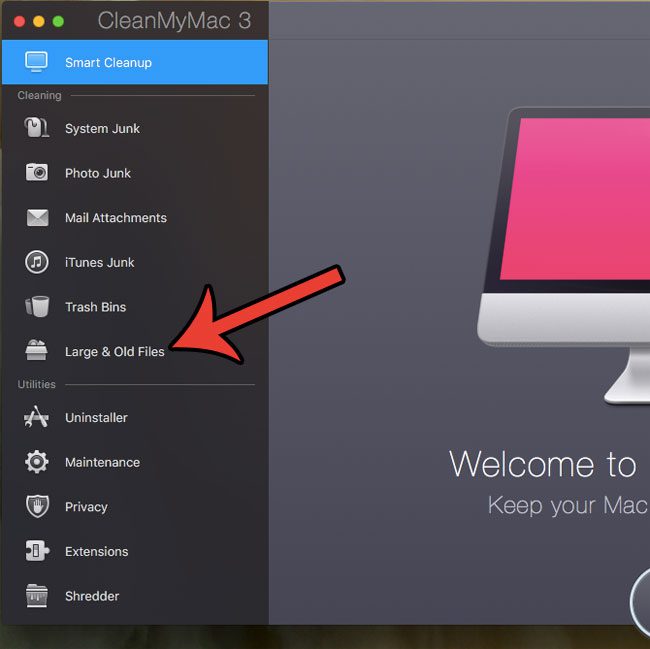
Step 3: Click the Large & Old Files link in the left column of the program.
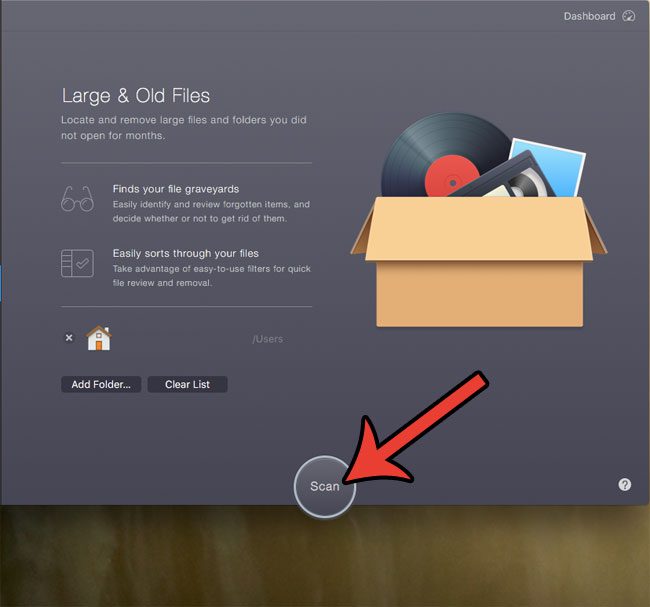
Step 4: Click the Scan button at the bottom of the window. Note that this can take a while, depending upon the size of your hard drive and the speed of your laptop.
Step 5: Click the Review Files button at the bottom of the window.
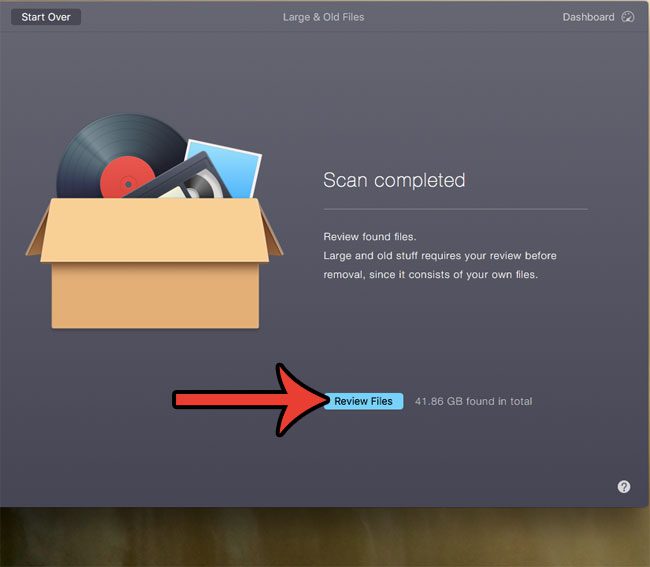
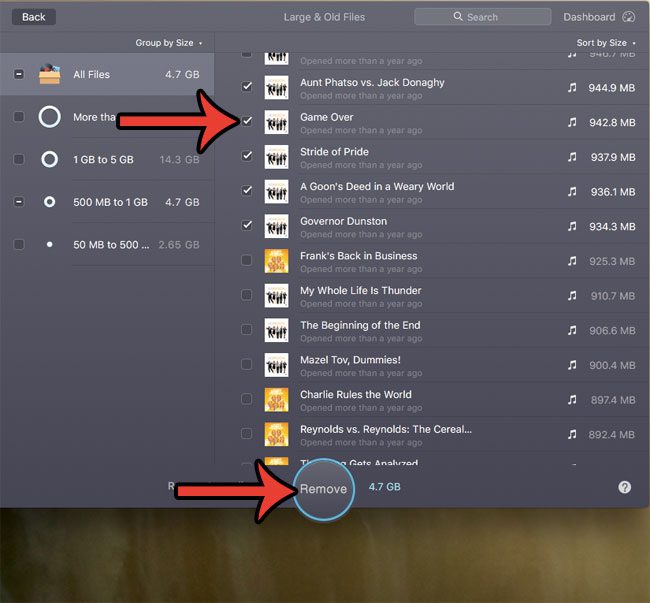
Step 6: Select the files that you would like to remove, then click the Remove button at the bottom of the window. You will notice in the image below that the majority of the large files on my computer are iTunes video files. If you are an iTunes user who purchases movies or TV shows, then you may be in the same situation.
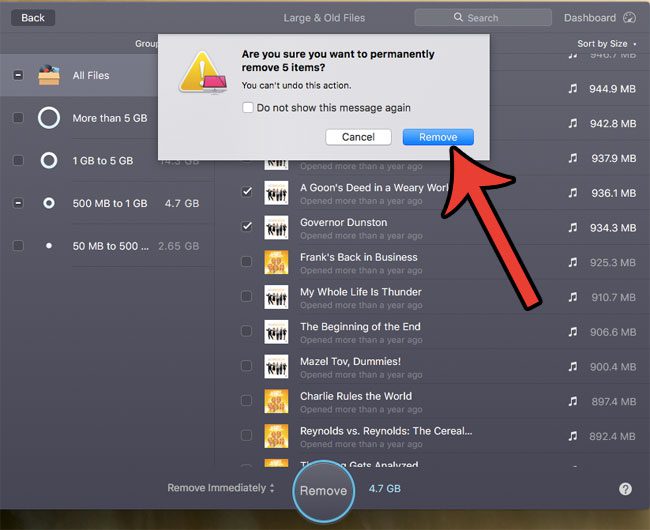
Step 7: Click the Remove button to confirm that you want to delete these files. This action can’t be undone, and it will permanently delete the files from your computer.
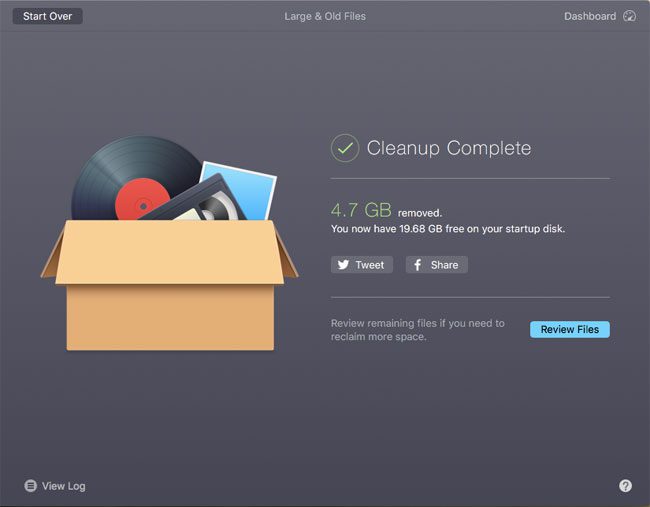
Once the files have been deleted you will see information concerning the amount of space you freed up, as well as how much total space is remaining. You can click the Review Files button if you want to remove some additional files, or close the application window if you are done.
Now that you know how to find and remove large files from your MacBook Air you can perform this action whenever you need to free up some storage on the computer.
The makers of CleanMyMac also have another program called Gemini that you can use to remove duplicate files from your Mac, too. The combination of these programs can really help you to keep your Mac clean, and you get a 30% discount on Gemini if you already have CleanMyMac. You can check out the CleanMyMac and Gemini bundle here.
While CleanMyMac is great for removing old, large files from your MacBook, it is also good at finding the other, smaller junk files that are filling your hard drive. Learn how to delete the junk files from your Mac for simple, additional ways to increase the hard drive space on the computer.

Matthew Burleigh has been writing tech tutorials since 2008. His writing has appeared on dozens of different websites and been read over 50 million times.
After receiving his Bachelor’s and Master’s degrees in Computer Science he spent several years working in IT management for small businesses. However, he now works full time writing content online and creating websites.
His main writing topics include iPhones, Microsoft Office, Google Apps, Android, and Photoshop, but he has also written about many other tech topics as well.