You can clear your iPhone Safari history in iOS 17 by going to Settings > Safari > Clear History and Website Data > Clear History.
Our guide continues below with additional information about deleting iOS 17 Safari history, including pictures of these steps.
You can also watch our video about how to delete Safari history in iOS 17 for more on this topic.
How to Delete History and Data in Safari (Guide with Pictures)
The steps in this article were performed on an iPhone 14 Plus in the iOS 17 operating system.
These steps will work for other iPhone models that have updated to iOS 17 as well.
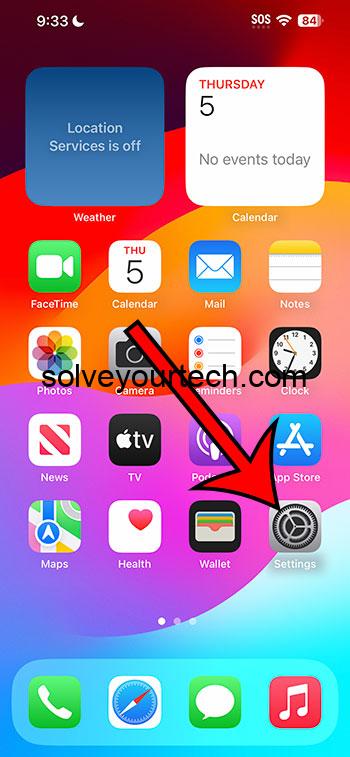
Step 1: Open the Settings app on your iPhone.
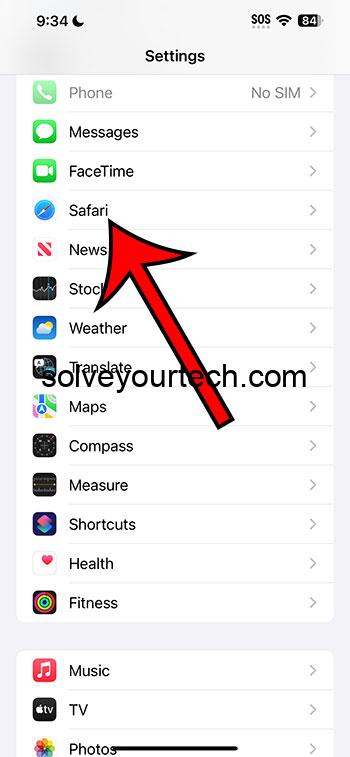
Step 2: Scroll down and choose the Safari option.
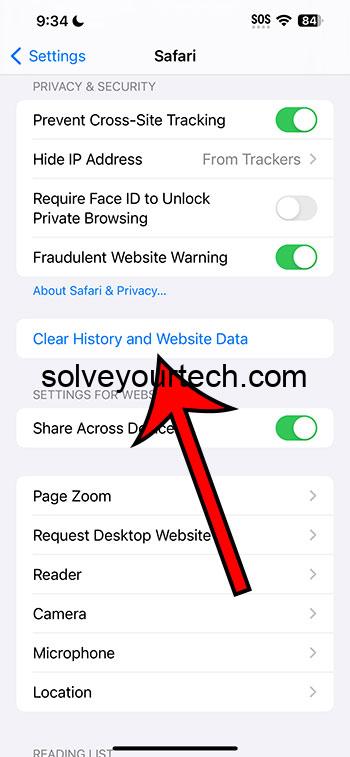
Step 3: Scroll down and tap the Clear History and Website Data button.
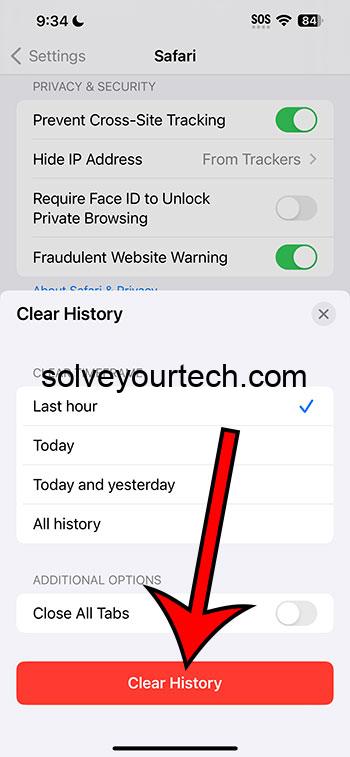
Step 4: Choose what you wish to delete, then touch the Clear History button.
Note that you can specify the time range of data to delete, and you can also choose whether or not to close your open tabs.
Now that you know how to delete your history from the iPhone Safari browser after updating to iOS 17, you will be able to manage this information in the new operating system.
Video About Clearing Data in iOS 17
Summary – How to Delete iPhone Safari History
- Tap Settings.
- Select Safari.
- Choose Clear History and Website Data.
- Adjust the settings.
- Tap Clear History.
Related: How to Delete Apps on iPhone Permanently
More Information
Ah, the Safari browser! The trusty gateway to the Internet for countless iPhone users. But just as one would clear away footprints on a sandy beach, there are times when you might want to wipe clean the digital tracks you leave behind on Safari. Let’s dive into the how and why of clearing your Safari history and data from an iPhone.
First off, why might you want to clear your history? Well, think of your Safari history as a diary of all your digital wanderings. Sometimes, it’s just good to start fresh, or maybe there’s that one website you accidentally clicked on that you’d rather forget. Additionally, clearing out old data can help Safari run smoother. Just like decluttering your living room can make you feel more at ease, giving Safari a good clean-up might just speed things up a bit.
Now, let’s get to the nitty-gritty. Clearing your history and website data from Safari on an iPhone is a piece of cake, and I’m here to guide you through it, step by step:
- Hop into Settings: Tap on that silver cog icon commonly found on your home screen. That’s the “Settings” app. Once inside, scroll down until you see the “Safari” option, and give that a tap.
- Seek out the Clearing Option: Once you’re in the Safari settings, you’ll see an option that says “Clear History and Website Data.” It’s usually highlighted in blue. Found it? Great!
- Tap and Confirm: Now, simply choose your desired options, then tap on “Clear History.” A prompt will pop up, asking you if you’re sure you want to clear. It’s always good to double-check, as this action can’t be undone. If you’re ready, tap “Clear History” and watch the magic happen.
- The Results?: After you’ve done this, your history, cookies, and other browsing data will be wiped from your iPhone. However, your AutoFill information will remain intact. If you’re signed into iCloud, this will also clear your history from devices synced with the same iCloud account. It’s a bit like casting a spell that works across all your magical devices!
Just a side note: If you’re looking to only delete specific sites or specific pages, then you can open a tab in Safari, tap the book icon, choose the clock tab, and then swipe to the left on each page that you wish to remove.
Another cool tip while we’re chatting about this: If you want to browse without logging history at all, consider using Private Browsing mode. When you open Safari, tap the two-square icon at the bottom, and then tap “Private” on the bottom-left. Voilà! You’re in stealth mode.
Now, I know what you might be thinking: “Is this truly necessary?” Well, not always. But it’s a good habit to get into, especially if you’re concerned about privacy or if you’re handing your phone over to a friend to browse. Plus, let’s be real, there’s something oddly satisfying about starting with a clean slate, digitally speaking.
So there you have it! Simple, right? The world of tech can sometimes feel like a labyrinth, but with a guide like this, you’re never lost. Here’s to more smooth sailing (or should I say, browsing?) on Safari! And remember, whether it’s digital footprints or sandy ones, you now know how to leave no trace behind. Happy browsing!
Conclusion
Once you are comfortable deleting your history from the Safari browser in iOS 17, it can be a good idea to do this periodically so that the Safari browser runs as well as possible.
Additionally, you may find that your suggestions prompts when you search are affected by your history, and you might be seeing options there that you aren’t going to visit again.
Hopefully, our tutorial above about how to clear your iOS 17 Safari history has provided you with the information that you need in order to be able to make this change whenever you wish.

Matthew Burleigh has been writing tech tutorials since 2008. His writing has appeared on dozens of different websites and been read over 50 million times.
After receiving his Bachelor’s and Master’s degrees in Computer Science he spent several years working in IT management for small businesses. However, he now works full time writing content online and creating websites.
His main writing topics include iPhones, Microsoft Office, Google Apps, Android, and Photoshop, but he has also written about many other tech topics as well.


