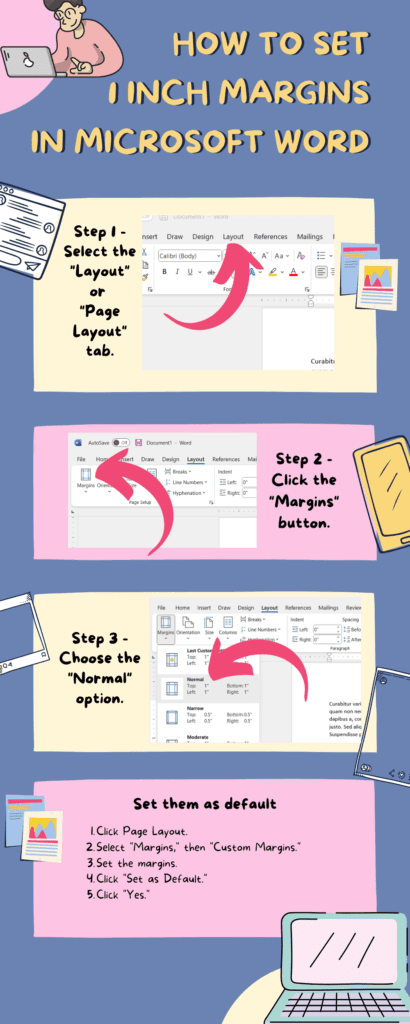
To set 1-inch margins in Microsoft Word, first navigate to the ‘Page Layout’ tab at the top. Then, click on the ‘Margins’ option. In the dropdown menu, choose ‘Custom Margins’. Now, you can manually set your margins. Use the up and down arrows to input ‘1’ in the boxes for Top, Bottom, Left, and Right. Confirm by clicking ‘OK.’ This process will effectively set your document to have 1-inch margins all around.
Our article continues below with additional information about how to use 1 inch margins in Word, and pictures for these steps. We also discuss changing your Word settings so that all future new documents will have one inch margins by default.
How to Make 1 Inch Margins in Word 2010 (Guide with Pictures)
Note that you can change the size of your margins at any time while the document is open. The margin change will be applied to every page of your document, so you don’t need to worry about manually adjusting the margins on every page of a multi-page paper.
Step 1: Open Microsoft Word 2010, or double-click your existing Word document to open it in Word 2010.
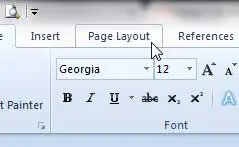
Step 2: Click the Page Layout tab at the top of the window.
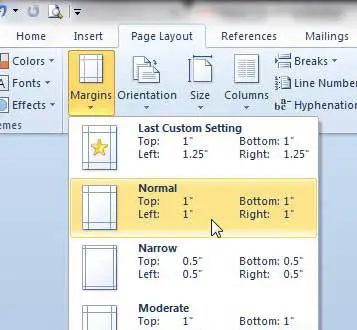
Step 3: Click Margins in the Page Setup section of the window, then click the Normal option.
Deal of the Day
- HIGH-QUALITY SOUND — Powered by the Apple H1 headphone chip, AirPods deliver rich, vivid sound.
- EFFORTLESS SETUP — After a simple one-tap setup, AirPods are automatically on and always connected. They sense when they’re in your ears and pause when you take them out. And sound seamlessly switches between your iPhone, Apple Watch, Mac, iPad, and Apple TV.
Last update on 2025-02-27 / Affiliate links / Images from Amazon Product Advertising API | As an Amazon Associate, I earn from qualifying purchases.
Since this is a very common document layout, Microsoft has provided an easy way to set it up. But if you need to set up your document so that the margins are 1 inch on just some of the sides, but not all of them, then you need to use custom page margins. You can read this article to learn more about custom page margins.
You can also change the margins in your document by adjusting the guides that appear on the ruler at the top and left of the document.
If you don’t see the ruler, then you can display it from the View tab.
Related: How to Set 1 Inch Margins in Word 2011
How to Set 1 Inch Margins as the Default in Word 2010
If every document that you create in Word 2010 requires 1-inch margins, then it might be easier to set those as the default page margins for every new document that you create. You can do this by following these steps.
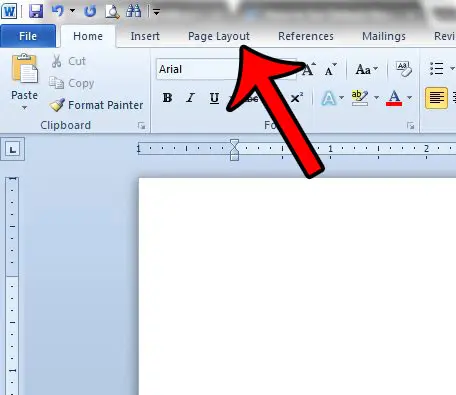
Step 1: Click the Page Layout tab at the top of the window.
Step 2: Click the Margins button, then click Custom Margins at the bottom of the list.
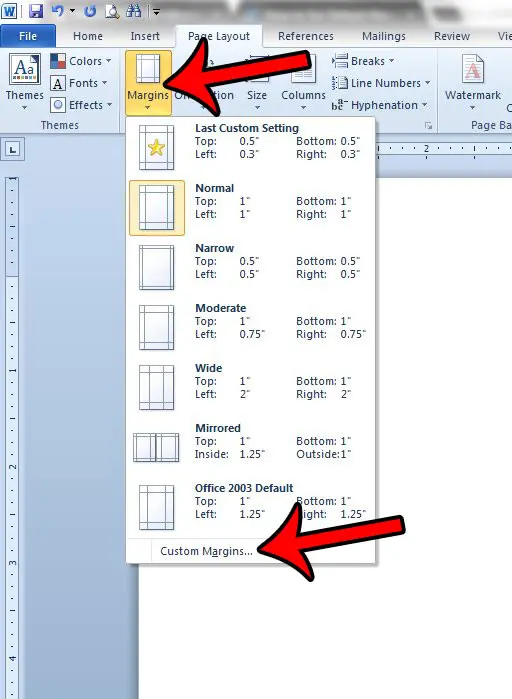
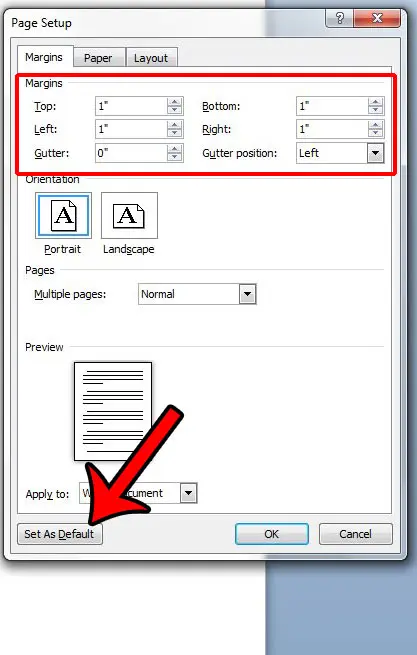
Step 3: Confirm that the current margin settings are what you wish to use as the defaults, then click the Set As Default button at the bottom of the window.
Step 4: Click the Yes button to confirm that you wish to change the default settings.
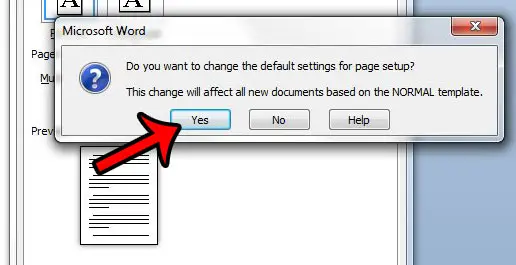
This setting will be applied to each new document that you create that uses the Normal template. Existing documents, or documents that you receive from others, will not use your default settings.
Quick summary – How to set one inch margins in Word 2010 by default
- Click the Page Layout tab.
- Click Margins, then click Custom Margins.
- Enter your desired default margins into the Top, Left, Bottom, and Right fields, then click Set as Default.
- Click Yes to confirm the new default margins.
If you’re setting up a research paper to turn in for school, then you might also be interested in learning how to remove the page number from your title page. Click here to learn how.
Read this article to change your margins from inches to centimeters in Word 2010.
1 Inch Margins in Word Infographic
Summary – How to Set 1 Inch Margins in Word 2010
- Click the Page Layout tab.
- Click the Margins button in the Page Setup section of the ribbon.
- Click the Normal option.
Occasionally you might need to add a sheep to a slide instead of a text box or a picture. Our guide on how to make a circle in Google Slides will show you how.
Conclusion
If you are creating a document in Microsoft Word for school or work, then you might need to make sure that you are using one-inch margins in that document.
This is a requirement of institutions that utilize the MLA or APA style guides, and it can help to improve readability as well as provide a reader with space to write edits in the margins.
It’s common for schools or workplaces to have specific requirements for the documents that you create, and one of those requirements might involve margins.
Since Microsoft Word is still one of the most popular ways that you could create a document, that makes it likely that you will need to know how to set 1 inch margins in Word.
If you are in high school or college, then you have probably had to write a lengthy paper in Word 2010. Your teacher or professor probably also has a format that they prefer for these documents, and one of the requirements will usually involve the size of the margins.
In most cases, this is meant to combat students that attempt to artificially inflate the size of a paper by making small changes to the layout of the document. Hopefully, the steps above have helped you to learn how to set up 1 inch margins in Microsoft Word 2010.

Matthew Burleigh has been writing tech tutorials since 2008. His writing has appeared on dozens of different websites and been read over 50 million times.
After receiving his Bachelor’s and Master’s degrees in Computer Science he spent several years working in IT management for small businesses. However, he now works full time writing content online and creating websites.
His main writing topics include iPhones, Microsoft Office, Google Apps, Android, and Photoshop, but he has also written about many other tech topics as well.

