Microsoft Word 2010 has a surprisingly robust set of image editing tools, including some very advanced tools that you might not even think were possible within the program.
One such option is the ability to remove a background from a picture in Word 2010. This option is ideally suited for scenarios where the background of an image is unnecessary or unwanted and you do not have other tools to use to perform the action.
The background removal is fast and very effective when used correctly on an image in which Word 2010 is capable of easily identifying foreground versus background objects.
Removing Image Backgrounds in Word 2010
I had become so accustomed to doing most of my image editing in other programs that I had never considered this to be something that might be possible with Word.
So when I stumbled upon it and began experimenting with it, I was pleasantly surprised to see that it was a very capable tool for removing image backgrounds.
This tool will not work on every image and you do not have as much control over the background removal as you might like, but it can be very effective.
Step 1: Open the document for which you want to remove a background from a picture in Word 2010.
Step 2: Scroll to the image in the document.
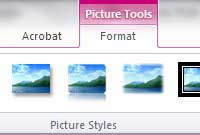
Step 3: Click the image so that it is selected, which will switch the top ribbon to the Picture Tools – Format option.
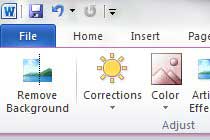
Step 4: Click the Remove Background button in the Adjust section of the ribbon.
Step 5: Move the boundaries on the image until the portion of the image that you want to keep is selected. You will notice that the background is in a purplish hue. This identifies the portion of the image that will be removed.
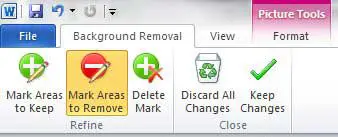
Step 6: Use the tools in the Refine section of the ribbon to draw lines around any areas that are either incorrectly marked to be removed or to be kept.
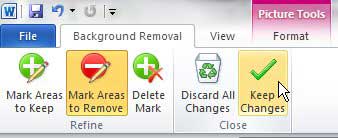
Step 7: Click the Keep Changes button in the Close section of the ribbon to remove the background.
You will have difficulty removing image backgrounds if there is not a lot of difference between the background and foreground but, for images with contrast between those two areas, this tool can be very helpful.
See also
- How to insert a check mark in Microsoft Word
- How to do small caps in Microsoft Word
- How to center text in Microsoft Word
- How to merge cells in Microsoft Word tables
- How to insert a square root symbol in Microsoft Word

Matthew Burleigh has been writing tech tutorials since 2008. His writing has appeared on dozens of different websites and been read over 50 million times.
After receiving his Bachelor’s and Master’s degrees in Computer Science he spent several years working in IT management for small businesses. However, he now works full time writing content online and creating websites.
His main writing topics include iPhones, Microsoft Office, Google Apps, Android, and Photoshop, but he has also written about many other tech topics as well.


