Your iPhone provides a way for you to create a contact for yourself on the device. This may seem strange at first, but it actually creates an interesting opportunity to learn how to add relationship to iPhone contacts that can make it easier to use different voice commands.
Once you have configured these relationships you can tell Siri to text a brother or sister, call a parent, and much more.
How to Add a Relationship on the iPhone
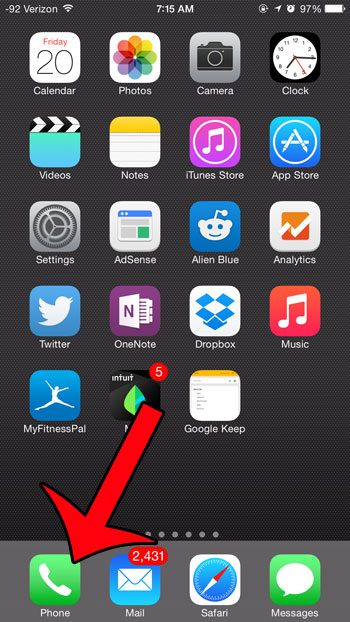
- Open the Phone app.
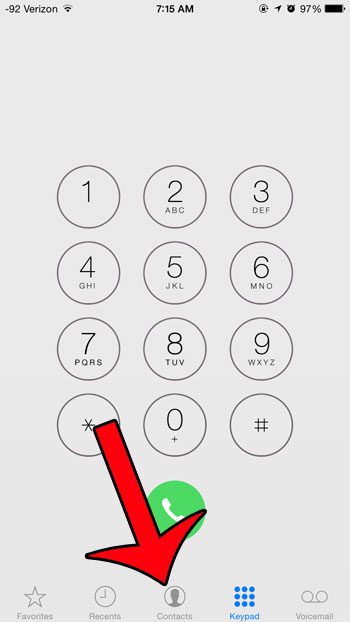
- Select Contacts.
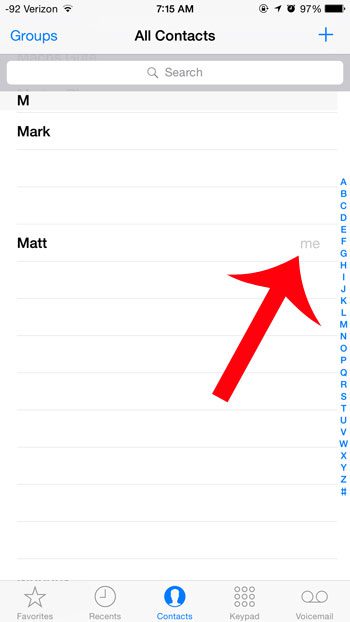
- Choose your name.
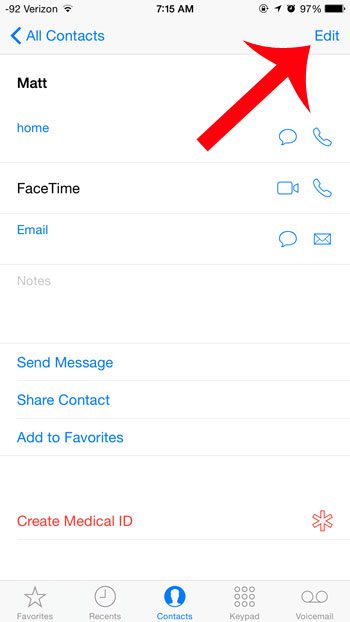
- Touch Edit.
- Select add related name.
- Choose mother.
- Tap the relationship to define.
- Select the blue i icon.
- Choose the contact.
- Tap Done.
Our guide continues below with additional information on how to add relationship to iPhone contacts, including pictures of these steps.
Check out our clock icon on iPhone article if you’ve noticed the clock at the top of your screen and weren’t sure what it meant.
You can assign a lot of information to a contact on your iPhone 5, which can be helpful for remembering addresses and birthdays. But you can also define relationship statuses between yourself and your contacts, which can give you some new ways to use Siri.
Our article below will walk you through the steps of creating a relationship between you and a contact that is on your device. You can even use these steps to create relationships between other contacts to provide yourself with even more helpful ways to remember important relationships.
If you have a contact with a moon or a bell next to it in your text messages, then read our how to remove moon on iPhone guide for more information.
Assigning Relationship Status to an iPhone Contact (Guide with Pictures)
The steps in this article were performed on an iPhone 6 Plus, in iOS 8. These steps may vary for earlier versions of iOS.
This tutorial will assume that the person for whom you wish to define a relationship is already in your contacts list. Additionally, you will need to have yourself identified on the device.
You can do this by going to Settings > Mail, Contacts, Calendars > My Info and selecting yourself from the contact list. If you are not in your contact list, then you will need to add yourself as a contact. This article will show you how to add a contact.
Step 1: Tap the Phone icon.
Step 2: Select the Contacts option at the bottom of the screen.
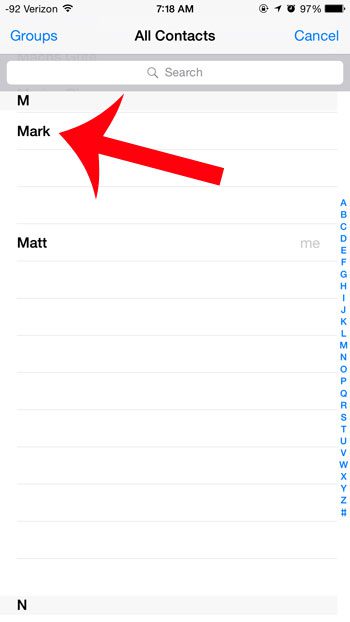
Step 3: Scroll down and select your name from the list of contacts.
There should be a grayed out “me” next to it if you have identified yourself on your iPhone using the method outlined above.
Step 4: Tap the Edit button at the top-right corner of the screen.
Step 5: Scroll down and select the add related name option.
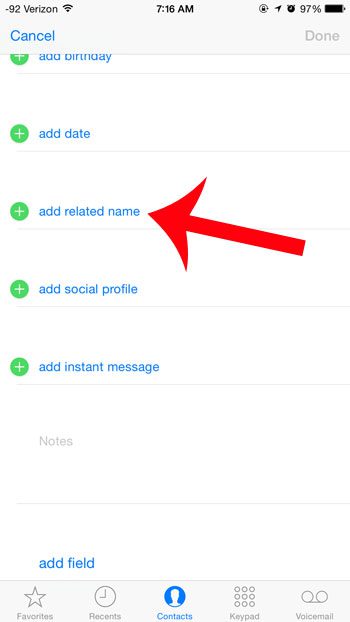
Step 6: Select the mother option.
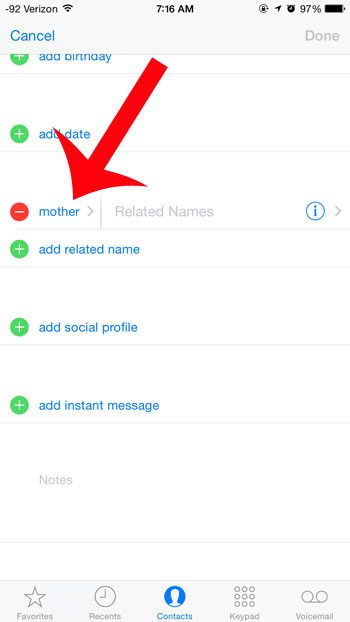
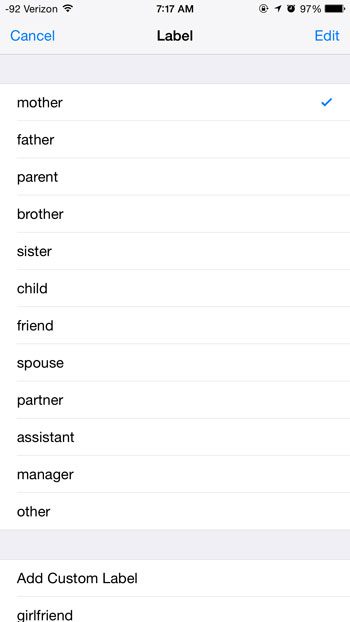
Step 7: Select the type of relationship that you want to define.
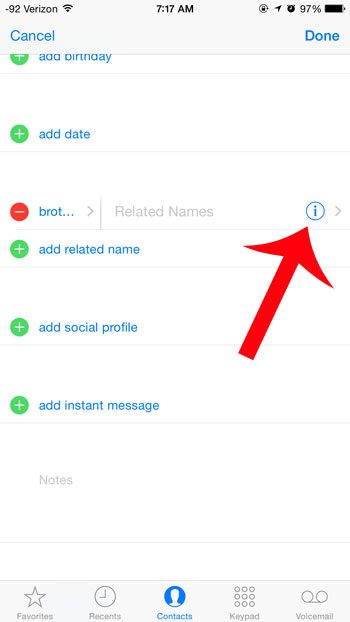
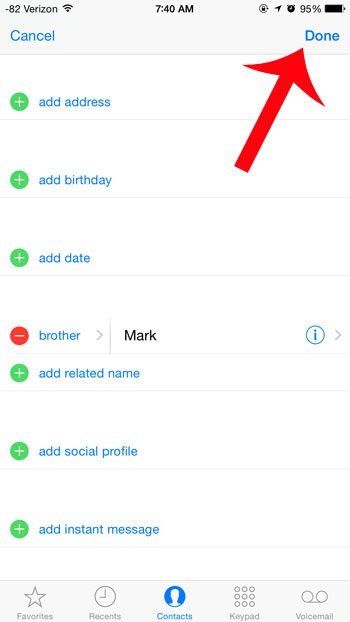
Step 8: Tap the blue i button to the right of Related Names.
Step 9: Select the contact that you want to assign as that relationship type.
Step 10: Tap the blue Done button at the top-right corner of the screen.
Now that you know how to add relationship to iPhone contacts you can continue going through your contacts and adding more related names so that you have other ways to command Siri to perform various actions.
Our blue clock on iPhone tutorial can provide information on why you might be seeing blue shading around the time on your iPhone.
You will then be able to use Siri to send text messages or make phone calls to that relationship by saying “call my brother” or “text my brother,” but replacing “brother” with whichever relationship type you just defined.
If this is not working for you, then you may not have identified yourself to Siri yet. You can do this by going to Settings > General > Siri > My Info and selecting yourself from the list of contacts.
Would you prefer that the Siri voice was a different gender? This article will show you how to change it.

Matthew Burleigh has been writing tech tutorials since 2008. His writing has appeared on dozens of different websites and been read over 50 million times.
After receiving his Bachelor’s and Master’s degrees in Computer Science he spent several years working in IT management for small businesses. However, he now works full time writing content online and creating websites.
His main writing topics include iPhones, Microsoft Office, Google Apps, Android, and Photoshop, but he has also written about many other tech topics as well.