There are a lot of different ways to use Microsoft Outlook but, if you receive a lot of emails to a particular account, you might have set up some additional folders where you move certain types of emails.
Whether this is done manually or with the help of an Outlook rule, this type of organization can make it easier to keep track of your correspondence.
But your folders might not be very descriptive or, at worst, misleading. One way that you can correct this issue is to start renaming some of those folders.
Our guide below will show you a short series of steps that you can use to change the name of a folder in Outlook 2013.
How to Change the Name of a Folder in Outlook 2013
The steps in this article are going to show you how to change the name of a folder in Outlook 2013.
Step 1: Launch Outlook 2013.
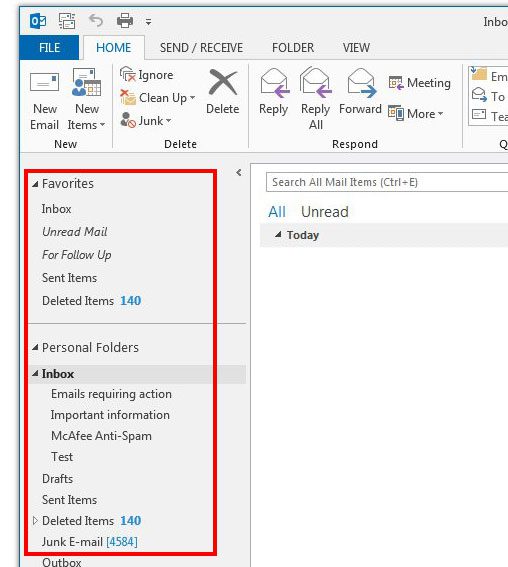
Step 2: Locate the folder for which you would like to change the name in the column at the left side of the window.

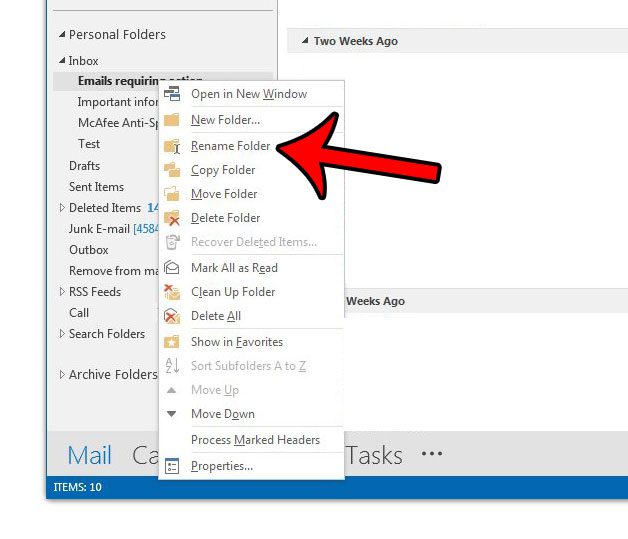
Step 3: Right-click the folder, then click the Rename Folder option.

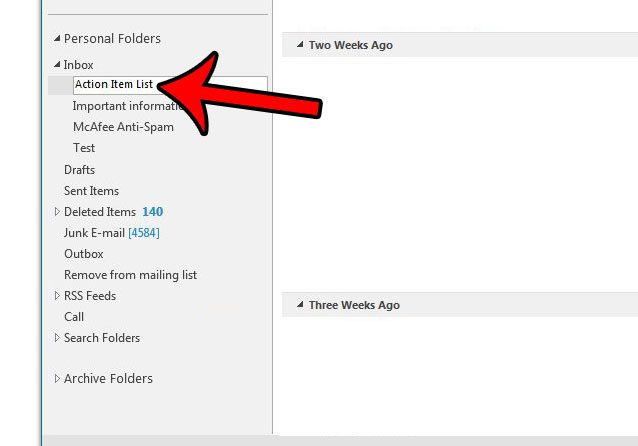
Step 4: Type the new name for the folder, then press the Enter key on your keyboard.

Now that you know how to rename a folder in Outlook 2013, you can use these steps to make your folders much easier to identify in the futrue.
Would you like Outlook to start in a different folder than the one it’s currently using? This article will show you how to adjust that setting.

Matthew Burleigh has been writing tech tutorials since 2008. His writing has appeared on dozens of different websites and been read over 50 million times.
After receiving his Bachelor’s and Master’s degrees in Computer Science he spent several years working in IT management for small businesses. However, he now works full time writing content online and creating websites.
His main writing topics include iPhones, Microsoft Office, Google Apps, Android, and Photoshop, but he has also written about many other tech topics as well.