While Microsoft Word is a very popular program and most people have a way to open the files that it creates, there are still many instances where someone either prefers a PDF, or can only view a PDF.
It used to be somewhat complicated to convert a Word .doc or .docx file to the PDF format, but Microsoft now includes a way to do it from directly within the program. Check out the tutorial below to learn how you can start saving your files as PDFs in Word 2013.
See also
- How to insert a check mark in Microsoft Word
- How to do small caps in Microsoft Word
- How to center text in Microsoft Word
- How to merge cells in Microsoft Word tables
- How to insert a square root symbol in Microsoft Word
How to Save a Word 2013 Document as a PDF
The PDF file format offers many advantages over other types of file formats, namely that changes to the document will leave an electronic footprint, and that the file can be viewed identically on a number of different systems, in a number of different applications. If you are working with someone that is specifically requesting a PDF file, then it is likely to be for one of these reasons.
Step 1: Open the document that you want to save as a PDF in Word 2013.
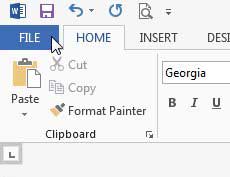
Step 2: Click the File tab at the top-left corner of the window.
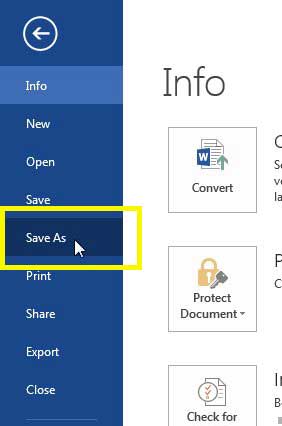
Step 3: Click the Save As option in the column at the left side of the window.
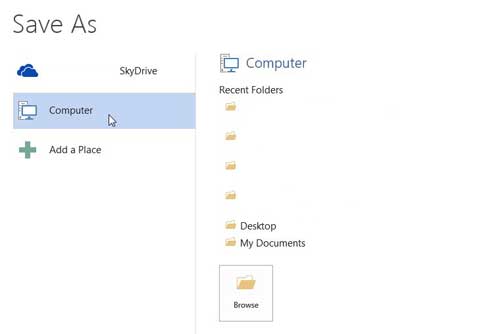
Step 4: Select the location to which you want to save the file.
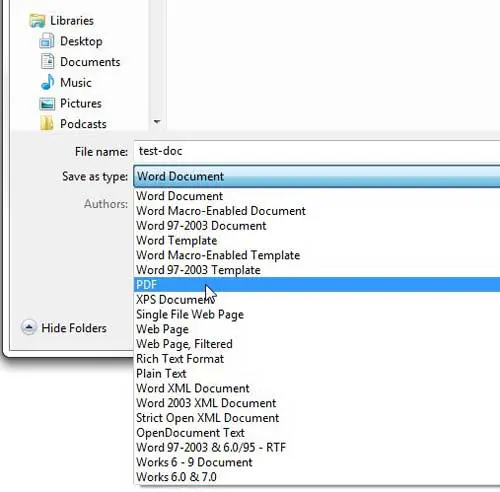
Step 5: Click the drop-down menu to the right of File Type, then select the PDF option.
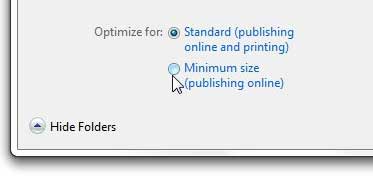
Step 6: Enter a name for the file into the File Name field, then select either the Standard or Minimum size option to the right of Optimize for.
Step 7: Click the Save button to create and save your PDF file.
If you want to start creating native PDF files and editing ones that are sent to you, consider purchasing Adobe Acrobat. Click here to learn more about it.
Are you numbering pages in your document, but you want to skip the first page? Click here to learn how.

Matthew Burleigh has been writing tech tutorials since 2008. His writing has appeared on dozens of different websites and been read over 50 million times.
After receiving his Bachelor’s and Master’s degrees in Computer Science he spent several years working in IT management for small businesses. However, he now works full time writing content online and creating websites.
His main writing topics include iPhones, Microsoft Office, Google Apps, Android, and Photoshop, but he has also written about many other tech topics as well.