Newer iPhone models like the iPhone 13 have more storage than earlier models, so many of the storage issues that existed on those devices are less of a problem now.
This means that you can comfortably download more songs or videos than you could before.
But you still might not have enough room to accommodate all of the apps and media that you want, so it becomes necessary to start getting rid of some files.
Our tutorial continues with more on how to remove downloaded music from iPhone 13.
How to Delete All of the Apple Music Songs on Your iPhone
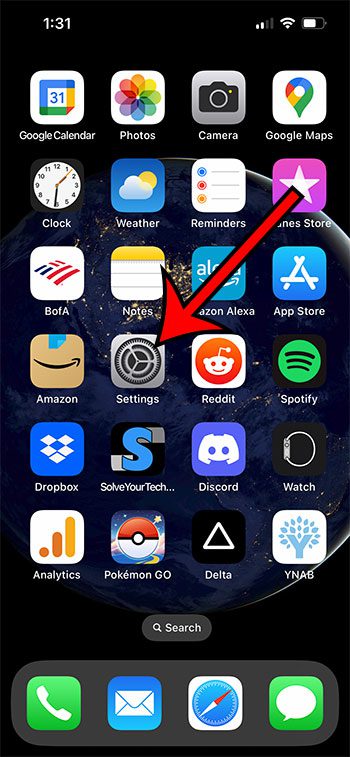
- Open Settings.
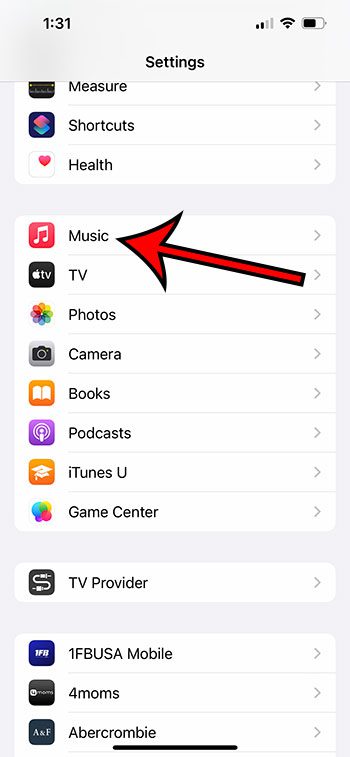
- Choose Music.
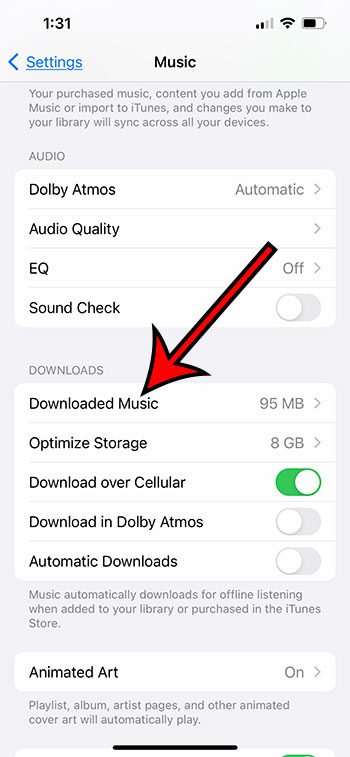
- Select Downloaded Music.
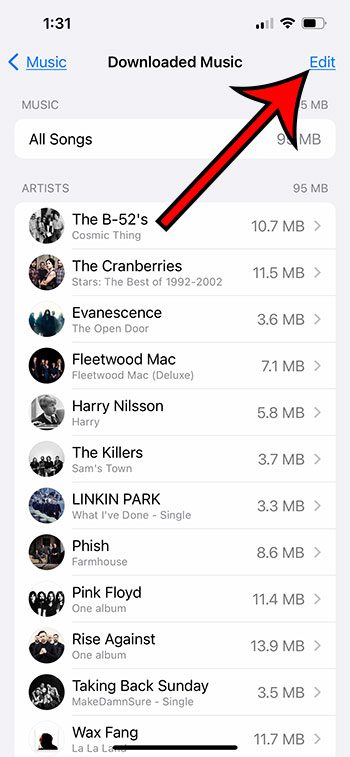
- Touch Edit.
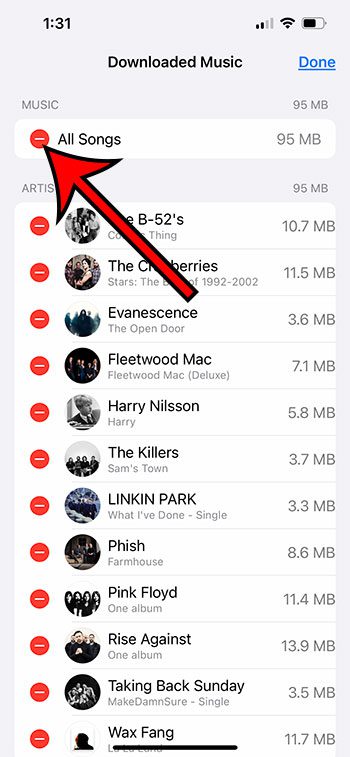
- Tap the red circle next to All Songs.
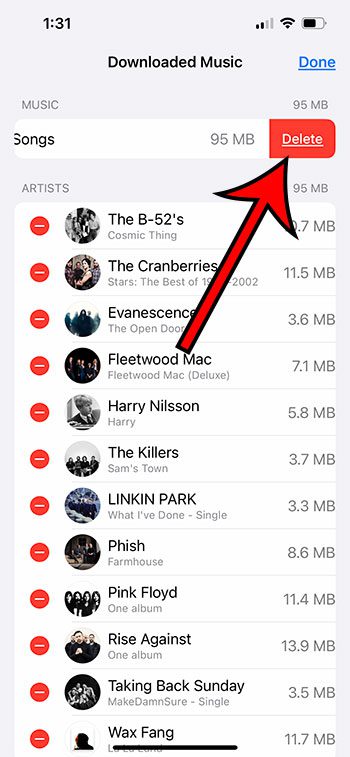
- Choose Delete.
Our guide continues below with additional information on how to remove downloaded music from iPhone 13, including pictures of these steps.
When you are trying to free up storage space so that you can update iOS or download a new app, removing media files like pictures or songs is typically one of the most efficient ways to do it.
If you have a lot of songs in the Music app on your iPhone, then that could certainly be one of the places that you go to first.
But deleting individual songs in the music app can be slow, so you might be looking for another way to just remove everything.
The next section of this article will walk you through that process.
Related: Our complete guide to deleting items on an iPhone can show you some other ways to free up storage on your device.
How to Get Rid of Every Downloaded Song in the iPhone Music App
The steps in this article were performed on an iPhone 13 in the iOS 16 operating system.
Step 1: Find the Settings app on your Home screen and select it.
Step 2: Scroll down and select the Music option.
Step 3: Tap the Downloaded Music option in the Downloads section of the menu.
Step 4: Select the Edit button at the top-right corner of the screen.
Step 5: Touch the red circle with the line in it to the left of All Songs.
Step 6: Tap the Delete button to remove all of the songs from your device.
Now that you know how to remove downloaded music from iPhone 13, you will be able to do this anytime you want to delete all of the songs that are saved locally to your device.
Related: How to Find My Downloads History in Google Chrome
How to Remove an Individual Downloaded Song from an iPhone 13
While the rest of this article has focused on deleting everything from the Music app, you might prefer to get rid of a couple of specific songs instead.
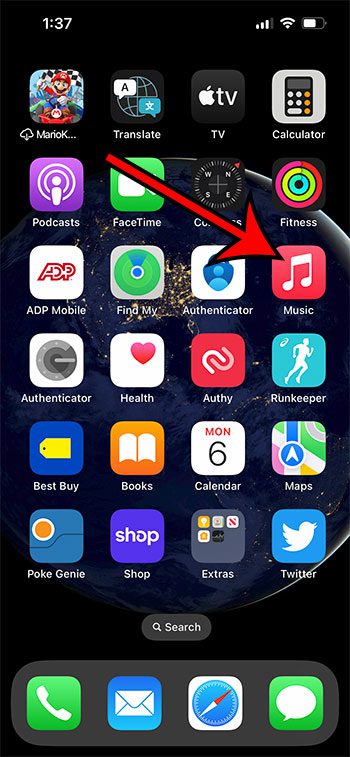
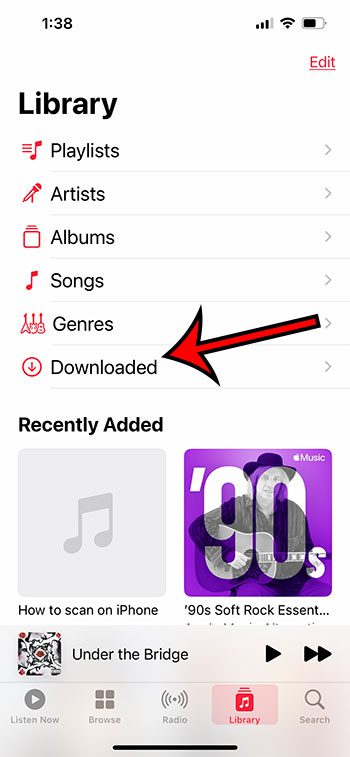
Step 1: Open the Music app.
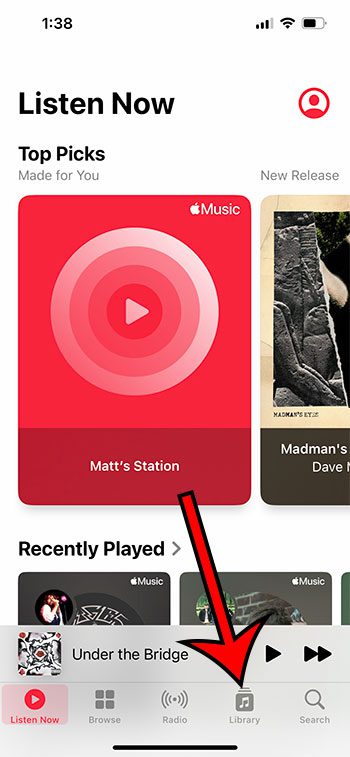
Step 2: Choose the Library tab.
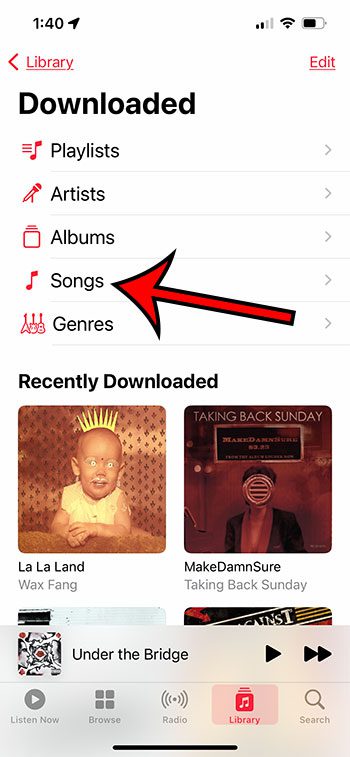
Step 3: Select Downloaded.
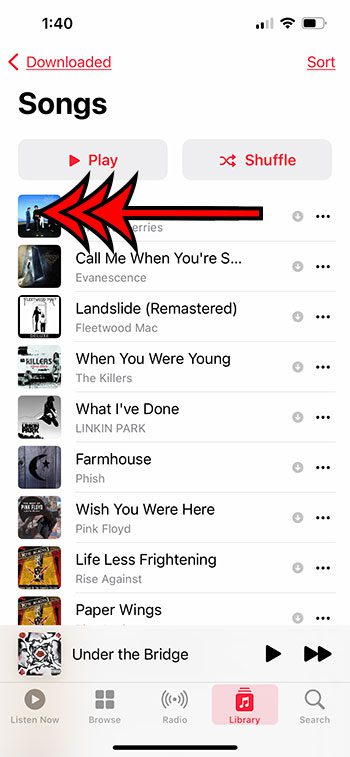
Step 4: Choose Songs.
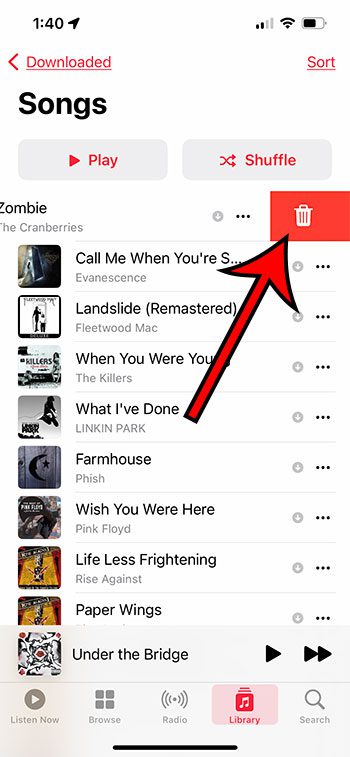
Step 5: Swipe left on a song to delete.
Step 6: Tap the trash can icon.
The next section covers some additional information about this topic, including how you can delete music downloaded to the Spotify app.
More Information on Deleting Music from an iPhone
Note that deleting all of your downloaded music won’t prevent you from listening to it. You will still be able to search for and stream that music in the app. You just won’t be able to listen to it if you have a really bad Internet connection or no Internet connection at all.
On a similar note, you can always redownload music that you own in the Music app by searching for it, then tapping the cloud icon next to it.
There is also a “Purchased” option on the “More” tab in the iTunes Store, where you will be able to see all of the songs that you have purchased with your Apple ID.
Additionally, you can only download music from iTunes for one Apple ID on an Iphone at the same time. This means that if you download songs from one Apple ID, then sign out and try to download from another Apple ID, you won’t be able to keep songs from both IDs on the same device.
Deleting all of the music in the steps above isn’t going to remove downloaded songs from other music streaming apps like Spotify. You will need to also complete the steps that are specific to deleting songs in that app.
For example, if you want to delete all music downloads in Spotify, you need to go to Spotify > Home > tap the gear icon > Storage > Remove all downloads.
You may clear up storage on your iPhone by deleting music, or you can do it to get rid of tracks you don’t listen to anymore. You can remove music from your iPhone in a number of methods, including through the Music app, iTunes, and third-party applications.
Using the Music app is one of the simplest ways to remove music from your iPhone. Follow these instructions to erase music from the Music app:
- Launch the iPhone’s Music app.
- At the bottom of the screen, tap the “Songs” tab.
- Swipe left on one of the songs you want to remove.
- On the right side of the screen, click the “Delete” button.
Using iTunes is a different technique to remove music from your iPhone. Use iTunes to erase songs by doing the following steps:
- Your PC and iPhone should be connected.
- On your PC, launch iTunes.
- In the left sidebar, select the “Music” tab.
- Click on the music or songs you want to remove after finding them.
- Press your keyboard’s “Delete” key.
- In order to confirm that you wish to remove the chosen music, click “Delete Song” when requested.
Using third-party software might be more convenient if you have a sizable music library on your iPhone or if you wish to remove several songs at once. There are various choices that you can select from, although many of them will have a price tag. You may use these tools to manage playlists, transfer music between your iPhone and computer, erase music from your iPhone, and more.
The Music app, iTunes, or third-party apps can all be used to easily delete music from your iPhone. You can either remove songs you no longer listen to from your collection or free up storage space by using the approach that best suits your needs.

Matthew Burleigh has been writing tech tutorials since 2008. His writing has appeared on dozens of different websites and been read over 50 million times.
After receiving his Bachelor’s and Master’s degrees in Computer Science he spent several years working in IT management for small businesses. However, he now works full time writing content online and creating websites.
His main writing topics include iPhones, Microsoft Office, Google Apps, Android, and Photoshop, but he has also written about many other tech topics as well.
