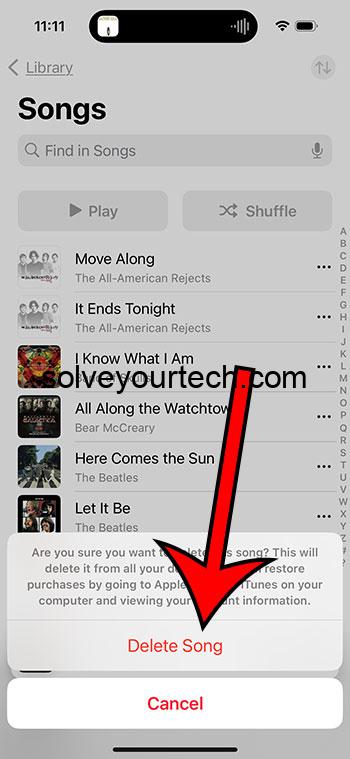
You can remove a song from your iPhone by going to Music > Library > Songs > swiping to the left on the song > tapping the trash can > selecting Delete Song.
Learning how to delete songs on an iPhone 5 is an important piece of knowledge to have for anyone who puts song files on their device.
There are several reasons that you might decide to delete music from your iPhone 5.
If you have a song that keeps coming up on shuffle that you no longer want to listen to, or if you need to delete some songs to free up space on your device, then you will inevitably find the need to delete a song.
However, this employs a touch screen technique that you may not have had a need for yet on your iPhone, making it difficult to selectively delete songs.
Fortunately, however, it is possible to delete individual songs from your iPhone by following the steps outlined below.
Click here if your iPhone is using iOS 7 to go directly to that part of the article.
iOS 17 – How to Delete an iPhone Song
The steps in this section were performed on an iPhone 15 in the iOS 17 operating system.
Step 1: Open the Music app.
Step 2: Choose the Library tab.
Step 3: Select Songs.
Step 4: Find the song to delete, then swipe left on it.
Step 5: Touch the trash can icon.
Step 6: Tap the Delete Song button to confirm that you wish to delete the song from all of your devices.
The next sections discuss how to perform this action in some other versions of the iOS operating system.
iOS 10 – How to Delete Songs on an iPhone
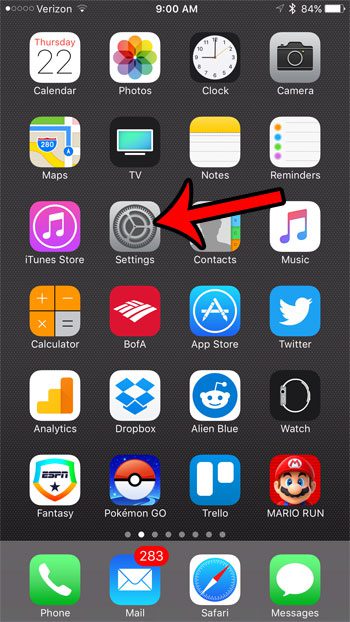
The steps below are going to show you how to delete an individual song from your iPhone by going through the Settings app.
Step 1: Open the Settings menu.
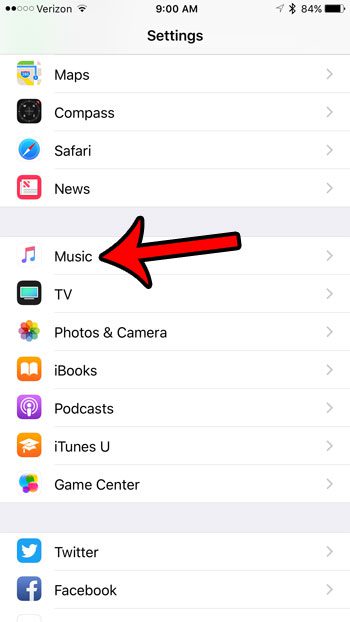
Step 2: Scroll down and select the Music option.
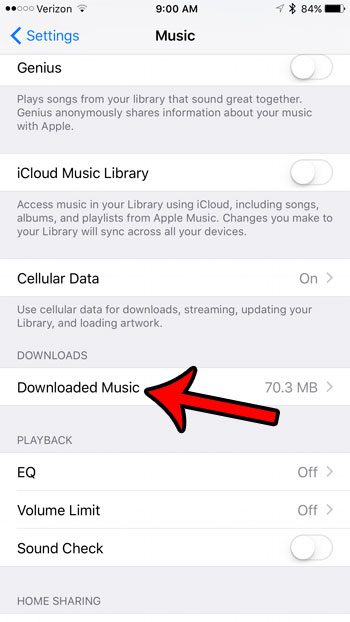
Step 3: Scroll down and tap the Downloaded Music option.
Step 4: Select the artist whose song you wish to delete.
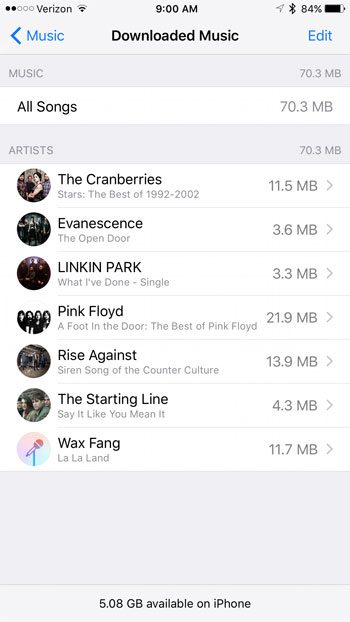
Step 5: Select the album.
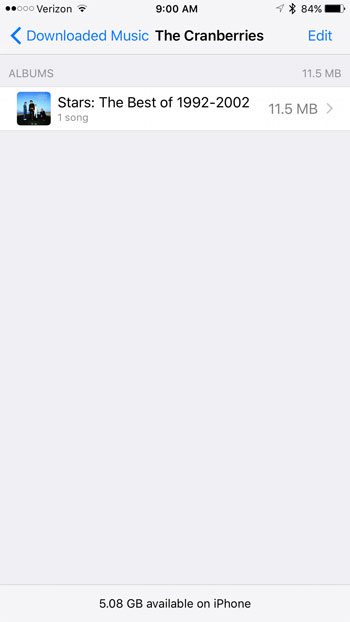
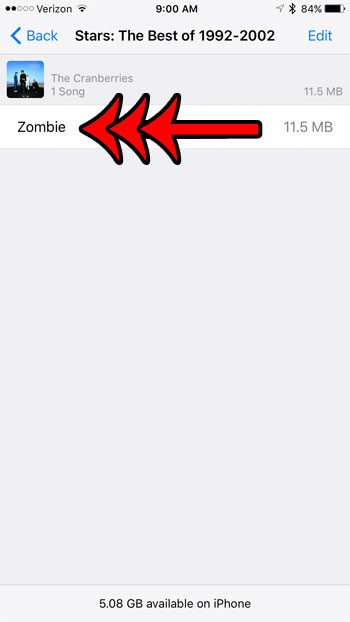
Step 6: Swipe left on the song you wish to delete.
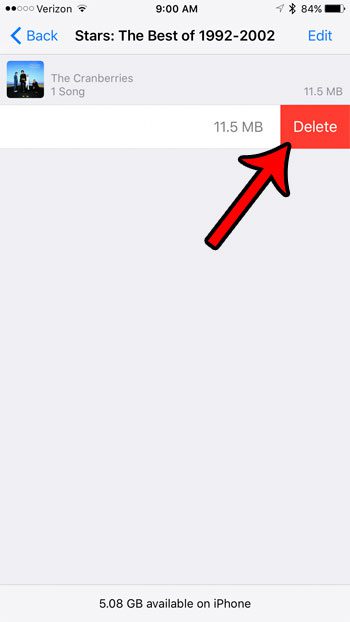
Step 7: Tap the red Delete button.
How to Delete Songs on the iPhone 5 in iOS 7
If you are familiar with deleting songs on your iPhone 5 from iOS 6, which we describe in this article, then this is a pretty similar process. One difference, however, is that the Music app in iOS 7 also includes songs from the cloud, which you may not have downloaded to your device. The difference is indicated in the image below.
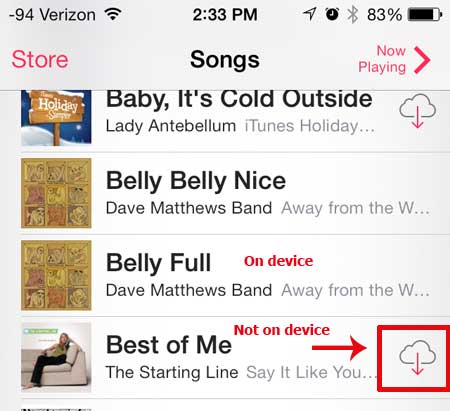
Songs with the cloud icon are not on your device, but songs without the cloud icon are on your device. You can only delete songs that are on your device, not songs that are currently located in the cloud. I know that I was attempting to delete some of my cloud songs before I noticed the difference. So, with that in mind, you can follow the steps outlined below to learn how to delete a song from your iPhone 5 if you have updated to iOS 7.
Step 1: Touch the Music icon.
Step 2: Select the Songs option at the bottom of the screen.

Step 3: Locate the song that you want to delete (remember the distinction between songs on your device and songs in the cloud mentioned above).

Step 4: Swipe from right to left on the name of the song you want to delete, which will reveal something similar to the screen below.
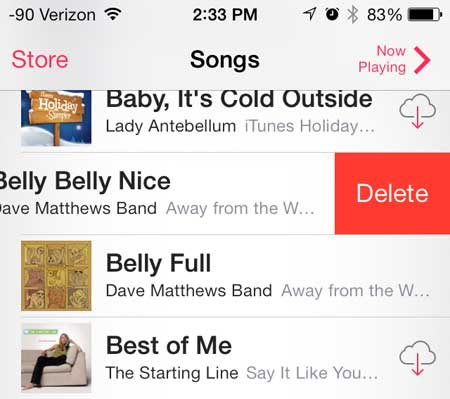
Step 5: Touch the Delete button to delete the song from your device.

Note that if this was a song that you purchased from iTunes, it will remain on this list if you decide to stream it or download it again in the future.
Now that you know how to delete songs on an iPhone 5, you can use these steps to remove any unwanted songs from the device.
There is now a flashlight on your iPhone 5, which is a very useful feature. Learn how to use the flashlight in iOS 7 by reading this article.

Matthew Burleigh has been writing tech tutorials since 2008. His writing has appeared on dozens of different websites and been read over 50 million times.
After receiving his Bachelor’s and Master’s degrees in Computer Science he spent several years working in IT management for small businesses. However, he now works full time writing content online and creating websites.
His main writing topics include iPhones, Microsoft Office, Google Apps, Android, and Photoshop, but he has also written about many other tech topics as well.
