When working with data in a spreadsheet, it’s very common to adjust the rows or columns within that spreadsheet. We don’t always know the exact layout of our data, and the need for additional rows or columns can often arise.
You may already be familiar with how to add a column to your spreadsheet in Google Sheets when you’re on a computer, but what if you are using the Google Sheets app on your iPhone?
The method for performing certain tasks on the iPhone app is a little different due to the layout of the application. The iPhone has limited buttons and ways to interact with your data, which means that some actions are a little tougher to find.
Our guide below is going to show you how to add a new column to your existing spreadsheet if you need to include a column amidst data that already exists in the spreadsheet.
How to Add a Column to a Spreadsheet in the Google Docs Mobile iPhone App
The steps in this article were performed on an iPhone 11 in iOS 13.5.1. I am using the most current version of the Google Sheets app that was available when this article was written.
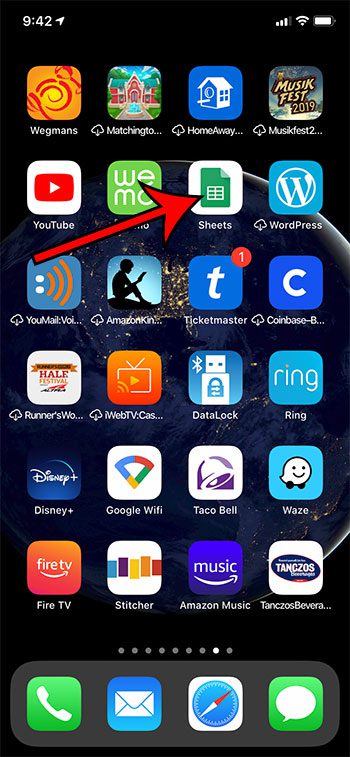
Step 1: Open the Google Sheets app.

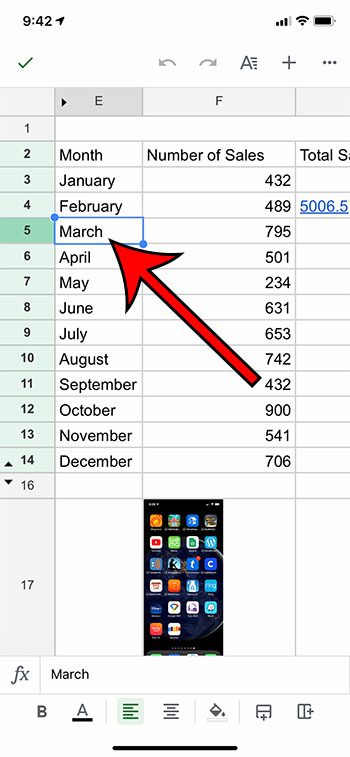
Step 2: Select the Sheets file to edit.
Step 3: Touch a cell in the column to the left of where you wish to add the new column.

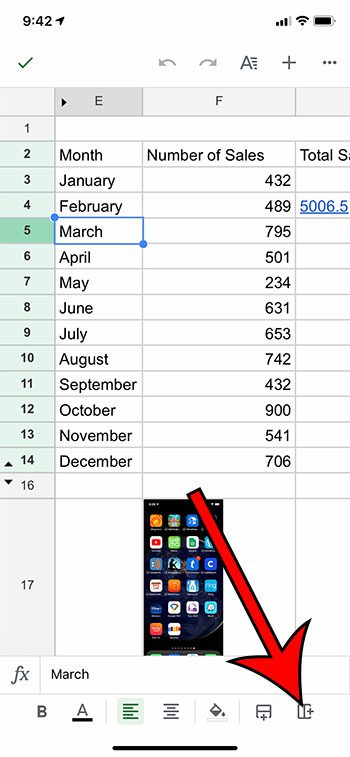
Step 4: Tap on the Insert Column button at the bottom-right corner of the screen.

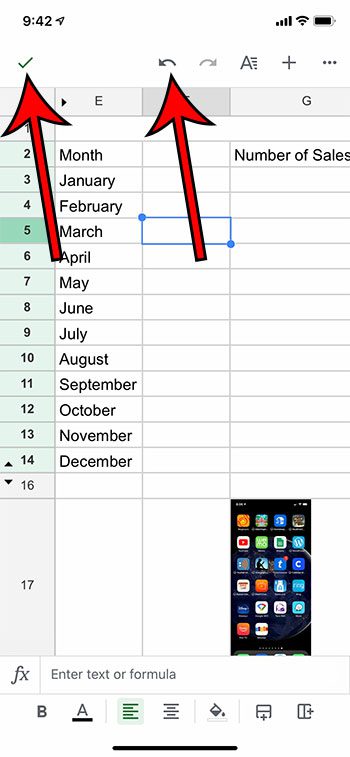
You can tap on the green check mark at the top-left of the screen when you’re finished. There is also a left-facing arrow at the top of the screen that you can touch if you would like to undo the column insertion.

Continue Reading
- How to merge cells in Google Sheets
- How to wrap text in Google Sheets
- How to alphabetize in Google Sheets
- How to subtract in Google Sheets
- How to change row height in Google Sheets

Matthew Burleigh has been writing tech tutorials since 2008. His writing has appeared on dozens of different websites and been read over 50 million times.
After receiving his Bachelor’s and Master’s degrees in Computer Science he spent several years working in IT management for small businesses. However, he now works full time writing content online and creating websites.
His main writing topics include iPhones, Microsoft Office, Google Apps, Android, and Photoshop, but he has also written about many other tech topics as well.