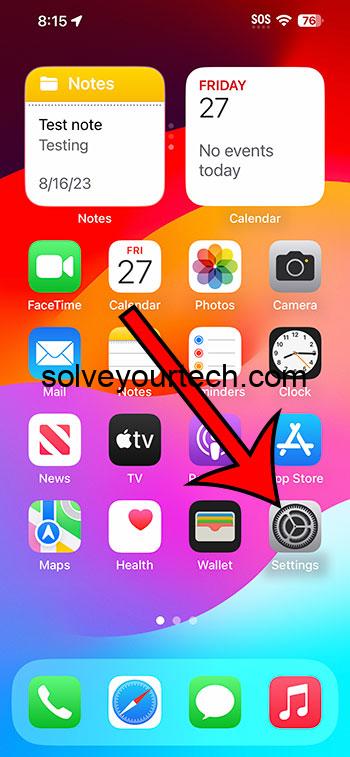
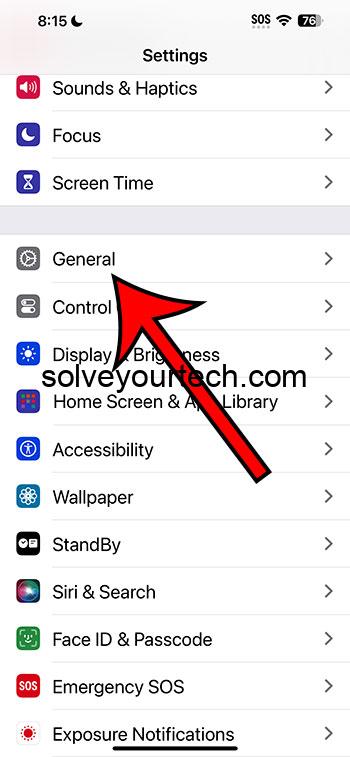
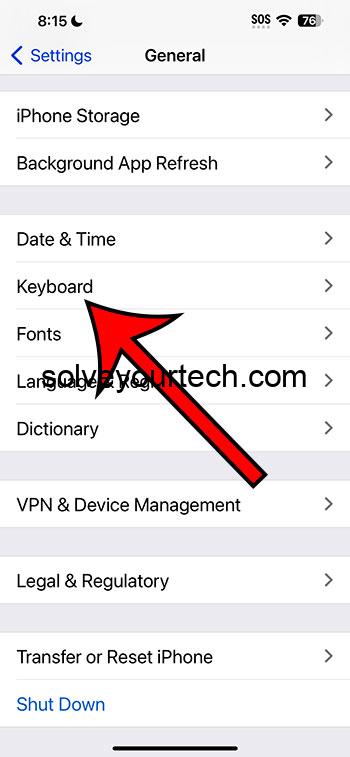
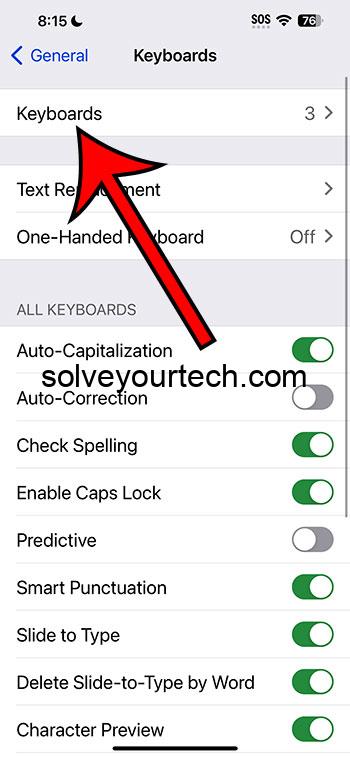
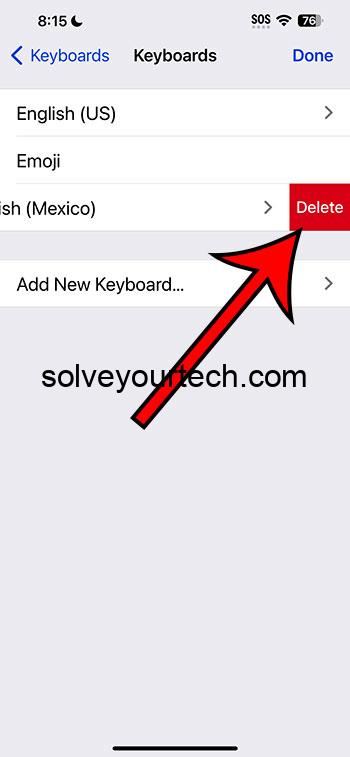
To delete a keyboard on iPhone 14, navigate to Settings > General > Keyboard > Keyboards. Here, you’ll see a list of all the keyboards you’ve installed. Swipe left on the keyboard you want to delete, tap “Delete,” and voilà! You’ve successfully removed the keyboard from your iPhone. This is a straightforward process that can be done in a matter of seconds.
Once you have completed these steps, the selected keyboard will be removed from your iPhone 14, and you will not be able to use it for typing anymore. You can always reinstall the keyboard later if you change your mind.
You can also check out this video about how to delete a keyboard on an iPhone for more on this topic.
Introduction
Are you fed up with that extra keyboard you installed on your iPhone 14? Perhaps it’s a third-party keyboard that’s been giving you grief, or maybe you’ve got too many keyboards and you just need to simplify things a bit. Whatever the reason, deleting a keyboard from your iPhone 14 is a simple and quick process. In this article, I’ll guide you through each step so you can get back to a clutter-free typing experience in no time!
Related: How to Reset the Keyboard on iPhone 11
The Process of Deleting a Keyboard
Step 1: Unlock your iPhone and Open Settings
First things first, you need to unlock your iPhone and locate the Settings app. This is usually found on your home screen, and it’s represented by a gear icon. It’s the control center of your iPhone, where all the magic happens.
Step 2: Navigate to the Keyboard Settings
Once you’re in Settings, scroll down and find “General.” Tap on it to open up a new menu.
In here, locate and select “Keyboard.” This is where all your keyboard settings are tucked away.
Step 3: Access the Keyboards List
Inside the Keyboard settings, you will see an option labeled “Keyboards.” This shows you how many keyboards are currently installed on your device. Tap on it to view the list of all your installed keyboards.
Step 4: Swipe to Delete
Now, find the keyboard you want to get rid of. Once you’ve got it in your sights, swipe left on the keyboard’s name. You should see a red “Delete” button appear on the right. Go ahead and tap “Delete,” and the keyboard will be removed from your device.
Step 5: Confirm and Exit
After tapping “Delete,” the keyboard will be instantly removed from your list. You can confirm that it’s gone by checking that it no longer appears in your list of keyboards. Once you’ve done that, you can exit out of Settings, and you’re all done!
Why Delete a Keyboard?
You might be wondering, why would someone want to delete a keyboard from their iPhone? Well, there are plenty of reasons! Maybe the keyboard was great at first but then it started glitching or freezing. Or perhaps it’s a third-party keyboard that you no longer trust. Some people just like to keep their iPhone as simple as possible, and getting rid of extra keyboards can help achieve that.
Pros of Deleting a Keyboard
- Free Up Space: Keyboards, especially third-party ones, can take up a surprising amount of space on your device.
- Simplify Your Typing Experience: Too many keyboards can make switching between them cumbersome.
- Enhance Performance: Some third-party keyboards can affect your iPhone’s performance. Deleting them can help your device run smoother.
- Increase Security: Removing third-party keyboards can also reduce the risk of any potential security issues.
Cons of Deleting a Keyboard
- Loss of Unique Features: Some keyboards come with cool and unique features that you might miss.
- Time-Consuming to Reinstall: If you decide you want the keyboard back, you’ll have to go through the process of reinstalling it.
- Adjustment Period: You might have gotten used to the keyboard you’re deleting, so it could take some time to adjust back to the default one.
Video About Deleting an iPhone Keyboard
Additional Information
When you delete a third-party keyboard from your iPhone, it’s completely removed from your device, and it won’t collect or store any of your typing data. If it’s an Apple keyboard (like the emoji keyboard or a different language keyboard), it’s just removed from your active keyboards list but not entirely deleted from your iPhone.
A Recap of the Steps
- Unlock your iPhone and open Settings.
- Scroll down to “General” and select “Keyboard.”
- Tap on “Keyboards” to see a list of all installed keyboards.
- Swipe left on the keyboard you want to delete and tap “Delete.”
- Confirm that the keyboard has been removed and exit Settings.
FAQs
Q1: Can I delete the default iPhone keyboard?
No, the default iPhone keyboard cannot be deleted.
Q2: Will deleting a keyboard also delete the app associated with it?
If the keyboard came with a separate app, you would need to delete that app separately.
Q3: Can I reinstall a keyboard after deleting it?
Yes, you can always reinstall a keyboard from the App Store if you change your mind later.
Q4: Is it safe to use third-party keyboards?
While many third-party keyboards are safe, it’s crucial to ensure that you download them from reputable developers and sources.
Q5: Will deleting a keyboard delete all my settings and preferences for that keyboard?
Yes, deleting a keyboard will remove all associated settings and preferences.
Conclusion
Deleting a keyboard from your iPhone 14 is a straightforward process that can help simplify your typing experience, free up space, and increase your device’s performance. Whether you’re looking to get rid of a glitchy third-party keyboard or just wanting to declutter, following the steps outlined in this guide will have you keyboard-free in no time. Remember, you can always reinstall the keyboard later if you change your mind.

Matthew Burleigh has been writing tech tutorials since 2008. His writing has appeared on dozens of different websites and been read over 50 million times.
After receiving his Bachelor’s and Master’s degrees in Computer Science he spent several years working in IT management for small businesses. However, he now works full time writing content online and creating websites.
His main writing topics include iPhones, Microsoft Office, Google Apps, Android, and Photoshop, but he has also written about many other tech topics as well.
