Creating and editing files in Powerpoint 2010 provides you with a lot of ways to customize the content and appearance of your slideshows.
But once you have finished creating your presentation you might be looking for an easier way to distribute it.
Presentations that are sent in the Powerpoint file format can be easily edited (which may not be ideal if the presentation is finalized), and some people may not be able to view them if they do not have compatible software on their computer.
Fortunately, Powerpoint 2010 has an option that allows you to save your file in the PDF file format.
Most computers will have a program installed on them that are capable of opening and viewing the PDF files, and many of the people that you work with may even prefer to receive files as PDFs.
Our tutorial below will show you the steps that you will need to take to convert your Powerpoint file to a PDF file.
For additional information on converting Powerpoint files, our how to save a Powerpoint as a PDF with notes guide can answer other questions you may have.
Saving a .ppt or .pptx File as a PDF in Powerpoint 2010
The steps in this article will not rely on any additional printing applications or add-ons to save your Powerpoint file as a PDF. It will use the built-in functionality that is included with every installed copy of Powerpoint 2010.
Note that these steps will create a new copy of your Powerpoint file, just in the PDF file format. This means that you will have the original file in the Powerpoint file format, plus a new file in the PDF file format.
Step 1: Open your Powerpoint file in Powerpoint 2010.
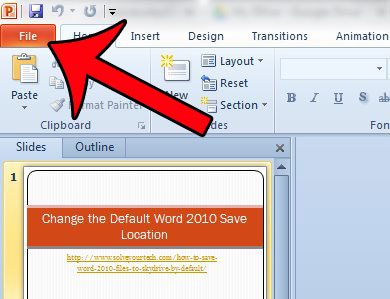
Step 2: Click the File tab at the top-left corner of the window.
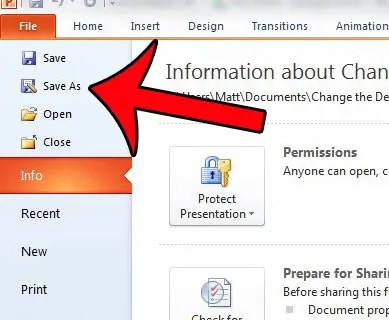
Step 3: Click the Save As option in the column at the left side of the window.
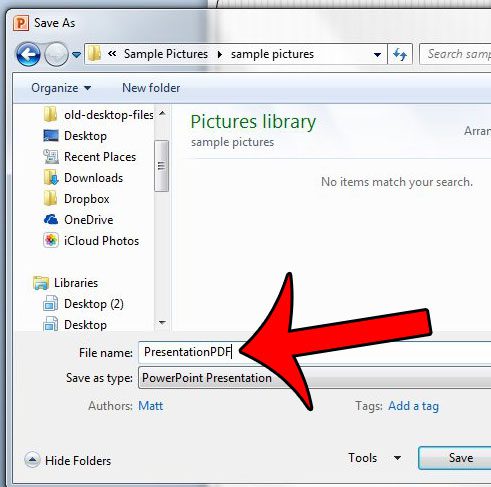
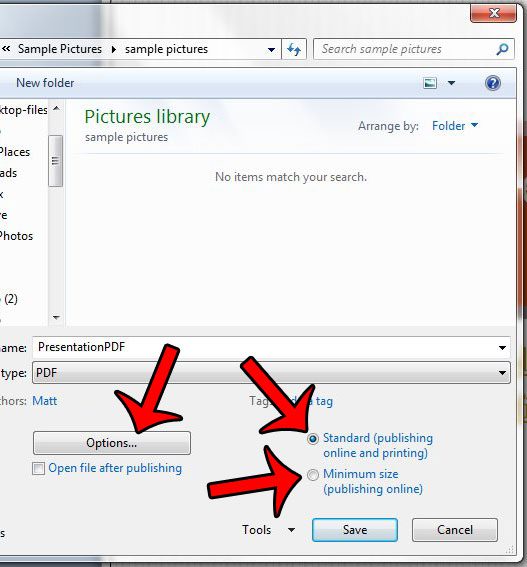
Step 4: Click inside the File name field, then enter a name for the PDF file that you are about to create.
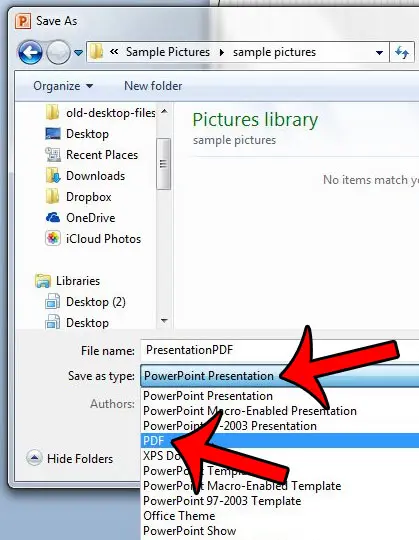
Step 5: Click the drop-down menu to the right of Save as type, then click the PDF option from the list.
Step 6: Select either the Standard option or the Minimum size option, depending upon your needs. If you have a very large Powerpoint file that you will be sending through email, then you may wish to select the Minimum size option. If you wish to make any further customizations, click the Options button. If not, you can skip to Step 8.
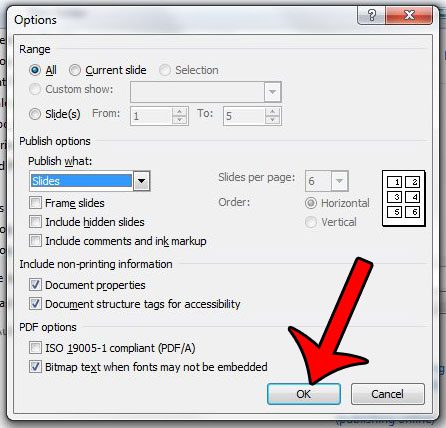
Step 7 (optional): Make any additional changes to the PDF file that you are about to create, then click the OK button.
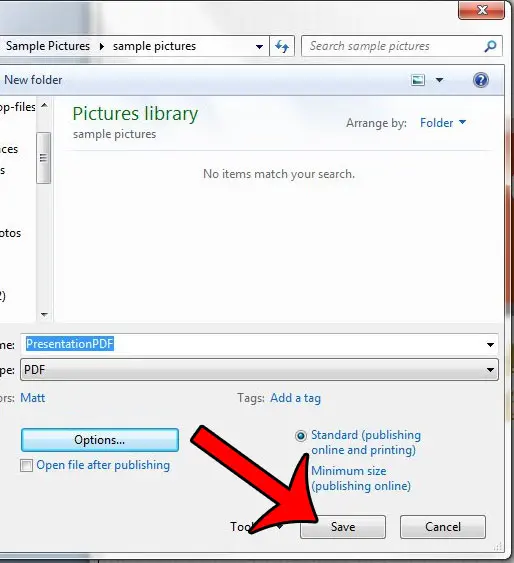
Step 8: Click the Save button to create your PDF file.
Do you have multiple Powerpoint presentations that you would like to combine into one file? This article will show you how.

Matthew Burleigh has been writing tech tutorials since 2008. His writing has appeared on dozens of different websites and been read over 50 million times.
After receiving his Bachelor’s and Master’s degrees in Computer Science he spent several years working in IT management for small businesses. However, he now works full time writing content online and creating websites.
His main writing topics include iPhones, Microsoft Office, Google Apps, Android, and Photoshop, but he has also written about many other tech topics as well.