Slideshows in Microsoft Powerpoint usually do a better job of keeping an audience’s attention when they contain media.
This could be something like a picture or video, but it could also include data.
One good way to present data is in a table. Our tutorial below will show you how to insert a table in Powerpoint 2013 by following a short series of steps.
Once you have the table in a slide you will be able to add data to it, as well as change its appearance.
How to Create a Table in Powerpoint 2013
- Open your presentation.
- Choose a slide.
- Click Insert.
- Select Table, then the number of rows and columns.
Our guide continues below with additional information on how to insert a table in Powerpoint 2013, including pictures of these steps.
A Powerpoint slideshow is a type of document that is meant to be shown to an audience to convey a piece of information.
While many presentations will simply focus on presenting this information as efficiently as possible, you may find that you need to take additional steps to present data that can’t be listed as a bullet point or in a text box.
One effective way to do this is through the use of the table, which you can create and add to your slides directly from the Powerpoint application.
The tutorial in this article will show you how to create and insert a table into a slide in your presentation so that you can present a set of data as a table.
Once the table has been created, you can even modify its appearance to make it more visually appealing.
If you also work on slideshows in Google Slides, then check out our guide on how to add bullet points in Google Slides for a useful way to format lists in slides.
How to Add a Table to a Powerpoint Slide (Guide with Pictures)
The steps below will show you how to add a table directly to a slide in your Powerpoint 2013 presentation.
Once you have inserted the table, you will be able to utilize the Table Tools menu at the top of the window to modify the appearance of the table, and you can also use the handles on the border of the table to adjust its’ size.
Step 1: Open the Powerpoint presentation to which you want to add the table.
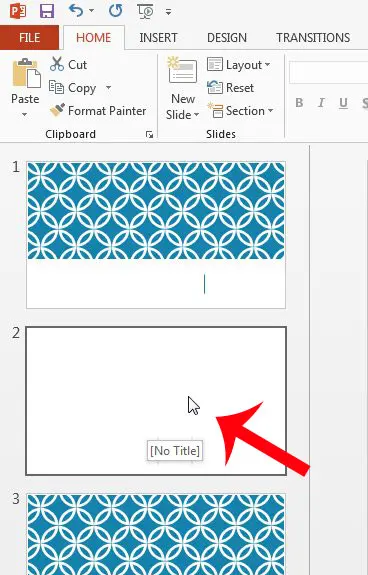
Step 2: Select the slide where the table will be inserted.

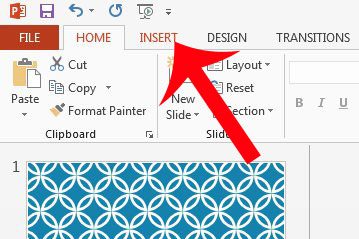
Step 3: Click the Insert tab at the top of the window.

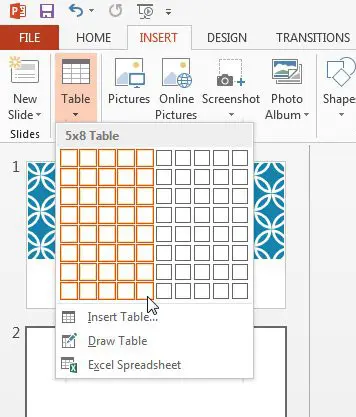
Step 4: Click the Table button in the navigational ribbon at the top of the window, then select the dimensions for the table.

Now that you have completed the steps on how to insert a table in Powerpoint, you might find that you need to adjust some layout or formatting options for that table.
Note that there are also options on this Tabeledropdown menu to draw a table or to insert a table from an excel spreadsheet.
As mentioned earlier, there will now be a Table Tools tab at the top of the window, with Design and Layout tabs underneath it. You can use the options on these tabs to modify the appearance of the table.

Is there a slide in your presentation that you want to use in a different document? Save a Powerpoint slide as a picture so that it can be used in any program that is compatible with JPEG images.

Matthew Burleigh has been writing tech tutorials since 2008. His writing has appeared on dozens of different websites and been read over 50 million times.
After receiving his Bachelor’s and Master’s degrees in Computer Science he spent several years working in IT management for small businesses. However, he now works full time writing content online and creating websites.
His main writing topics include iPhones, Microsoft Office, Google Apps, Android, and Photoshop, but he has also written about many other tech topics as well.