It’s very easy to take a picture with your iPhone 5’s camera, and almost as easy to send that picture through a text message or in an email.
But if you’ve taken a picture that you need to use on a computer or another device, you might think that this requires you to sync your iPhone 5 with iTunes, or to email the picture to yourself.
While these are certainly good solutions, there is an even simpler option if you have a Dropbox account and take a few minutes to install their app and configure it.
So continue reading below to learn how to automatically upload pictures from your iPhone 5 to your Dropbox account.
You don’t have to use an app or cloud storage for your iPhone pictures. Read this guide and find out how to move your photos to your Windows computer.
Use the Camera Upload Feature on the iPhone 5 Dropbox app
Throughout this website there are a lot of screenshots that were taken on an iPhone or an iPad. All of these images were uploaded to a Dropbox account, where they could be accessed from a computer with the Dropbox app installed on it.
Moving files around on devices with Dropbox is extremely easy, and takes away any need for physical device connection for this purpose. So if you have a Dropbox account (if you don’t, you can sign up for one here) and want to start using it to store your iPhone 5 pictures, you can follow the steps below to turn on the Camera Upload feature in the iPhone 5 Dropbox app.
Step 1: Launch the Dropbox app on your iPhone 5. If you do not already have the app, you can download it from the App Store, then enter your Dropbox email address and password.
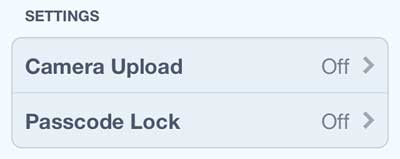
Step 2: Tap the Settings icon at the bottom of the screen. It’s the gear icon circled below.
Step 3: Select the Camera Upload option.
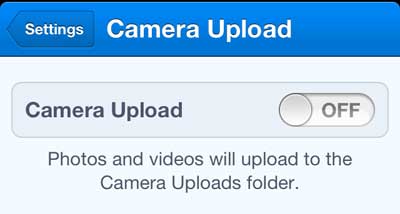
Step 4: Move the Camera Upload option to the On position. If you’ve never enabled the camera upload on another device or on a computer, then this will create a Camera Uploads folder in your Dropbox account, which is where the uploaded pictures will be stored.
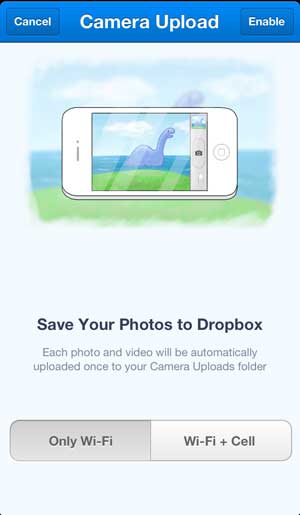
Step 5: Choose whether to use only Wi-Fi or a combination of Wi-Fi and cellular to upload your pictures. The correct choice here is entirely based upon your data plan with your cellular provider and the frequency with which you think you will be uploading pictures. The best bet is probably to choose the Wi-Fi only option, as you can always come back to the Camera Upload screen and elect to use Cellular Data as well.
Now, whenever you launch the Dropbox app, it will automatically upload the pictures you have taken since the last time you uploaded. If you take a lot of pictures it is best to do this with some frequency, or you could find yourself in a situation where you need to upload a large number of pictures at once.
We have also written about how to set this up on the iPad as well.
You can also save images that you have received as picture messages to your Dropbox account, too.
If you’re looking for a simple but useful gift, consider Amazon gift cards. You can use your own images to customize how the gift card looks, and you can even send a video gift card.

Matthew Burleigh has been writing tech tutorials since 2008. His writing has appeared on dozens of different websites and been read over 50 million times.
After receiving his Bachelor’s and Master’s degrees in Computer Science he spent several years working in IT management for small businesses. However, he now works full time writing content online and creating websites.
His main writing topics include iPhones, Microsoft Office, Google Apps, Android, and Photoshop, but he has also written about many other tech topics as well.


