You can set a picture from your camera roll as a contact picture in iOS 9.
A contact picture is an image that is associated with a single contact on your iPhone, and will appear alongside that contact in several places, such as next to text message conversations in the Messages app.
So if you have seen someone else that had set pictures for their iPhone contacts, then you may be wondering how to do it for your iPhone as well.
Our guide below will show you how to select a contact and associate a picture on your iPhone with that contact.
These steps were written on an iPhone 6 Plus in iOS 9, but will work for many other iPhone models and iOS versions as well.
Here is how to set a picture for a contact in iOS 9 –
- Open the Phone app.
- Select the Contacts option at the bottom of the screen.
- Select the contact for whom you would like to set a picture.
- Tap the Edit button at the top-right corner of the screen.
- Tap the Add photo button at the top-left of the screen.
- Select the Choose Photo option.
- Select the album containing the picture you want to use for the contact.
- Select the picture.
- Adjust the picture as needed, then tap the Choose button.
- Tap Done at the top-right corner of the screen to complete the process.
These steps are also shown below with images –
Step 1: Tap the Phone icon.

Step 2: Tap Contacts at the bottom of the screen. Note that you can also get to this screen directly by opening the Contacts app. Click here if you have are having trouble finding the Contacts app.

Step 3: Find and select the contact for whom you would like to set a contact photo.
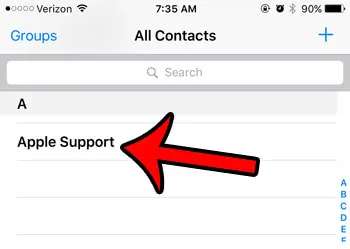
Step 4: Tap the blue Edit button at the top-right of the screen.
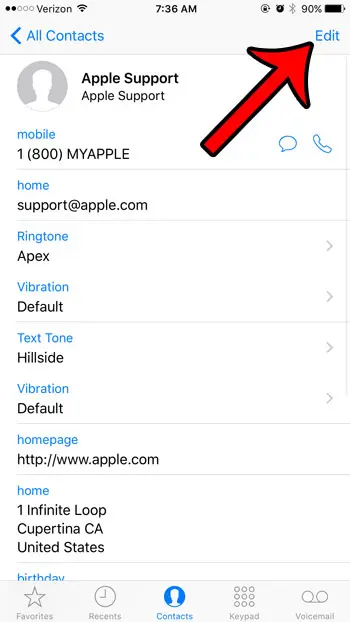
Step 5: Touch the Add photo button at the top-left of the screen.

Step 6: Tap the Choose Photo button to select a picture that is on your iPhone. You can alternately select the Take Photo button if you would like o use your iPhone camera to take a new picture right now. Click here to learn how to download a picture from a Web page to your iPhone.
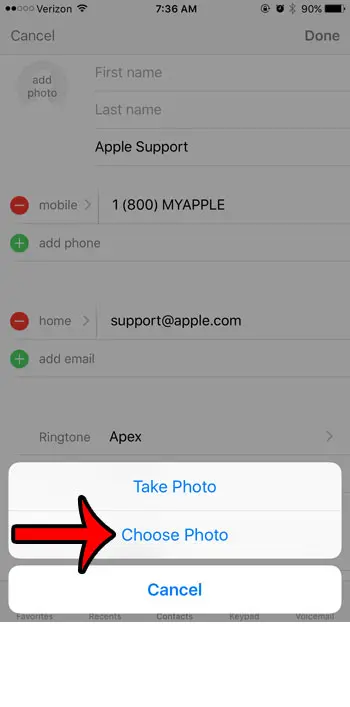
Step 7: Select the album containing the picture you want to use.
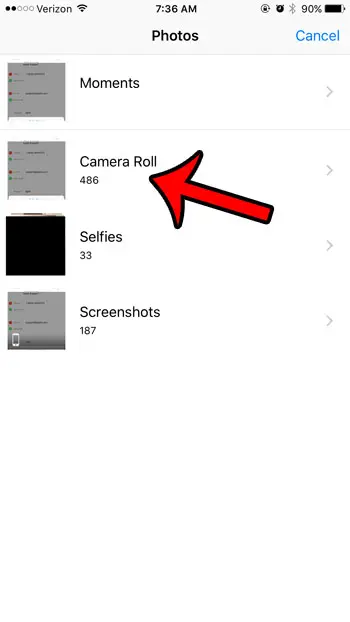
Step 8: Select the picture to use.
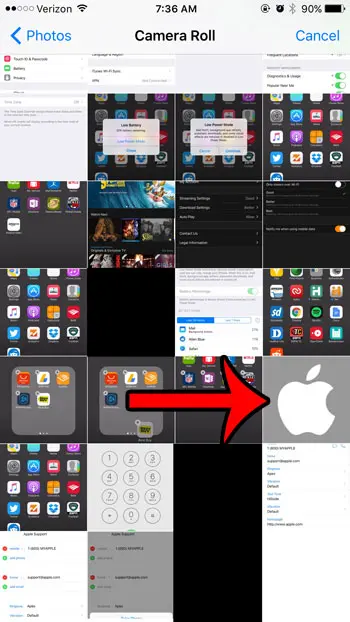
Step 9: Move the picture until the part that you want to use is located inside the circle, then touch the Choose button.

Step 10: Touch the blue Done button at the top-right of the screen to complete the process.

Now that you know how to add a contact picture in iOS 9, you can start to see those images in the various locations on the device where they can appear.
If you decide later that you don’t want to use a picture, or if you want to change it to something else, then you can use these steps to delete an iPhone contact picture.

Matthew Burleigh has been writing tech tutorials since 2008. His writing has appeared on dozens of different websites and been read over 50 million times.
After receiving his Bachelor’s and Master’s degrees in Computer Science he spent several years working in IT management for small businesses. However, he now works full time writing content online and creating websites.
His main writing topics include iPhones, Microsoft Office, Google Apps, Android, and Photoshop, but he has also written about many other tech topics as well.