Multi-column Microsoft Word documents are helpful in many word processing scenarios. Unfortunately, due to the combination of formatting that is put in place by Microsoft Word and the columns, navigating them can be a bit of a headache.
Until you make changes to the way that formatting is displayed on your page, you will not see the formatting marks on the page, so you will not know where the next column starts.
If your layout ideas hinge upon having complete control over which content appears in which column, this can make for a difficult editing session.
Luckily you can insert a column break into your Word column at any time, which allows you to dictate the point in your document where Word will start a new column.
Insert a Column Break in Word 2010
Regardless of the number of columns that are in your document, the column break will move your cursor to the top of the next column and the next key you press will display in that location.
The column break sits at the bottom of your column like any other document object, and you cannot add anything below it.
However, you can add content above the column break, which will push the column down. This is a helpful fact to know if you determine that you need to add something to one of your earlier columns and are worried how it will affect the rest of your document.
Begin the process of adding a column break to your Word 2010 document by double-clicking the document to open it in Microsoft Word 2010.
Note that this document will already need to be formatted with columns if the column break is to work.
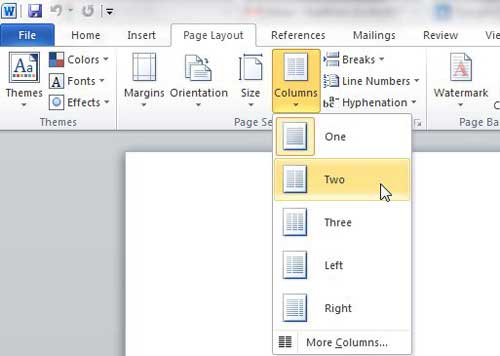
If you do not already have columns, you can add the formatting by clicking the Page Layout tab at the top of the window, clicking the Columns drop-down menu in the Page Setup section of the ribbon, then choosing the number of columns you want in your document.
Navigate to the point in your document where you want to start another column.
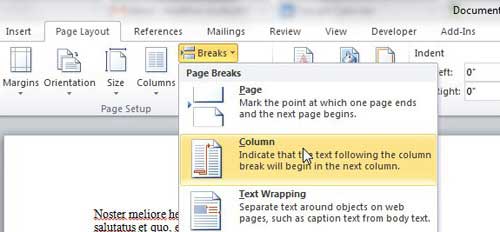
Click the Breaks drop-down menu in the Page Setup section of the ribbon, then click the Column option.
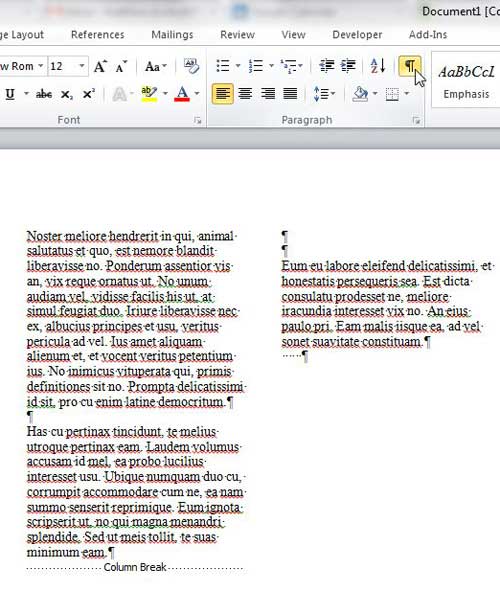
Any text after your chosen break point will be displayed in the next column, as will any additional typing that you do after the column break insertion point. To gain a better visual grasp on where your column break is located, you can click the Home tab at the top of the window, then click the Show/Hide button in the Paragraph section of the ribbon.
This displays all of the paragraph marks and formatting symbols that are normally hidden in your document, including any column breaks that you might have inserted.

Matthew Burleigh has been writing tech tutorials since 2008. His writing has appeared on dozens of different websites and been read over 50 million times.
After receiving his Bachelor’s and Master’s degrees in Computer Science he spent several years working in IT management for small businesses. However, he now works full time writing content online and creating websites.
His main writing topics include iPhones, Microsoft Office, Google Apps, Android, and Photoshop, but he has also written about many other tech topics as well.


