To name a version in Google Docs, click the Last edit (clock) icon at the top right to open version history, pick a version, click the three dots (More) next to it, and choose Name this version. Named versions do not get merged with others, so they are easy to find later. You can add up to 40 named versions per document.
These steps come from Google’s help page on version history, checked in October 2026. They work in Google Docs on a computer, and the same steps apply in Sheets and Slides.
How to Name or Rename a Version in Google Docs
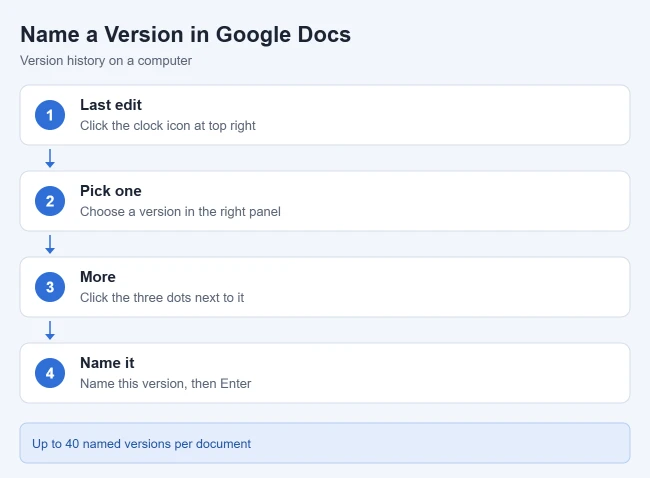
- Open your document in Google Docs on a computer. Result: the document is open.
- Click the Last edit icon at the top right. You can also click File > Version history > See version history. Result: the version history panel opens on the right.
- In the right panel, click the version you want to name. Result: that version shows, with changes highlighted.
- Click the three dots (More) next to it. Result: a menu opens.
- Click Name this version. Result: a name box appears.
- Type a name and press Enter. Result: the version now shows your name in the list.
To rename a version later, follow the same steps; the menu lets you change the existing name. Good names describe the moment, like “Draft sent to client” or “Final, approved June 3.”
Why Name Versions?
Google merges some revisions over time, which can make older edits hard to find. Naming a version keeps it from being merged. Google also lets you keep up to 15 named versions per spreadsheet in Sheets.
Tip: Spot Recent Changes
Hover over the Last edit icon to see who last changed the file and when. A blue dot on the icon means someone updated the file since you last viewed it.
How to Show Only Named Versions
At the top of the version history panel, turn on Only show named versions. The list then shows just the versions you named, which is handy for long documents with many edits.
How to Restore or Copy an Old Version
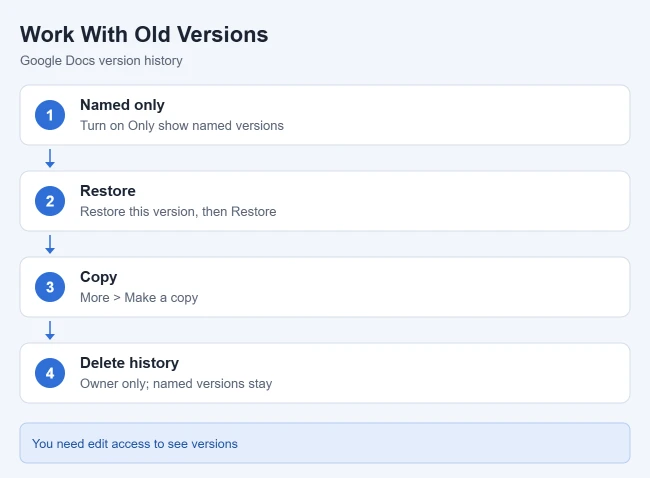
- Open version history and click the version you want. Result: the old version shows.
- Click Restore this version at the top, then Restore. Result: the document goes back to that version.
To keep the current document and get a separate copy of the old one, click the three dots next to the version and choose Make a copy. Enter a name, choose where to save it, and optionally check Share it with the same people. For Sheets, see how to restore an older version in Google Sheets.
How to Delete Version History
Only the file owner can do this, and Google warns it is permanent. Named versions are kept either way.
- Delete all unnamed versions: in the version history panel, click More (three dots) at the top, choose Delete history, then Delete forever.
- Delete older versions: click More next to a version and choose Delete this and older versions, then Delete forever.
See Who Changed a Part of the Document
On some Google Workspace plans (Business Standard and Plus, Enterprise Standard and Plus, and Education Plus), you can select text, right-click, and choose Show editors to see who changed it.
Frequently Asked Questions
Why can I not see version history?
Google says you need edit access to see earlier versions. Ask the owner to make you an Editor.
Why is an older version missing?
Google says revisions are sometimes merged. Naming important versions prevents that.
Does naming a version change the document?
No. It only adds a label in version history.
Related Guides
- How to switch viewing modes in Google Docs
- How to stop sharing a Google Docs file
- How to delete a Google Doc

Matthew Burleigh has been writing tech tutorials since 2008. His writing has appeared on dozens of different websites and been read hundreds of millions of times.
After receiving his Bachelor’s and Master’s degrees in Computer Science he spent several years working in IT management for small businesses. However, he now works full time writing content online and creating websites.
His main writing topics include iPhones, Microsoft Office, Google Apps, Android, and Photoshop, but he has also written about many other tech topics as well.