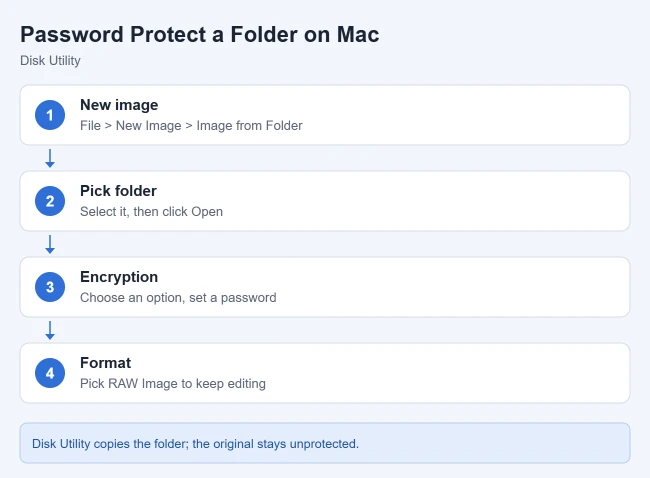
macOS has no setting that puts a password on an ordinary folder, but you can lock a folder’s contents inside an encrypted disk image with the free Disk Utility app. Open Disk Utility, choose File > New Image > Image from Folder, pick the folder, choose an option from the Encryption menu, and set a password.
These steps follow Apple’s Disk Utility guide to creating disk images for macOS 27, the current version, and they work on any Mac, not just a MacBook Air. Older versions of macOS use the same Image from Folder steps, with one image format named differently (noted below).
What You’ll End Up With
- What you end up with: a single file ending in .dmg (a disk image). It holds a copy of your folder. When you double-click it and type the password, it opens like a USB drive. When you eject it, the files are locked again.
- The original folder stays unprotected. Disk Utility copies the folder; it doesn’t lock the folder in place. You’ll delete the original after you test the image.
- Free space: you need enough free space for the copy. Apple notes that an image made from a folder contains only the data, so a folder holding 10 GB makes an image of roughly 10 GB.
- A password you won’t forget. If you lose the password, you can’t open the image or see any of its files. Save it in the Passwords app or another password manager before you start.
How to Password Protect a Folder on a MacBook Air
- Open Disk Utility. It’s in Applications > Utilities, or press Command + Space, type Disk Utility, and press Return. The Disk Utility window opens with your disks in the sidebar.
- In the menu bar, choose File > New Image > Image from Folder. A window opens so you can pick a folder.
- Select the folder you want to protect and click Open (some versions say Choose). A save window appears.
- In Save As, type a name for the image, such as Private Files. Add tags if you like, and choose where to save it, such as Documents.
- Click the Encryption pop-up menu and choose an option. Most Macs offer 128-bit AES and 256-bit AES. Either is strong for personal files; 256-bit is the stronger choice and is a little slower to work with.
- Type a password in Password, type it again in Verify, and click Choose. You return to the save window.
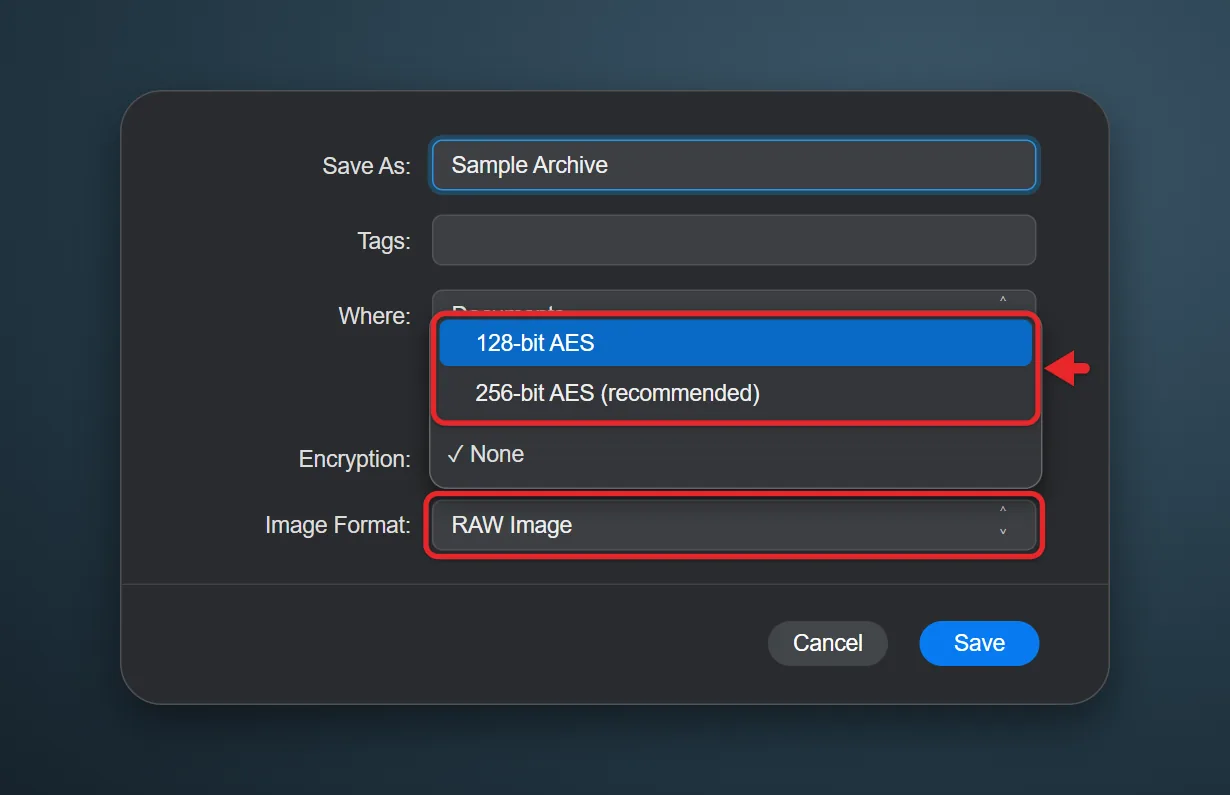
- Click the Image Format pop-up menu and choose RAW Image if you want to add or change files later, or a read-only option if the contents won’t change (see the next section).
- Click Save. A progress bar shows while Disk Utility copies the folder. Large folders can take several minutes.
- Click Done when the window says the operation is complete.
Disk Utility saves the .dmg file where you chose and mounts it, so it appears in the Finder sidebar and, if your Mac shows disks there, on your desktop. If it isn’t on the desktop, you can show drives on the Mac desktop.
Which Image Format to Choose
| Image Format | Can you change files later? | Best for |
|---|---|---|
| RAW Image | Yes | A private folder you keep adding to. Older versions of macOS call this read/write. |
| Read-only image | No | An archive of finished files. It’s fast to create and open. |
| Read-only Compressed | No | Saving space, such as a copy you plan to send or back up. |
Disk Utility also lists DVD/CD master and Hybrid image. Those are for burning discs and working with other systems, so skip them for this task.
Test the Image, Then Delete the Original
Do this before you rely on the image.
- Click the eject button next to the image’s name in the Finder sidebar. The image disappears from the sidebar.
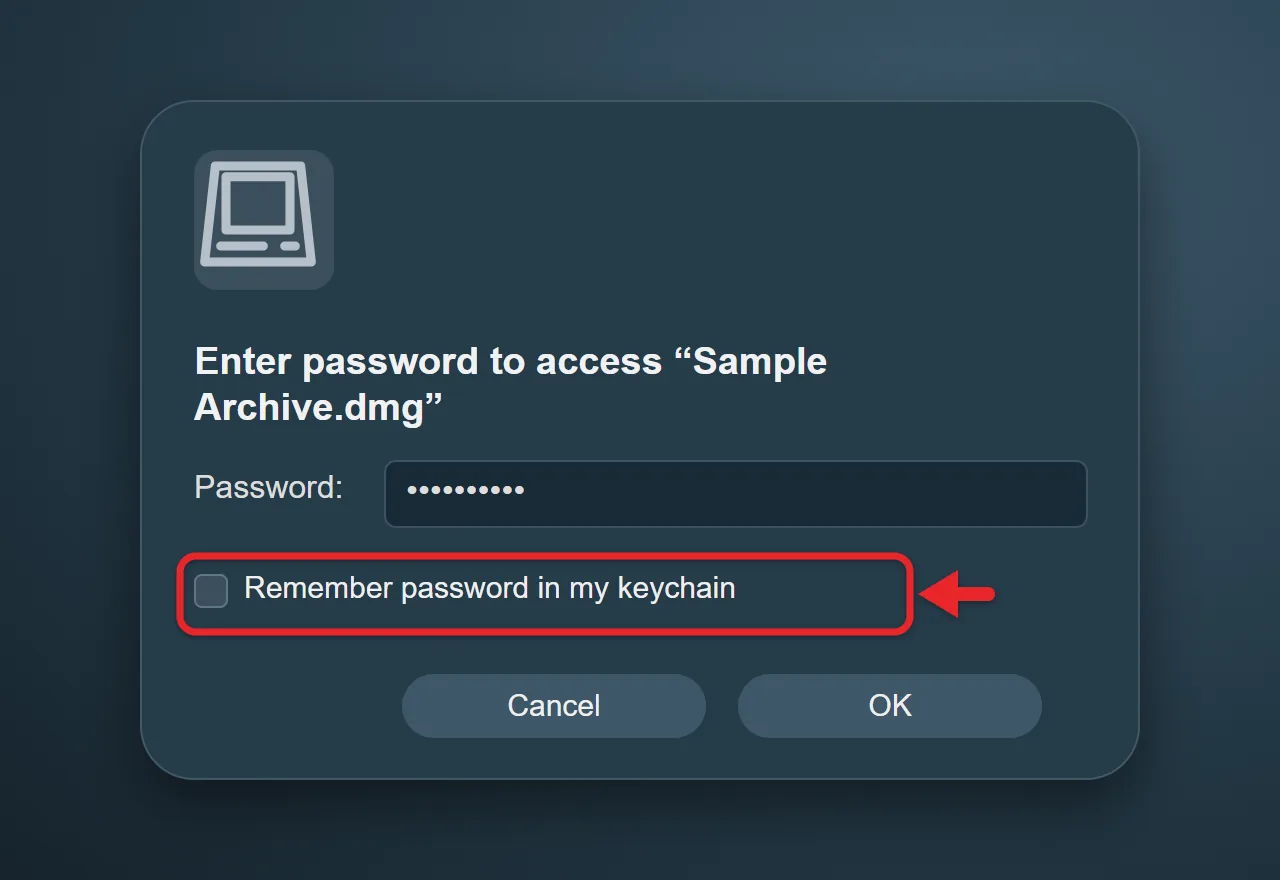
- Double-click the .dmg file. A password window opens.
- Type the password and click OK. Leave the option to remember the password in your keychain turned off. If you save it, anyone who uses your Mac account can open the image without typing anything.
- Open the mounted image and check that every file is there and opens.
- Eject the image again.
- Drag the original folder to the Trash, then choose Finder > Empty Trash. This step keeps the unprotected originals from being recovered from the Trash.
If you use iCloud Drive or another cloud service, also check that the original isn’t still sitting in a synced folder, and that the .dmg is stored where you want it.
How to Open and Lock the Protected Folder
To open it, double-click the .dmg file and enter the password. Its contents appear in Finder like a drive, and you can open files as usual.
To lock it again, eject it: click the eject button next to its name in the Finder sidebar, or drag its desktop icon to the Trash (which turns into an eject symbol). While an encrypted image is open, anyone with access to your Mac can use the files on it, so eject it before you walk away. The image also locks when you restart or shut down the Mac.
How to Add Files Later
If you chose RAW Image, open the image, drag files into its window, then eject it. Files you drag in are copied, so delete the unprotected copies afterward.
An image made from a folder is sized to fit that folder’s contents, so it may not have much free room. If you run out of space:
- Eject the image.
- In Disk Utility, choose Images > Resize, select the .dmg file, and click Choose.
- Enter a larger size and click Resize.
Not every format can be resized. If you made a read-only image, use Images > Convert, select the file, choose RAW Image from the Image Format menu, and save the converted copy. You can also change the encryption from the Encryption menu in the same window.
Other Ways to Protect Files on a Mac
| Method | What it protects | Good to know |
|---|---|---|
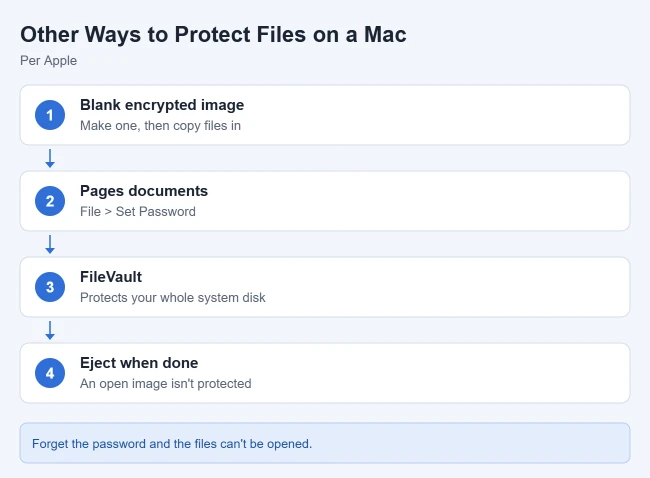
| Blank encrypted image | An empty private “drive” you fill over time | Set the size up front |
| Terminal (hdiutil) | Same as Image from Folder | One command, no menus |
| Locked notes | Individual notes in the Notes app | Not for files or folders |
| Password-protected PDF | One PDF in Preview | Good for sending a single document |
| Password-protected Pages document | One Pages file | Touch ID can open it |
| Encrypted external drive | A whole USB drive | Converts it to APFS |
| FileVault | Your entire Mac’s startup disk | Protects files if the Mac is lost |
Make a Blank Encrypted Image
Use this if you’d rather start with an empty, fixed-size space. In Disk Utility, choose File > New Image > Blank Image. Enter a name and a Size (for example, 5 GB), choose APFS as the Format on Macs with macOS 10.13 or later, choose an Encryption option and password, and choose RAW Image or Sparse Bundle Image as the Image Format. A sparse bundle grows as you add files instead of using the full size right away. Click Save, then copy files into the mounted image.
Use Terminal
If you’re comfortable with Terminal (in Applications > Utilities), this command makes the same kind of encrypted image. Replace the folder path and names with your own:
hdiutil create -srcfolder ~/Documents/Private -encryption AES-256 -volname Private ~/Desktop/Private.dmgTerminal asks you to enter and confirm a password, then saves Private.dmg to your desktop. The zip -er command also makes a password-protected ZIP, but it uses older ZIP encryption that’s much weaker than AES, so use a disk image for anything sensitive.
Lock Notes, PDFs, and Pages Documents
- Notes: select a note, click the More button near the search field, and choose Lock Note. Apple’s Lock your notes guide explains that you can use your login password or a separate one. Notes with attached PDFs, videos, or audio, shared notes, and Quick Notes can’t be locked.
- PDF in Preview: choose File > Export, click Permissions, select Require Password To Open Document, enter the password twice, then click Apply and Save. Give the file a new name if you want to keep an unprotected copy. Apple’s Preview guide has the details.
- Pages: choose File > Set Password. Apple’s Pages guide to password-protecting a document says this encrypts the file, and Macs with Touch ID can open it with a fingerprint.
Encrypt a USB Drive or the Whole Mac
- External drive: in the Finder sidebar, Control-click the drive and choose Encrypt, then create a password. Apple’s encryption guide warns that this converts the drive to APFS, which Macs that can’t use APFS can’t read.
- FileVault: choose Apple menu > System Settings > Privacy & Security > FileVault and turn it on. Apple’s FileVault guide explains how to pick iCloud or a recovery key in case you forget your login password. FileVault protects data if someone takes your Mac, but files are open to anyone using your unlocked account, so it doesn’t replace a protected folder on a shared Mac.
Options That Don’t Actually Protect a Folder
- Get Info > Locked: this checkbox only stops a file or folder from being changed or deleted. It doesn’t ask for a password.
- Hiding the folder: a hidden folder can be shown again by anyone who presses Command + Shift + Period in Finder. It’s not protection. See also how to show hidden files on a Mac to see why hiding is not protection.
- A separate user account: another user can’t browse your home folder, but anyone signed in to your account can. Use an encrypted image for files that need a password every time.
If You Can’t Find Disk Utility
- You can’t find Disk Utility: press Command + Space and type its name, or open Finder and choose Go > Utilities.
- “Not enough space” or the image fails partway: free up room so you have at least as much free space as the folder uses. Start by deleting junk files on your MacBook Air.
- You can’t drag files into the image: it’s a read-only image or it’s full. Convert it or resize it as shown above.
- The image opened without asking for a password: the password was saved in your keychain. Open the Keychain Access app, search for the image’s name, and delete that entry.
- You forgot the password: there’s no reset option and Apple can’t recover it. If you still have the original folder, make a new image with a new password.
Mac Folder Password Questions
Can someone open my protected folder on another Mac?
Only with the password. The encrypted image can be copied, emailed, or stored in the cloud, and it still asks for the password wherever it’s opened. A .dmg file is a Mac format, so Windows PCs can’t open it without extra software.
Should I choose 128-bit or 256-bit AES?
Either is fine for personal files. Choose 256-bit AES for highly sensitive documents; on a modern Mac the speed difference is small.
Can I change the password of the disk image?
Yes. In Disk Utility, choose Images > Convert, select the image, choose an encryption option, and enter a new password. Disk Utility saves a new copy. Check it opens, then delete the old one.
Does this work on any Mac, not just a MacBook Air?
Yes. Disk Utility is on every Mac, including MacBook Pro, iMac, and Mac mini, and the steps are the same.
How is this different from my Mac’s login password?
Your login password protects your whole account. An encrypted image adds a second password just for the files inside it, which helps on a shared Mac or if you leave your Mac signed in. To change your account password, here’s how to change the login password on a MacBook Air.
Using a Windows PC instead? Here’s how to password protect a folder in Windows 11.
More Mac Guides
- How to change the login password on a MacBook Air
- How to free up space on a MacBook Air
- How to change your contact card (My Card) on a Mac
- How to choose when the screen saver turns on for your Mac, and require a password when it ends
Clearing out old files as well? Here’s how to get CleanMyMac from the Mac App Store and what its App Store edition can clean.
Want more protection on public Wi-Fi? Turn on the firewall on your Mac. Because other devices on a network can see what your Mac is called, you may also want to change the computer name on your MacBook Air to something that does not include your full name.

Matthew Burleigh is the founder, head writer, and editor of Solve Your Tech, which he launched in 2012. He has written technology tutorials since 2008 and worked in IT since 2003, including small-business support, IT management, and consulting. He holds Bachelor’s and Master’s degrees in Computer Science from Arizona State University.
Matthew writes practical guides for Windows, iPhone and iPad, Microsoft Office, Outlook, Google apps, and Android. Solve Your Tech’s guides are checked step by step against the device or app maker’s own documentation and tested on his own devices whenever he has the hardware or software, with clear steps, sources, and update dates.
Read more about Matthew and how Solve Your Tech writes and updates its guides, or report a correction.