If you are coming from a different version of Microsoft Word, or if you are used to a different word processor, then the Microsoft Word line spacing may be too big. Use these steps to make document line spacing smaller.
- Open the document in Word.
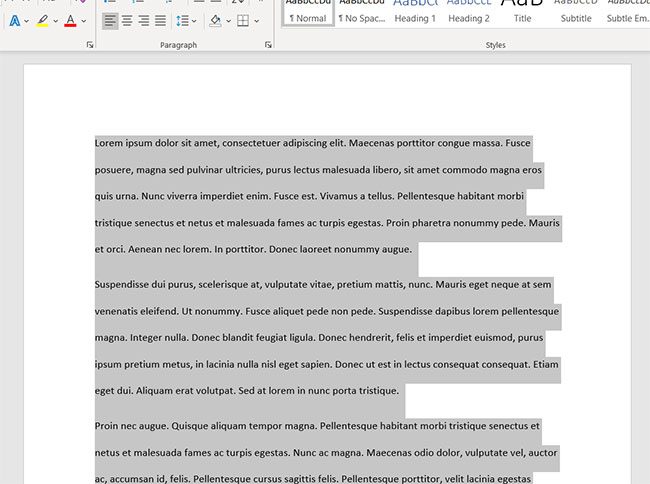
- Click inside the document, then press Ctrl + A to select everything.
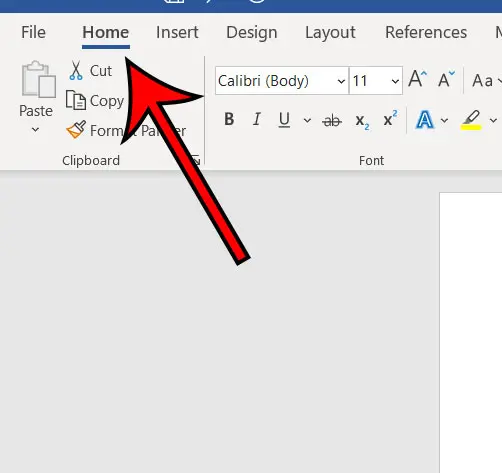
- Click the Home tab.
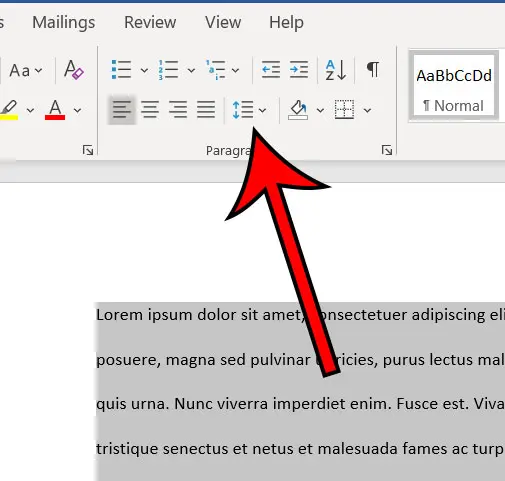
- Select the Line and Paragraph Spacing button.
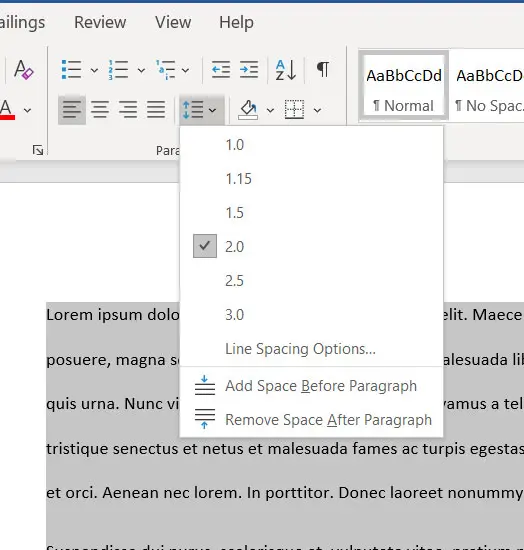
- Choose a smaller line spacing.
This article continues below with additional information and pictures of the steps.
If your school, job, or organization has document formatting requirements, then it’s possible that you will need to make some changes when writing a document in Microsoft Word.
One of the more common changes involves the line spacing. While you might already be familiar with changing line spacing in Google Docs, it can be a bit different in Microsoft’s word processor.
It may seem tedious to change the line spacing in an existing document, but Word has an option that lets you quickly select the entire document, then adjust the line spacing for everything.
Our guide below will show you how to reduce the line spacing for a document in Microsoft Word.
For more information about line spacing in Word documents you can read our how to double space in Word guide.
How to Reduce Line Spacing if Microsoft Word Line Spacing is Too Big
The steps in this article were performed in the Microsoft Word for Office 365 version of the program, but will work in most other versions as well.
Step 1: Open the document with the line spacing you want to change.
Step 2: Click in the document body, then press Ctrl + A on your keyboard to select everything.

Step 3: Select the Home tab at the top of the window.

Step 4: Click the Line and Paragraph Spacing button in the Paragraph section of the ribbon.

Step 5: Choose the desired line spacing.

Now that you know how to fix line spacing that is too big in Microsoft WQord, you can use this setting to adjust future line spacing problems that you encounter.
You can change the default line spacing for future new documents by clicking the small Paragraph Settings button at the bottom-right corner of the Paragraph section in the ribbon, changing the Line Spacing setting from the dropdown menu, then clicking the Set as Default button.
Note that changing the default line spacing will only affect new documents. Existing documents will keep their current line spacing settings.
Continue Reading
- How to insert a check mark in Microsoft Word
- How to do small caps in Microsoft Word
- How to center text in Microsoft Word
- How to merge cells in Microsoft Word tables
- How to insert a square root symbol in Microsoft Word

Matthew Burleigh has been writing tech tutorials since 2008. His writing has appeared on dozens of different websites and been read over 50 million times.
After receiving his Bachelor’s and Master’s degrees in Computer Science he spent several years working in IT management for small businesses. However, he now works full time writing content online and creating websites.
His main writing topics include iPhones, Microsoft Office, Google Apps, Android, and Photoshop, but he has also written about many other tech topics as well.