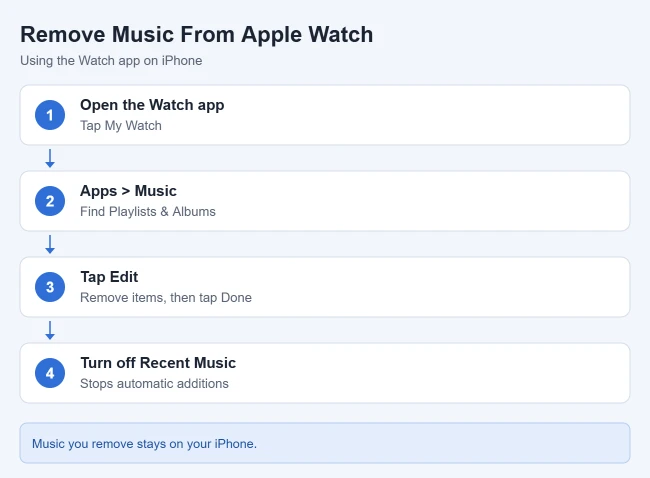
To limit or remove music on your Apple Watch, open the Watch app on your iPhone, tap My Watch > Apps > Music, tap Edit, remove the playlists or albums you don’t need, and tap Done. Then turn off Recent Music so the watch stops adding songs on its own. According to Apple, music you remove from the watch stays on your iPhone.
This guide follows Apple’s Remove music from Apple Watch and Add music to Apple Watch pages. Menu names can vary slightly by watchOS version.
How to Check How Much Music Is on Your Apple Watch
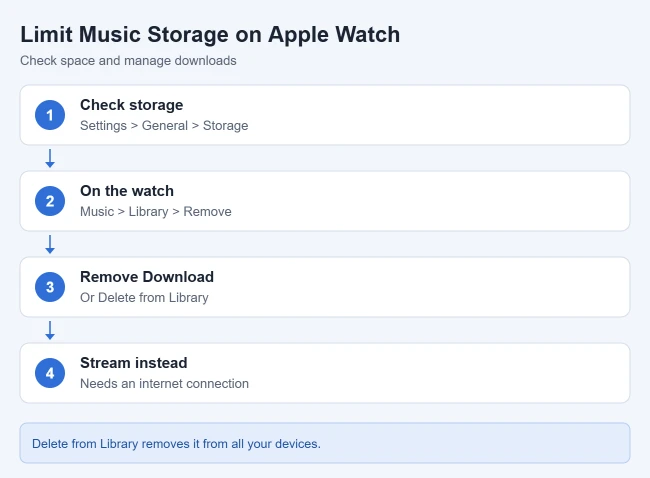
Apple suggests checking storage first so you know how much space music is using:
- On the watch: open Settings, then go to General > Storage.
- On your iPhone: open the Watch app, tap My Watch, then go to General > Storage.
Result: You see how much storage music and other apps take up on the watch.
How to Remove Music From Apple Watch Using Your iPhone
These steps come from Apple’s guide. They work whether or not you subscribe to Apple Music.
- Open the Watch app on your iPhone.
- Tap My Watch, tap Apps, then tap Music.
- For music you added yourself, tap Edit, tap the remove button next to each item you want to take off, then tap Done.
- For music that was added automatically, turn off Recent Music or the other automatically added music options.
Result: The music is removed from the watch but stays on your iPhone. To clear it from the phone too, see how to delete songs on an iPhone. Apple notes that recently played music won’t be added to the watch again until you turn Recent Music back on.
How to Remove Music Directly on the Watch
Apple says Apple Music subscribers can also remove music on the watch itself, whether it was added automatically or by you.
- Open the Music app on your Apple Watch.
- From the Home screen, open the menu, tap Library, then tap Playlists or Albums.
- Tap a playlist or album, tap the More button, tap Remove, then tap Remove Download or Delete from Library.
Result: The music comes off your watch. Be careful with this method. Apple’s guide says the music is removed from your watch and from all other devices that use the same Apple Account. If you only want to free up space on the watch, the iPhone method above is the safer choice, because Apple says that music stays on your iPhone.
To delete a single song, Apple says to swipe left on it, tap the More button, tap Delete from Library, then tap Delete Song. That removes the song from your watch, from any playlists it’s in, and from your other devices on the same Apple Account.
How to Keep Music From Filling Up Your Watch
- Turn off Recent Music. Apple says Apple Music subscribers get recently played music added automatically. Turning it off in the Watch app stops that.
- Add only what you need. Music you add in the Watch app syncs when the watch is near your iPhone, per Apple. Choosing a few playlists keeps storage under control.
- Stream instead of downloading. Apple says you can stream music on a watch with an internet connection, but you need to download music to listen without your iPhone or a connection.
- Sync while charging. Recent Music and other automatic additions sync only while the watch is charging. Apple also notes that downloading music while the watch isn’t on its charger uses more battery.
Frequently Asked Questions
Does removing music from my Apple Watch delete it from my iPhone?
Not if you use the Watch app on your iPhone. Apple says music you remove that way stays on your iPhone. Using Delete from Library on the watch is different, since Apple says it removes the music from all devices on your Apple Account.
Why does music keep coming back on my Apple Watch?
It’s most likely Recent Music or another automatic option. Apple says recently played music won’t be added again until you turn Recent Music back on, so turn it off in My Watch > Apps > Music.
Related Guides
- How to pair Bluetooth headphones with Apple Watch
- How to set a workout playlist on Apple Watch
- How to stop audio apps from opening on Apple Watch
- How to update your Apple Watch

Matthew Burleigh is the founder, head writer, and editor of Solve Your Tech, which he launched in 2012. He has written technology tutorials since 2008 and worked in IT since 2003, including small-business support, IT management, and consulting. He holds Bachelor’s and Master’s degrees in Computer Science from Arizona State University.
Matthew writes practical guides for Windows, iPhone and iPad, Microsoft Office, Outlook, Google apps, and Android. Solve Your Tech’s guides are tested on current devices or checked against official product documentation, with clear steps, sources, and update dates.
Read more about Matthew and how Solve Your Tech writes and updates its guides, or report a correction.