Everyone makes mistakes or forgets something, and this extends to the documents that we create for work and school.
While some of the more common mistakes involve spelling or grammar issues, you might also forget to cover an entire document after you’ve written most of your content.
Rather than trying to move everything around manually to accommodate this oversight, you can find out how to insert a blank page in Word with the help of a tool on the Insert tab.
How to Put a Blank Page in a Word Document
- Open the document.
- Click where you want the new page.
- Select the Insert tab.
- Choose the Blank Page button.
Our guide continues below with additional information on how to insert a blank page in Word 2010, including pictures of these steps.
I’ve created documents in the past where I was well into the editing process and discovered that I forgot a huge amount of information.
This can seem like a problem that you could fix by copying and pasting, or pressing the Enter key a bunch of times, but there is actually an option in Microsoft Word that exists for basically this exact reason.
There are a number of tools available in Word 2010 that make it possible to do many of the common edits that might come up during the creation of a document.
Even something that might seem unusual, such as wanting to add a blank page in the middle of a document, can actually be accomplished rather easily in Word 2010.
So if you find that you want to insert a new, blank page in Word 2010 and you do not want to simply hit “Enter” on your keyboard repeatedly, then you can follow our short guide below.
If you added a section break in the past and you need to get rid of it now, then check out our how to delete section break in Word article for additional information.
Adding a Blank Page to a Word 2010 Document (Guide with Pictures)
If you have page numbers inserted in your Word 2010 document, then the blank page that we will be inserting below will be numbered with the rest of your document. If you want to skip the blank page in your page numbering, then you will need to learn how to use section breaks and custom page numbering. You can check out Microsoft’s article on that topic here.
Step 1: Open the document into which you want to insert your blank page.
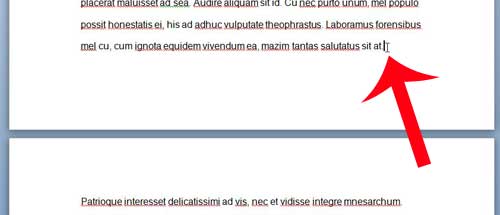
Step 2: Click on the location in your document where you want to insert the blank page.
In the example below, I am placing my cursor at the bottom of the first page, as I want to insert a blank page between the existing first and second page.

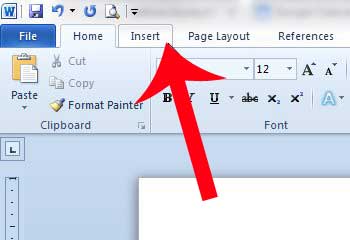
Step 3: Click the Insert tab at the top of the window.

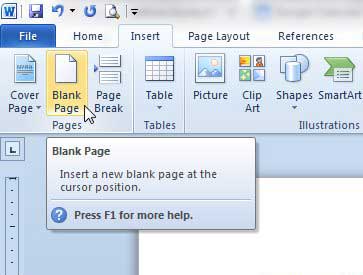
Step 4: Click the Blank Page button in the Pages section of the navigational ribbon at the top of the window.

Now that you know how to insert a blank page in Microsoft Word you can save yourself a lot of copy and paste headaches by using this when you need to insert a lot of information into the middle of an existing document.
If you are trying to insert a blank page at the top of a page, but Word is actually inserting two blank pages, then your cursor might be placed after a blank line or a paragraph break.
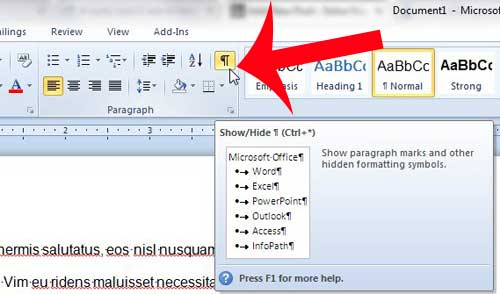
You can click the Show/Hide button on the Home tab to display document formatting symbols that will allow you to see what might be the problem with your blank page insertion.

Does your document have page numbers that it doesn’t need? Learn how to remove page numbers in Word 2010.

Matthew Burleigh has been writing tech tutorials since 2008. His writing has appeared on dozens of different websites and been read over 50 million times.
After receiving his Bachelor’s and Master’s degrees in Computer Science he spent several years working in IT management for small businesses. However, he now works full time writing content online and creating websites.
His main writing topics include iPhones, Microsoft Office, Google Apps, Android, and Photoshop, but he has also written about many other tech topics as well.