Screen recording on an iPhone in 2023 is a straightforward process. First, enable the feature in the Control Center via Settings. To start recording, access the Control Center, press and hold the screen recording icon, and select “Start Recording.” You can stop recording through the Control Center or by tapping the red status bar. Edit your recording in the Photos app, and share it directly from your device. Pros include convenience, built-in editing tools, and high-quality capture, while cons cover storage space, limited editing options, and potential glitches.
Have you ever wanted to capture a memorable moment on your iPhone screen or create an informative tutorial? Learning how to screen record on iPhone is a powerful tool that allows you to do just that! In this comprehensive guide, we will walk you through each step in setting up, customizing, and utilizing screen recording on your iPhone to its fullest potential. Get ready to become a screen recording master!
You can also check out this video about how to screen record on iPhone 14 for more on this topic.
Key Takeaways
Activate the Screen Recording feature in Settings and add it to Control Center.
Initiate a recording by opening Control Center and tapping the icon, then customize options such as audio or display touches on screen.
Troubleshoot common issues like limited duration or use of third party apps for enhanced functionality.
Activating Screen Recording Feature
To initiate screen recording on your iPhone, you first need to enable screen recording. By default, this feature is not readily accessible on your device, but don’t worry! Enabling it is a simple process that involves navigating to the Settings app and adding screen recording to the Control Center for easy access.
Navigating to Settings
Accessing the Settings app is your initial move towards enabling screen recording on your iPhone. Look for the gray icon with gears on your Home Screen and tap it to open Settings. Once you’re in the Settings app, you’re just a few taps away from activating the screen recording feature.
Adding Screen Recording to Control Center
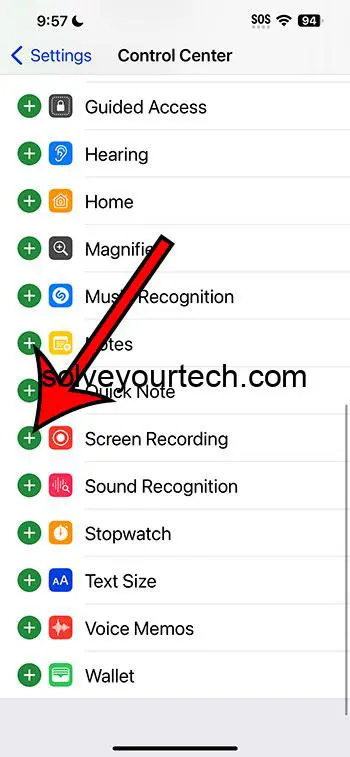
In the Settings app, follow these steps to add Screen Recording to the Control Center and open the Control Center:
Select ‘Control Center’.
Scroll down to the “More Controls” section.
Locate “Screen Recording”.
Tap the green plus icon (+) next to it to add screen recording to your Control Center.
Now, you’re all set to tap start recording your iPhone screen!
Initiating a Screen Recording
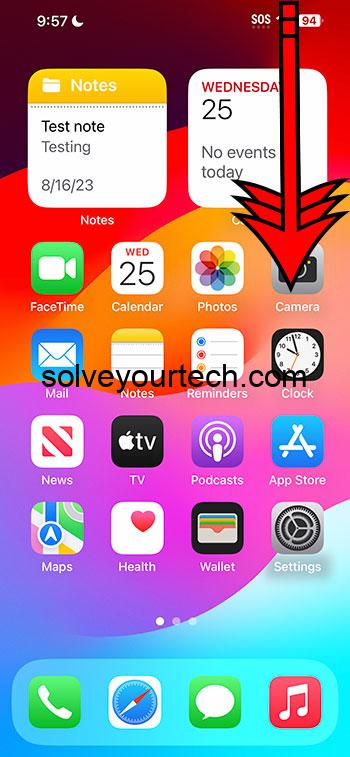
Having enabled screen recording and added it to your Control Center, you’re now ready to start capturing your iPhone screen. Initiating a screen recording is as simple as opening the Control Center and tapping the Screen Recording icon.
Opening the Control Center
To open Control Center, swipe down from the top right corner of your iPhone screen for iPhone X or later models, or up from the bottom for iPhone 8 or older models. The Control Center houses various control options, including screen recording, which you’ll now find after adding it in the previous steps.
Related: How to Record a Video of Your iPhone 14 Screen
Tapping the Screen Recording Icon
Initiate the recording of your iPhone screen by following these steps:
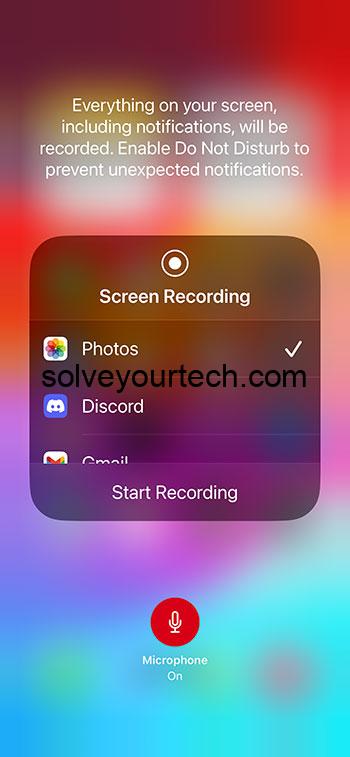
Tap the Screen Recording icon in the Control Center.
A three-second countdown will appear, giving you enough time to navigate to the content you want to capture before the recording begins.
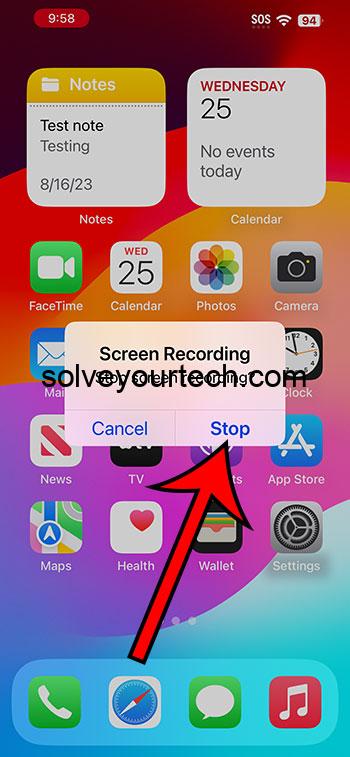
Remember, you can always stop the recording by tapping the red bar at the top of your screen or by returning to the Control Center and tapping the screen recording icon again.
Related: How to Record Your Screen on iPhone 15
Customizing Screen Recording Options
The screen recording function on your iPhone provides numerous customization options, including a screen recording option, to match your requirements. Two notable options are recording with or without audio and displaying touches on the screen during the recording.
Discover the customization of these options for an optimal screen recording experience.
Recording with or without Audio
Hold down the screen recording button, represented by the Screen Recording icon in the Control Center, if you wish to record audio while capturing the screen. This will allow you to capture both audio and video together. A pop-up menu will appear, giving you the option to turn on microphone audio. When the microphone icon is illuminated in red, your screen recording will include audio. If you prefer to record without sound, simply leave the microphone audio off.
Displaying Touches on Screen
Activate the AssistiveTouch feature on your iPhone if you wish to display touches on the screen during your recording. Here’s how:
Open the Settings app on your iPhone.
Select “Accessibility.”
Select “Touch.”
Activate the “AssistiveTouch” toggle.
A floating button will appear on your screen, indicating your touches during the recording.
This can be particularly helpful when creating tutorials or demonstrating app features.
Stopping and Saving Your Screen Recording
After capturing the required content, proceed to stop recording and secure the video. Halting and saving your screen recording is as straightforward as initiating it, requiring just a tap on the screen recording icon or red bar.
Stopping the Recording
To stop recording, either tap the red status bar at the top of your screen or return to the Control Center and tap the screen recording icon again. Your screen recording will then automatically save to your iPhone’s Photos app.
Locating the Recorded Video
Locate your saved screen recording by following these steps:
Launch the Photos app on your iPhone.
Select the ‘Albums’ tab at the bottom of the screen.
Scroll down to the “Media Types” section.
Tap on “Videos” to view all the videos on your iPhone, including your screen recording.
Now you can screen record, view, edit, or share your screen recording as needed, and even explore screen mirroring options for a more interactive experience.
Editing and Sharing Your Screen Recording
Following the capture of your screen recording, you might consider editing to enhance the video or sharing it with others. Thankfully, your iPhone makes it easy to perform basic editing tasks and share your screen recording through various methods.
Basic Editing Techniques
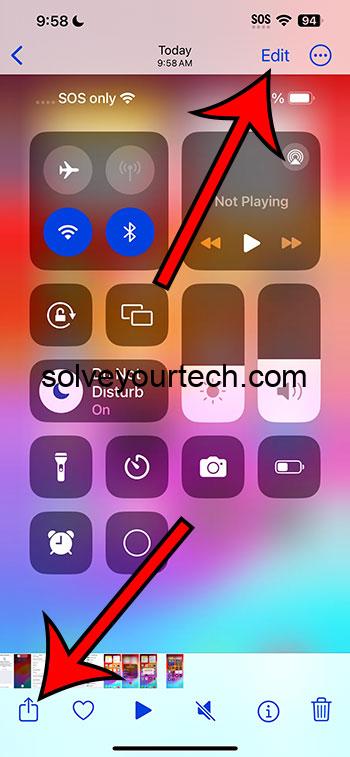
Launch the Photos app for editing your screen recording. Once opened, just select the video you’d like to work with. Tap “Edit” to access various editing tools, such as trimming, cropping, and adjusting color and lighting. Experiment with these options to create a polished screen recording that meets your needs.
Sharing Your Recording
The iPhone’s integrated sharing options make sharing your screen recording effortless. Here’s how:
Open the Photos app
Select your screen recording
Tap the share icon
From here, you can share your recording via email, text message, or social media platforms.
Alternatively, you can explore third-party apps like Dropbox, YouTube, or Google Drive for additional sharing possibilities.
Video About Using the iPhone Screen Recording Feature
Troubleshooting Common Screen Recording Issues
You might occasionally run into issues while screen recording on your iPhone. This section will tackle two prevalent concerns: limitations on recording duration and the usage of third-party apps for augmented functionality.
Recording Duration Limitations
The duration of your screen recording is not restricted by the iPhone itself but rather depends on your device’s available storage capacity and battery life. If you’re running out of space, consider clearing up some storage or backing up your iPhone before recording. Alternatively, you can use a third-party app with cloud storage capabilities to bypass storage limitations.
Third-Party Apps for Enhanced Functionality
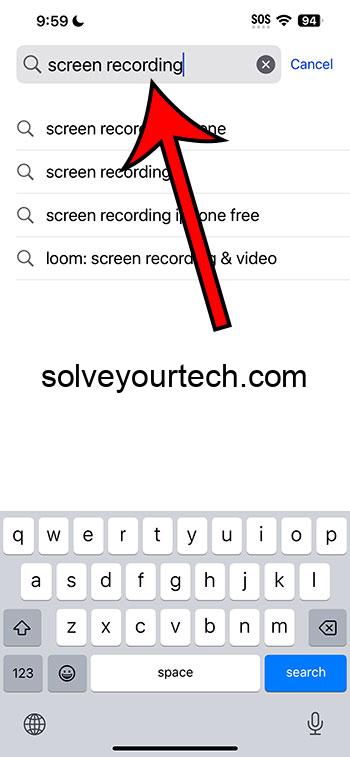
If you’re looking for additional features and options beyond the iPhone’s native screen recording capability, consider using third-party apps like:
Loom
Camtasia
OBS
FonePaw Screen Recorder
Snagit
These apps offer various advanced features, such as in-depth editing tools, live streaming, and cloud storage, to enhance your screen recording and screen recordings experience.
Summary
Finally, screen recording on the iPhone is a powerful tool that allows you to easily capture, modify, and share your on-screen actions. By following the steps outlined in this comprehensive guide, you’ll be well on your way to mastering screen recording on your iPhone. Happy recording!
Frequently Asked Questions
How do I record my iPhone screen with sound?
To record your iPhone screen with sound, go to your Control Center, tap and hold the Record button, then select Microphone to turn sound on or off for your video. Finally, click stop recording and your video will save to your Photos library.
Why can’t I screen record on my iPhone?
Screen recording on your iPhone cannot be used unless you enable it in the Settings menu. You must go to Content & Privacy Restrictions and ensure screen recording is allowed from the Game Center, as well as ensure you have the latest version of iOS installed. Furthermore, if you are recording but not hearing audio, make sure you check the mute settings.
How can I record audio during my screen recording?
Tap the Screen Recording icon in the Control Center and enable microphone audio in the pop-up menu to record audio during your screen recording.
How do I stop and save my screen recording?
To stop and save your screen recording, tap the red bar at the top of your screen or the screen recording icon in the Control Center, and the recording will automatically be saved to your Photos app.

Matthew Burleigh has been writing tech tutorials since 2008. His writing has appeared on dozens of different websites and been read over 50 million times.
After receiving his Bachelor’s and Master’s degrees in Computer Science he spent several years working in IT management for small businesses. However, he now works full time writing content online and creating websites.
His main writing topics include iPhones, Microsoft Office, Google Apps, Android, and Photoshop, but he has also written about many other tech topics as well.
